How It Works: Laying Low Profile Underfloor Heating
Installation guidelines
To demonstrate the ease of installation, we have carried out a demo installation of the underfloor heating with clip-on rails and documented it with pictures in these instructions. Detailed installation instructions can be downloaded at the bottom of the page and are included with each heating kit.
The FLEXIRO low-profile underfloor heating is a system kit that has been put together for easy retrofitting of the existing heating system and subsequent installation in individual rooms such as bathrooms or kitchens. Compared to conventional underfloor heating systems, the use of the thin and flexible 10 mm plastic composite pipe ensures a low installation height, even heat distribution and maximum flexibility in planning.
The retrofit installation of the underfloor heating is simplified by the use of plug-in connections and RTL boxes for control and connection to the heating system, making FLEXIRO equally suitable for DIY enthusiasts.
Underfloor heating version with clip rails
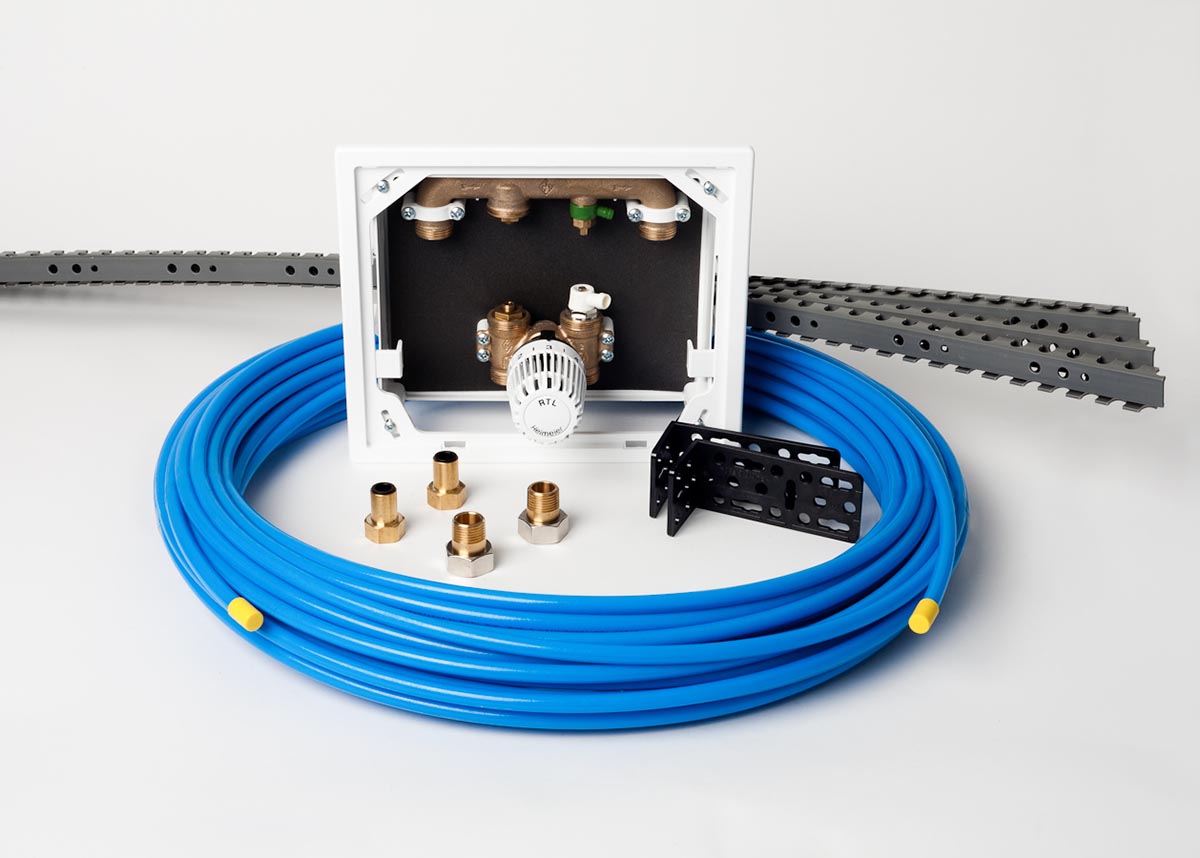
Kit components
The exact kit components vary depending on the selected size and can be found either in the PDF assembly instructions or on the corresponding product page. You can also find additional accessories and suitable tools in our shop.
Please note
For all its simplicity, the following also applies to FLEXIRO thin-bed underfloor heating: Working on heating systems requires sufficient technical knowledge and skills. If in doubt, have the installation carried out by a specialist.
1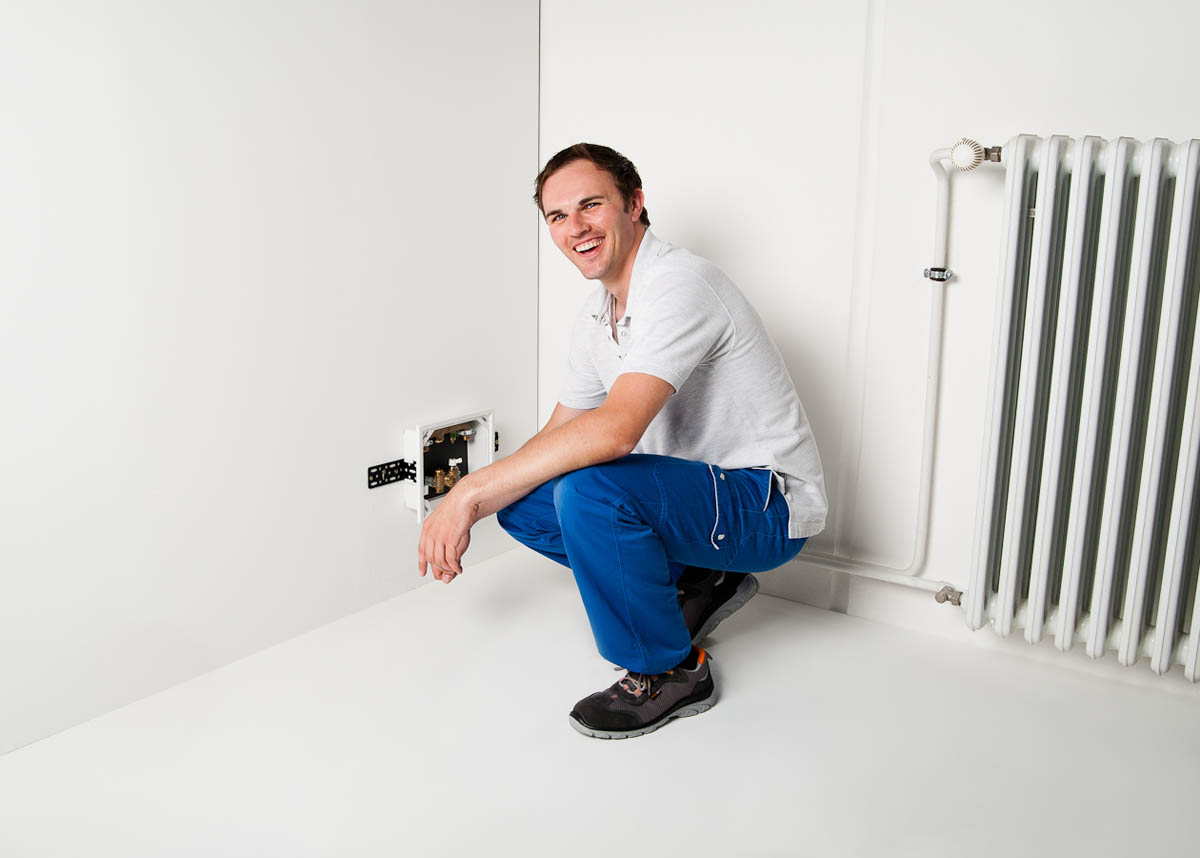
Arrangement of heating circuits and components
Determine the arrangement of the heating circuits. The installation location of the control box is selected so that the heating pipes of all heating circuits can be routed directly to the control box without extending the heating pipes.
Note: Set 2.5 m² = 1 heating circuit; 5.0 m² = 2 heating circuits; Set 7.5 m² = 3 heating circuits and 10.0 m² = 4 heating circuits
In principle, the underfloor heating pipes can be shortened. However, care must be taken to ensure that the differences in length between the individual connections are not too great (max. 15% difference in length).
2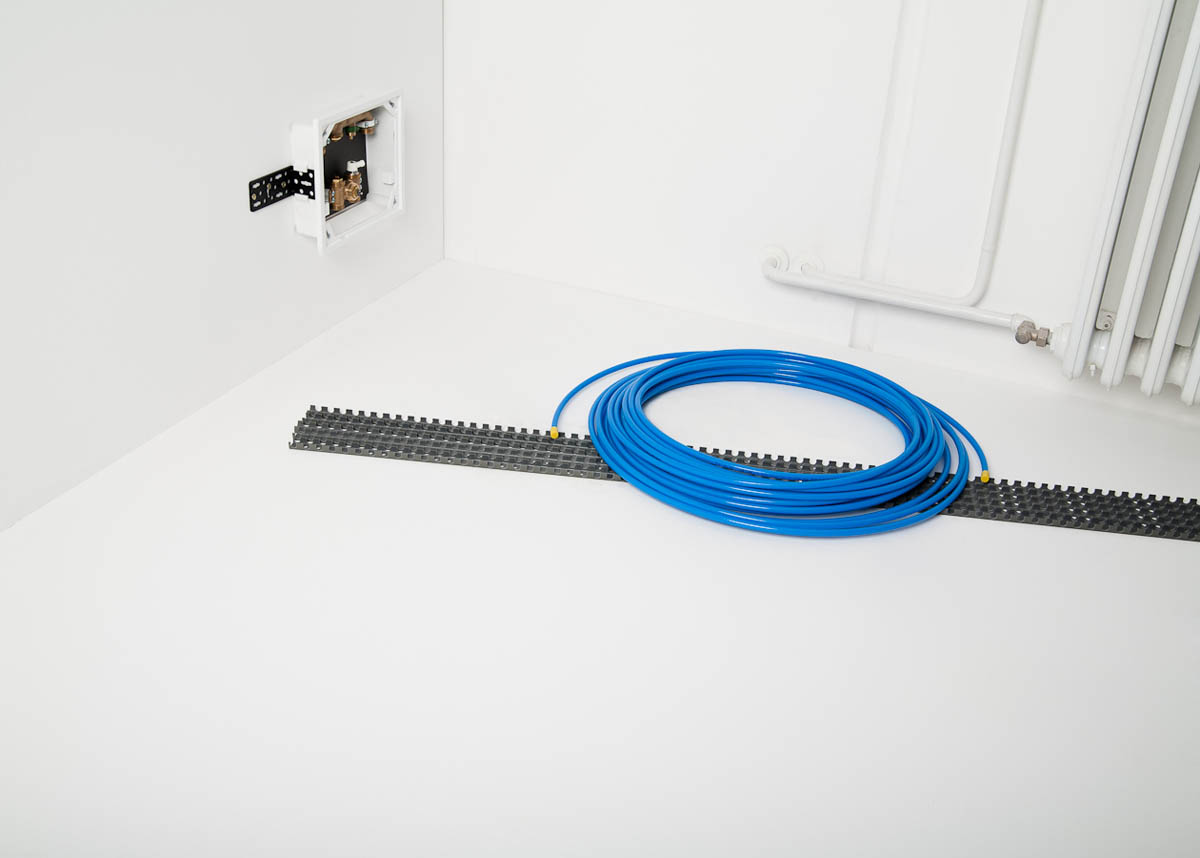
Positioning of the components
The existing substrate must be level, clean, dry and stable. Any primer can be applied.
Before laying the pipework, determine the position of the underfloor heating manifolds. The arrangement of the heating system and the location of the RTL boxes can be planned individually. Ensure that the RTL valve is always accessible. It must still be possible to insert the pipe ends into the individual connections after the manifolds have been installed. The distance to the finished floor should be at least 20 cm from the lower edge of the concealed box.
3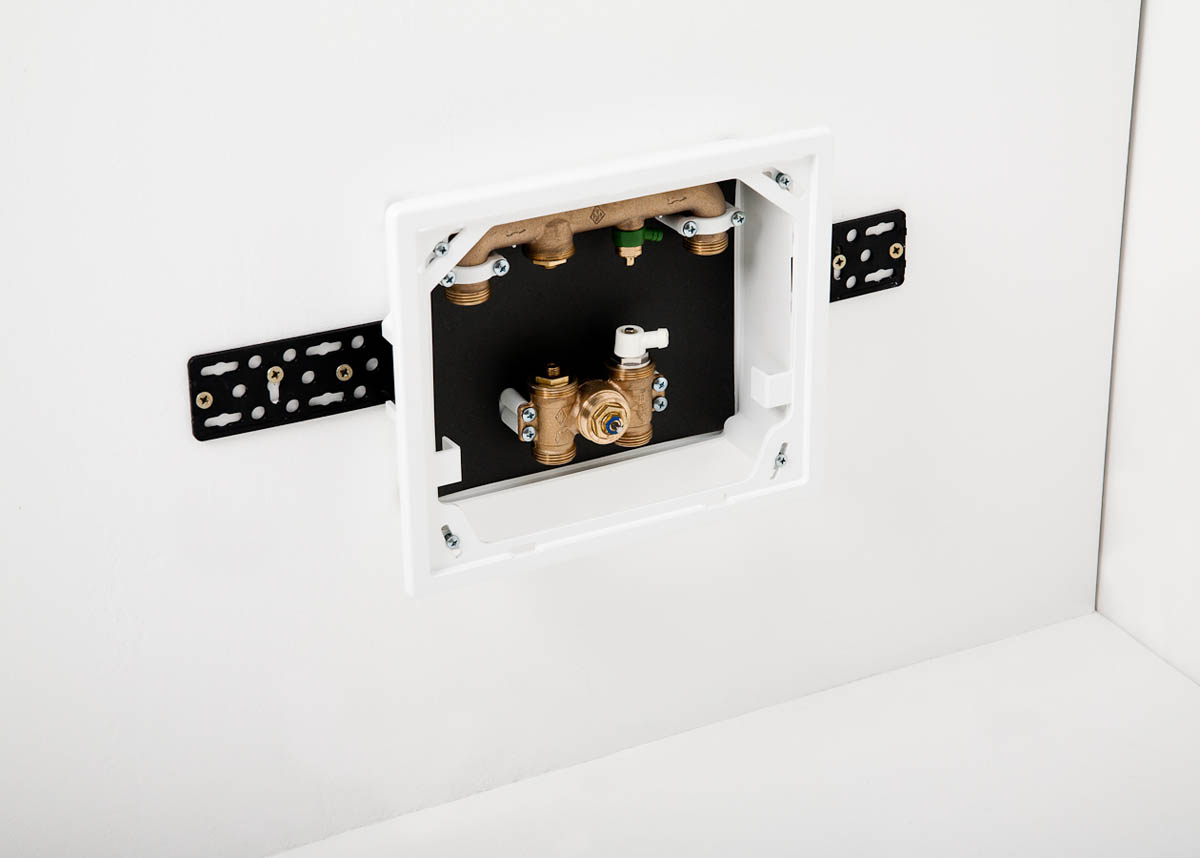
Mounting the RTL box
For accurate and efficient temperature control, the RTL box should be positioned so that the thermostatic head can detect the temperature of the room air and the air can flow freely around it.
Please refer to the RTL box installation and operating instructions supplied separately.
4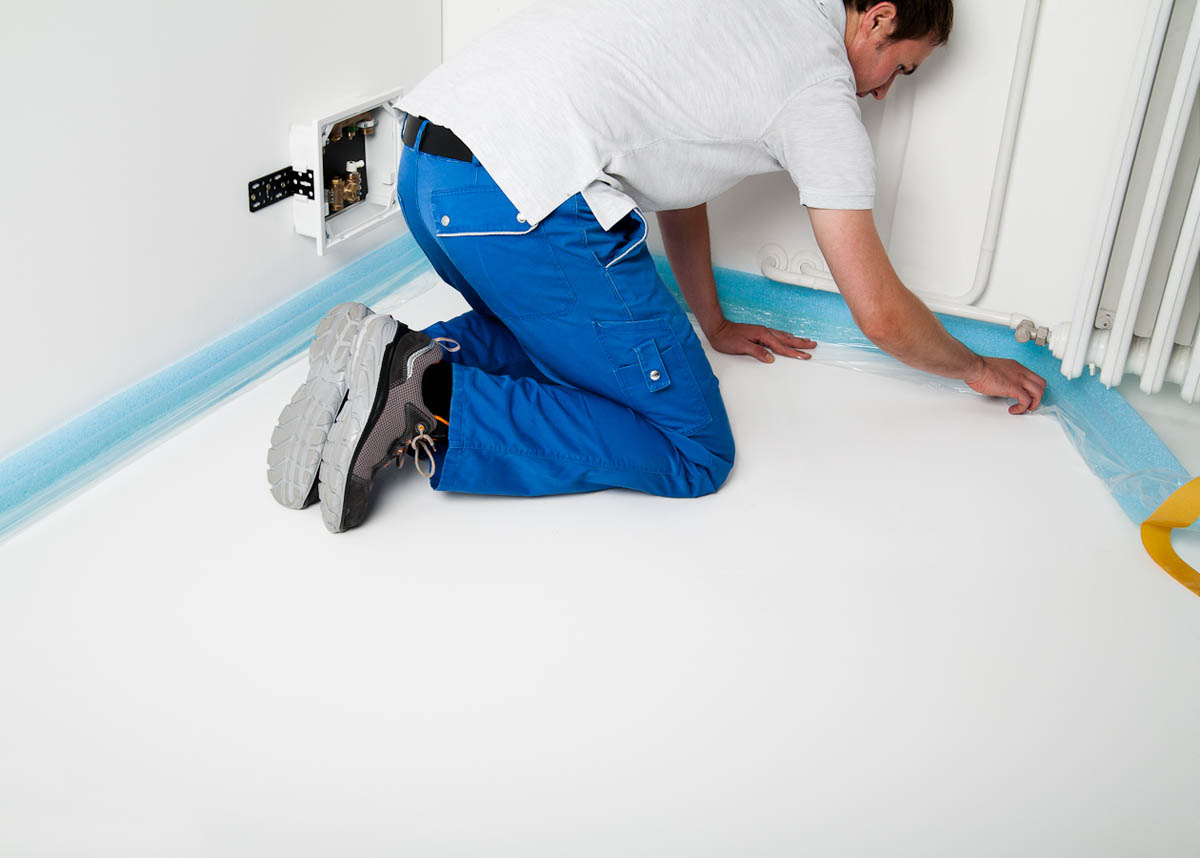
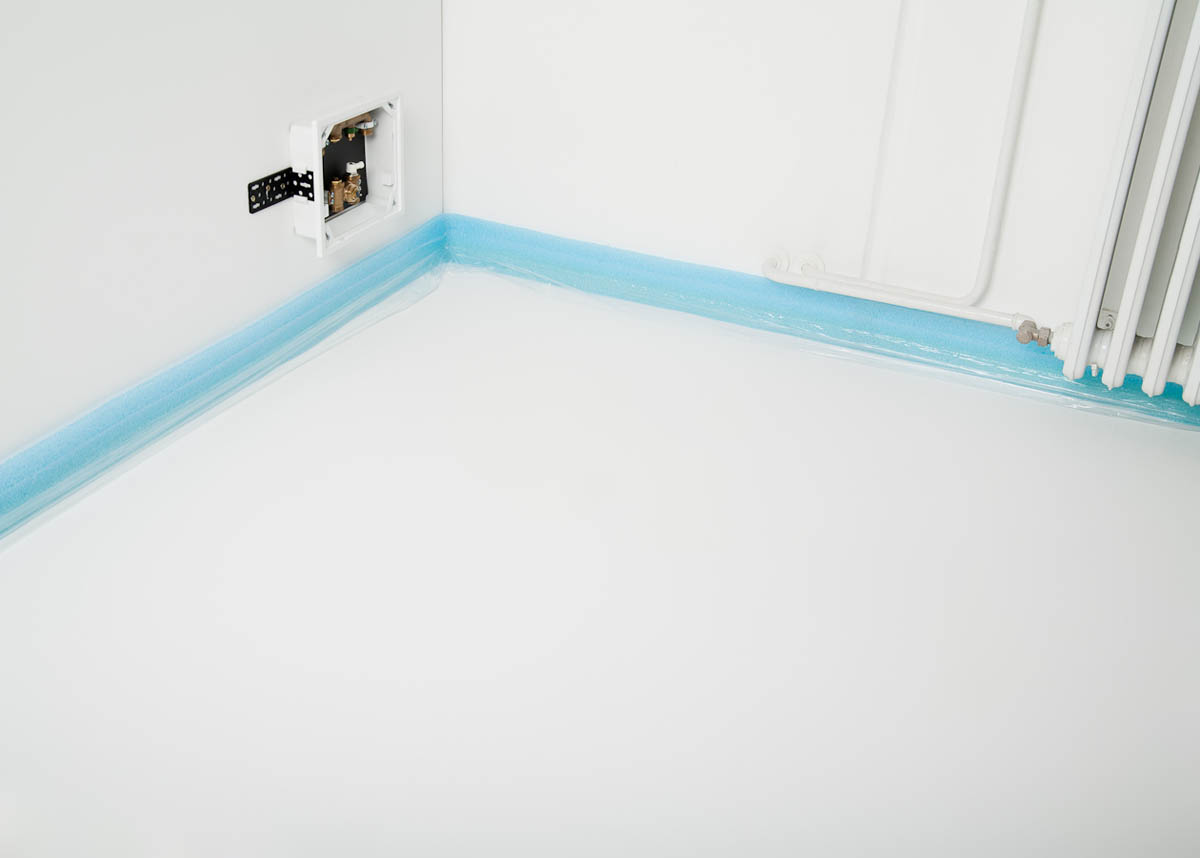
Installation of edge insulation strips
The next step is to lay an edge insulation strip at least 20 mm wide around the floor surface to be heated. Columns or similar should also be surrounded by the edge insulation strip to allow the entire floor structure to expand.
The edge insulation strip is later filled with permanently elastic grouting.
5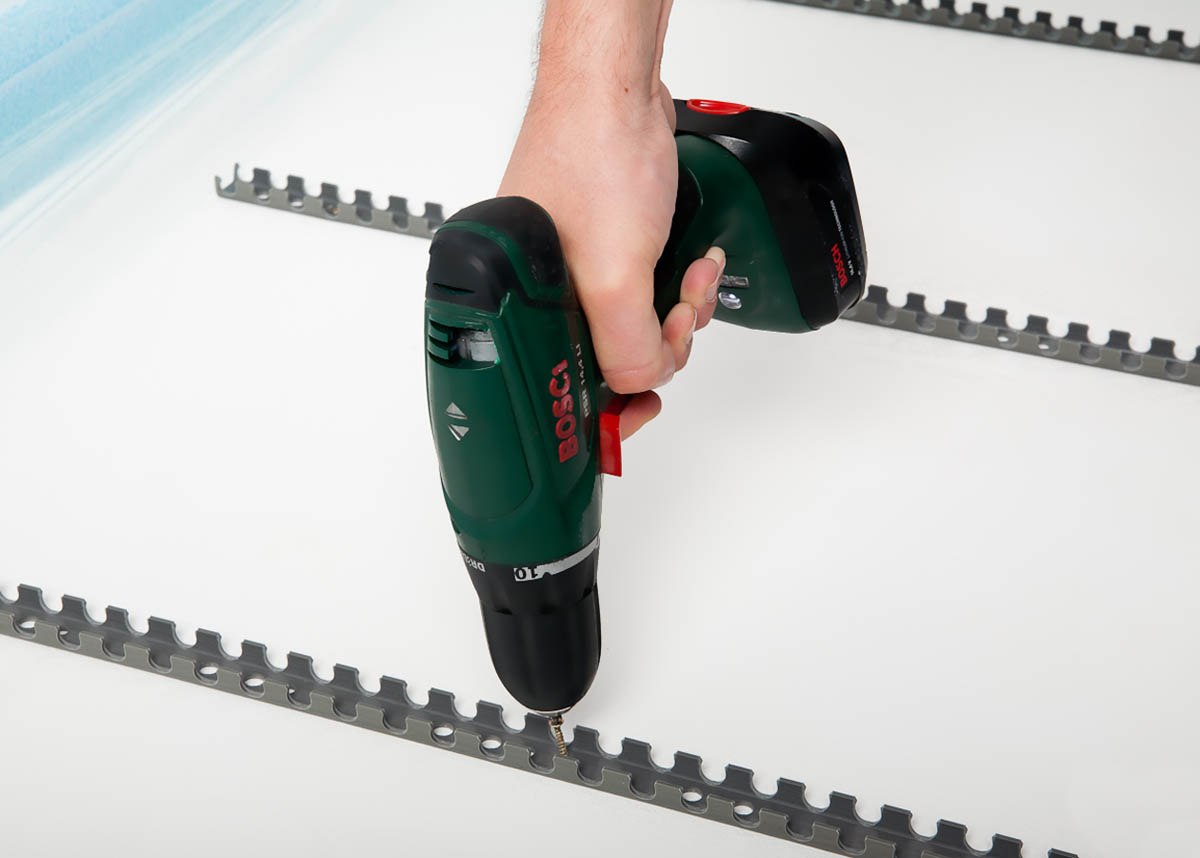
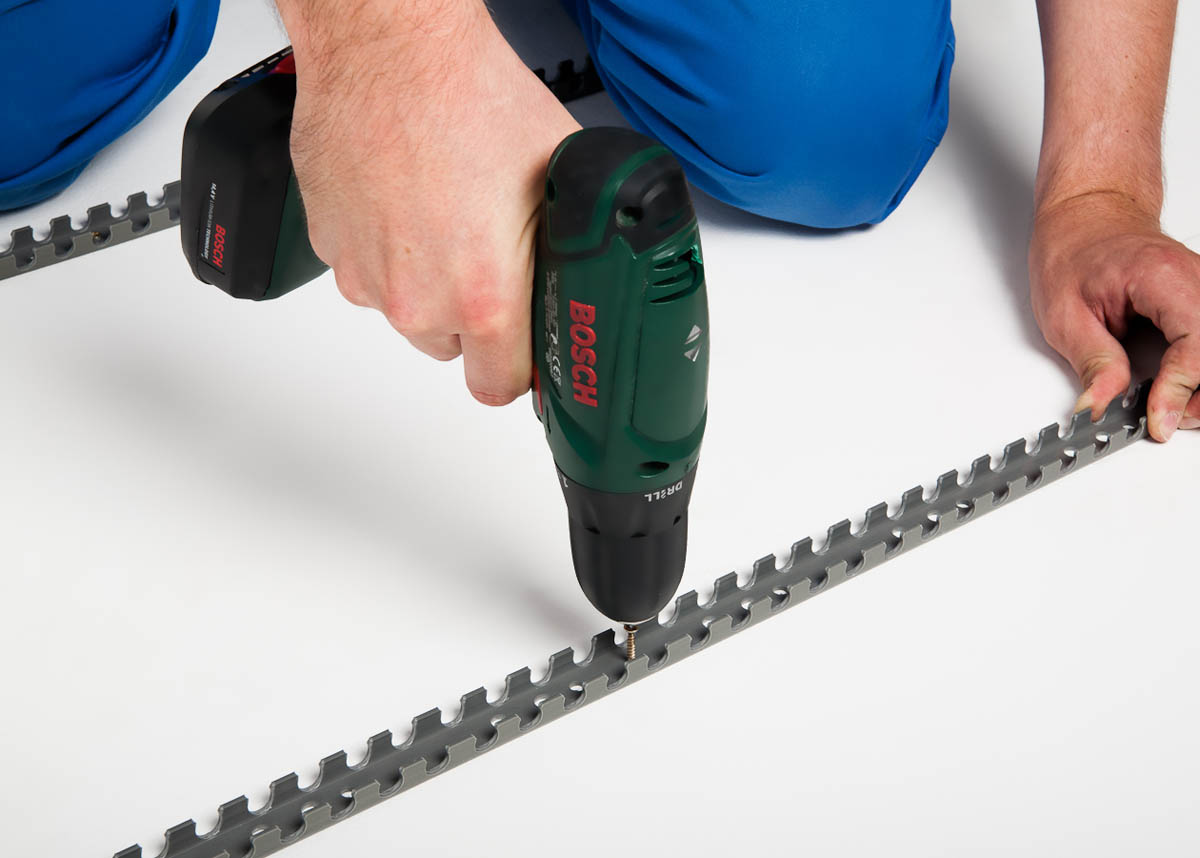
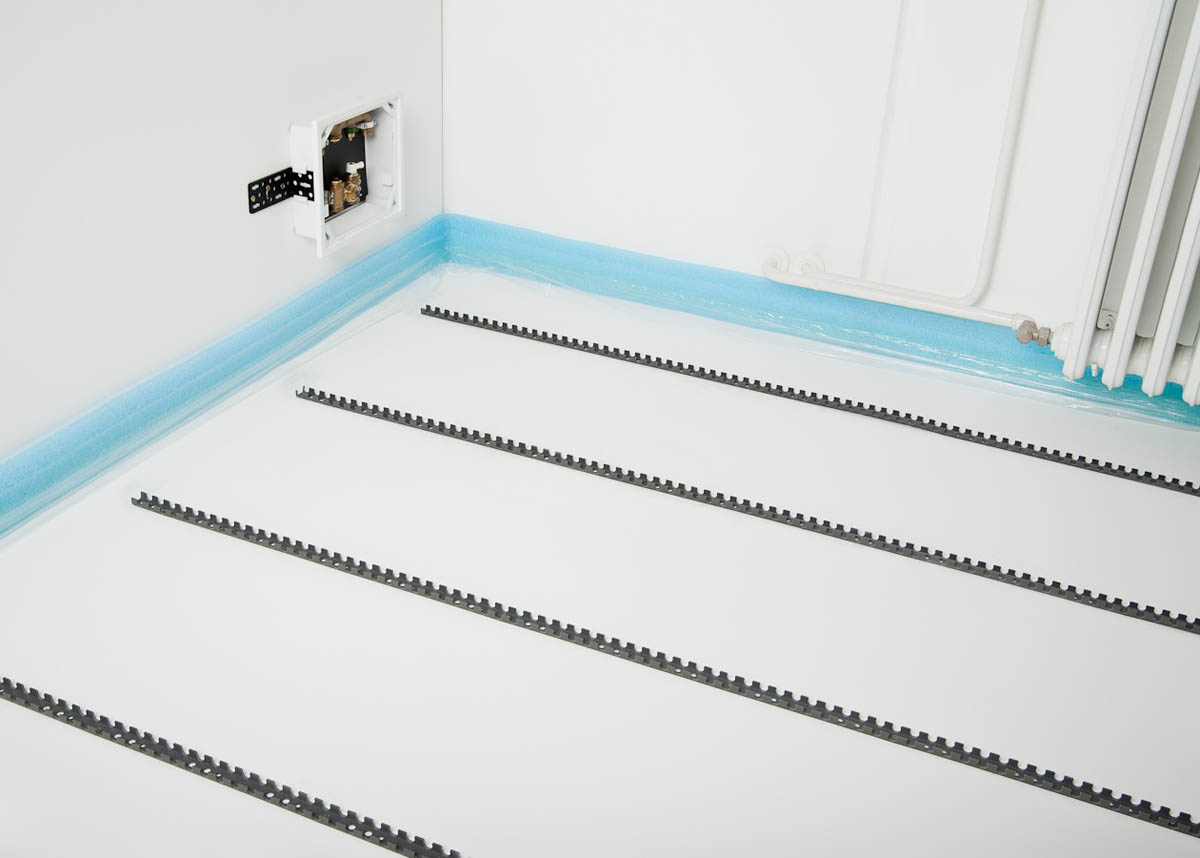
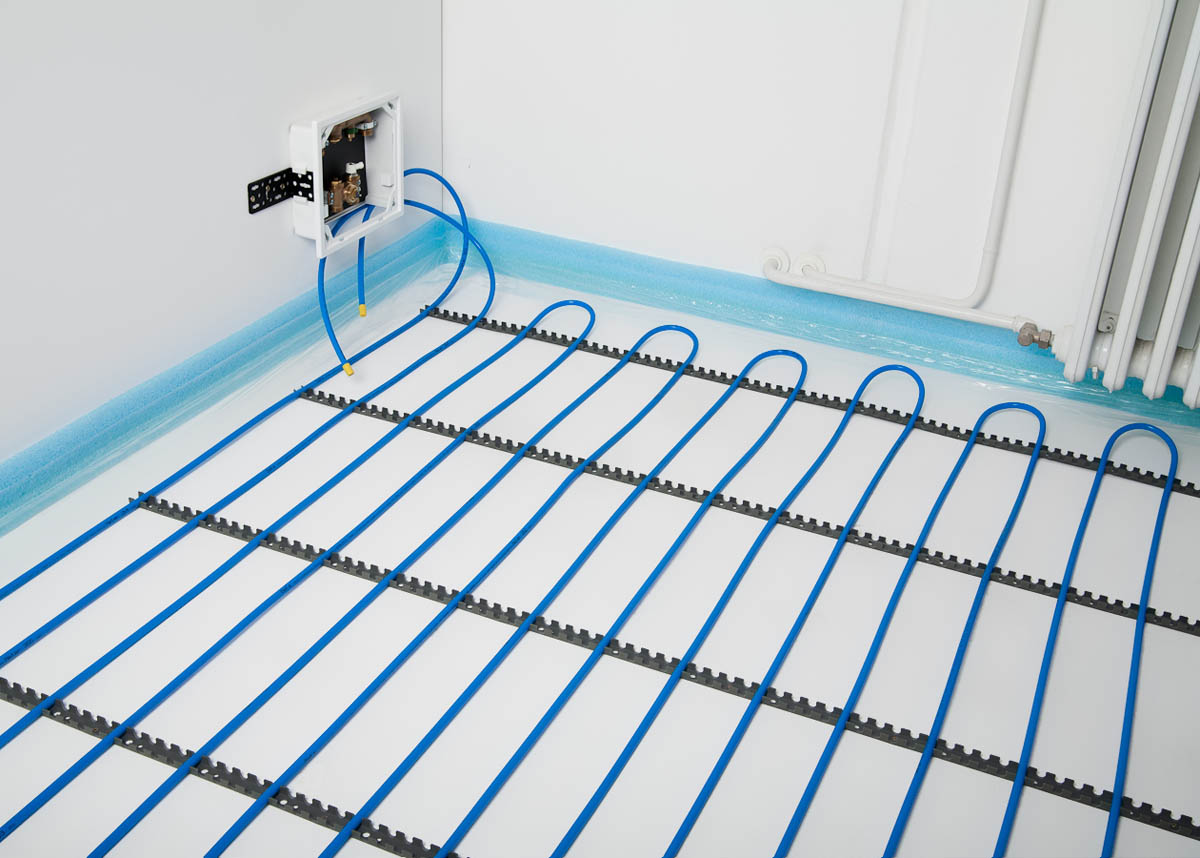
Laying of the clip rails
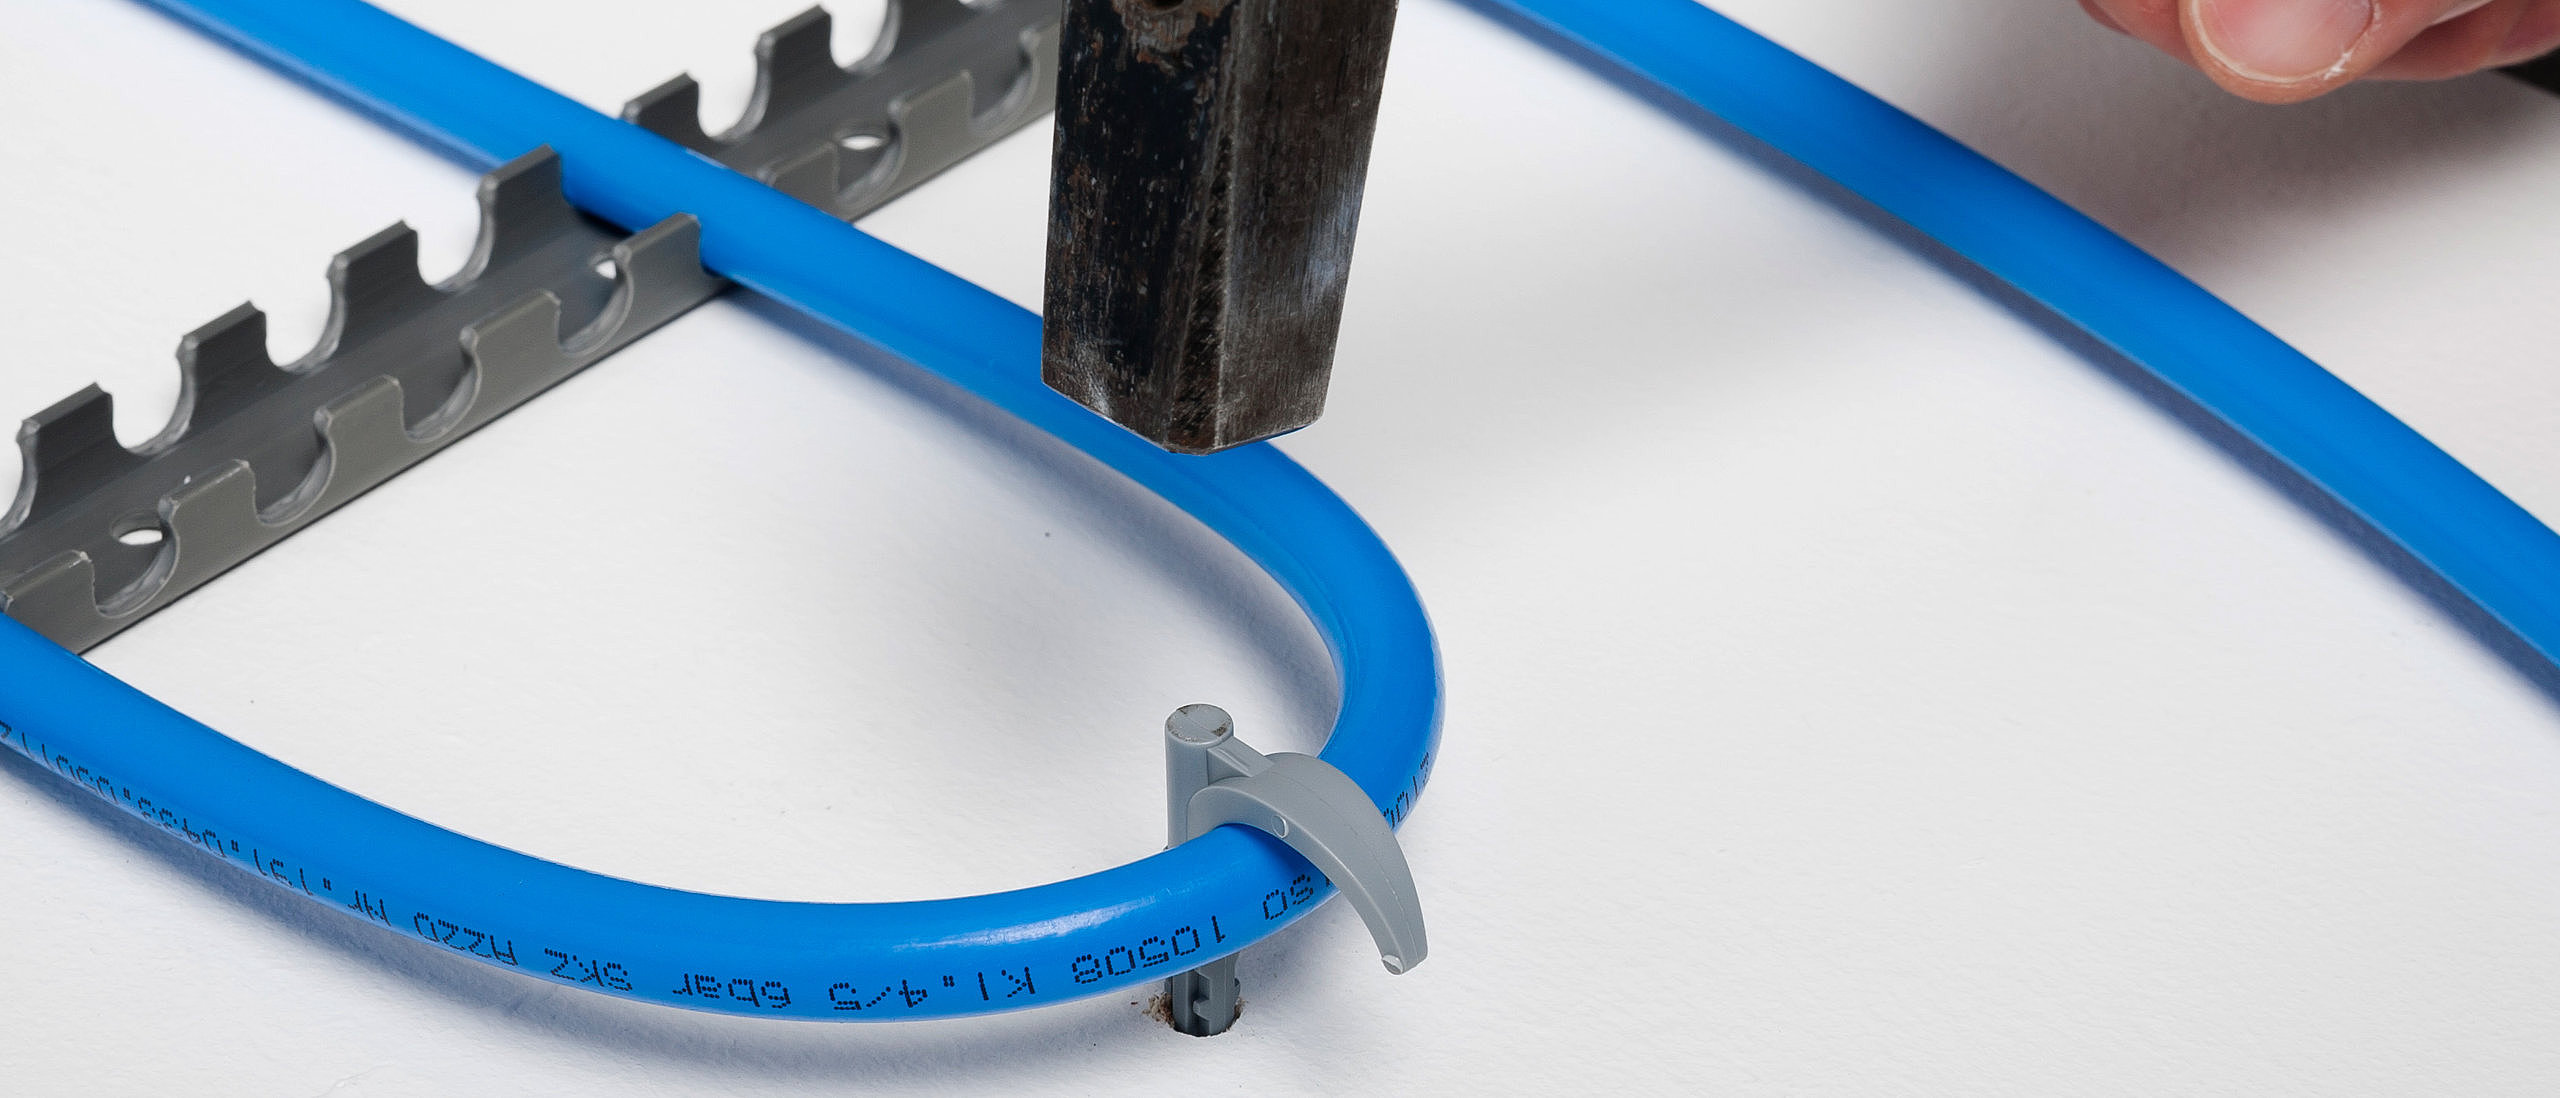
The clip rails are installed according to the heating surface specified in the planning. The clip rails are fixed directly to the floor. Screws, dowels, impact dowels or construction adhesive can be used for this.
The fastening must be sufficient. It should no longer be possible to move the clip rails horizontally or vertically after installation. The rails should lie flat on the floor to ensure that the pipework is securely fixed.
When laying the underfloor heating, all distances specified in the installation drawing must be observed. The fixing distance of the clip rails is 40-50 cm, in the deflection area 10-25 cm.
6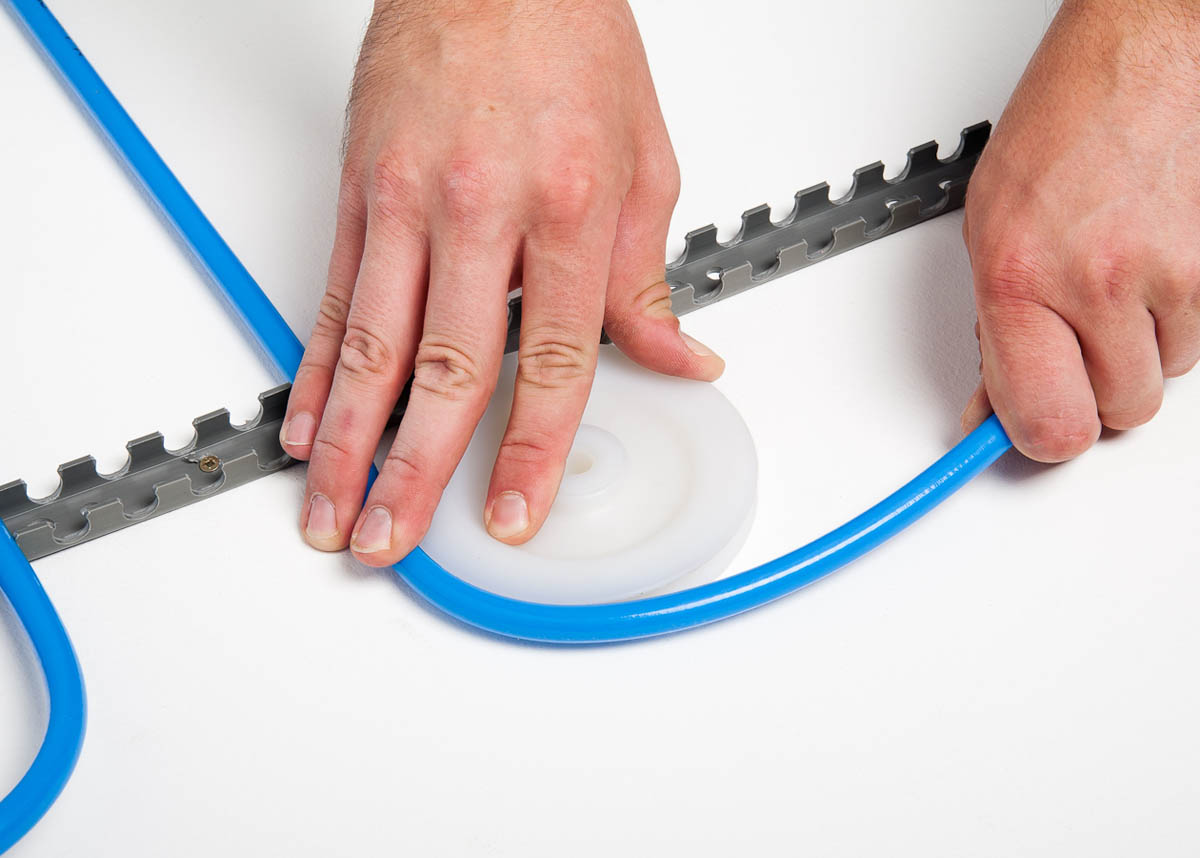
Laying the heating pipe
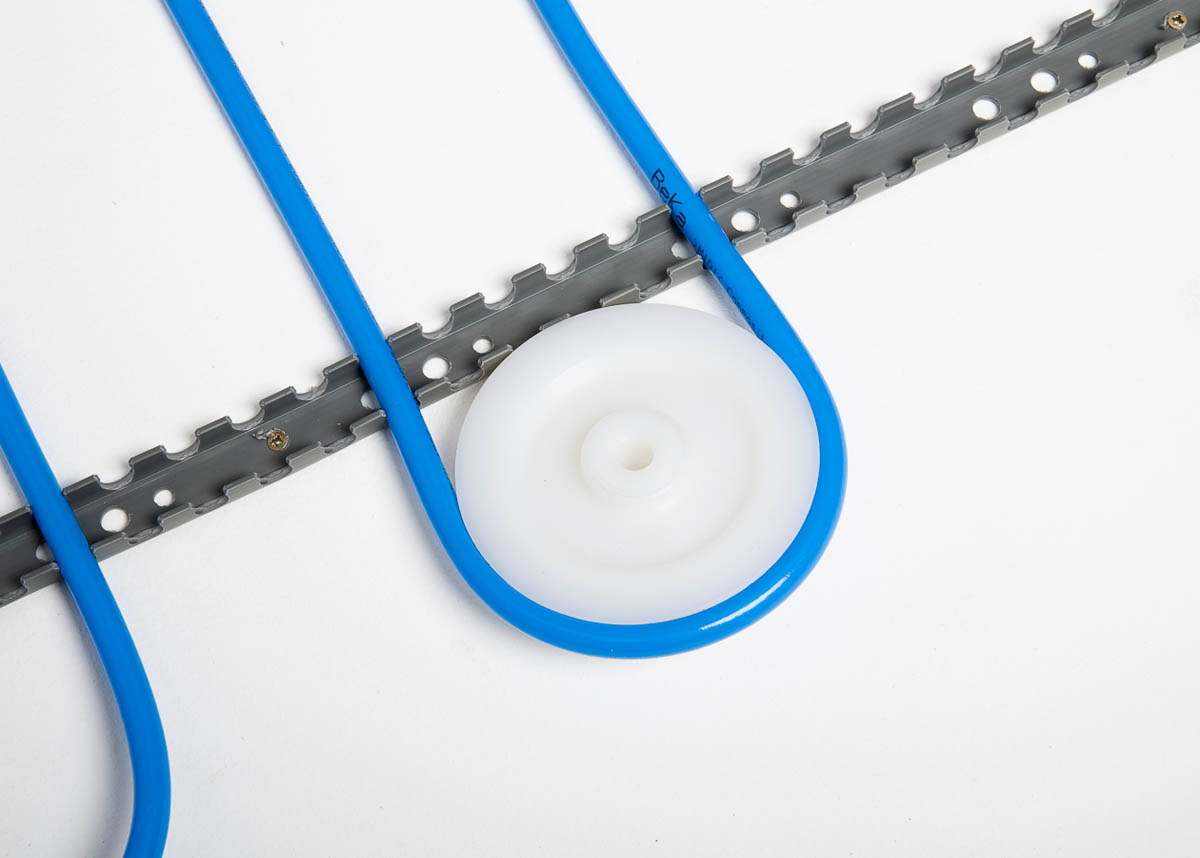
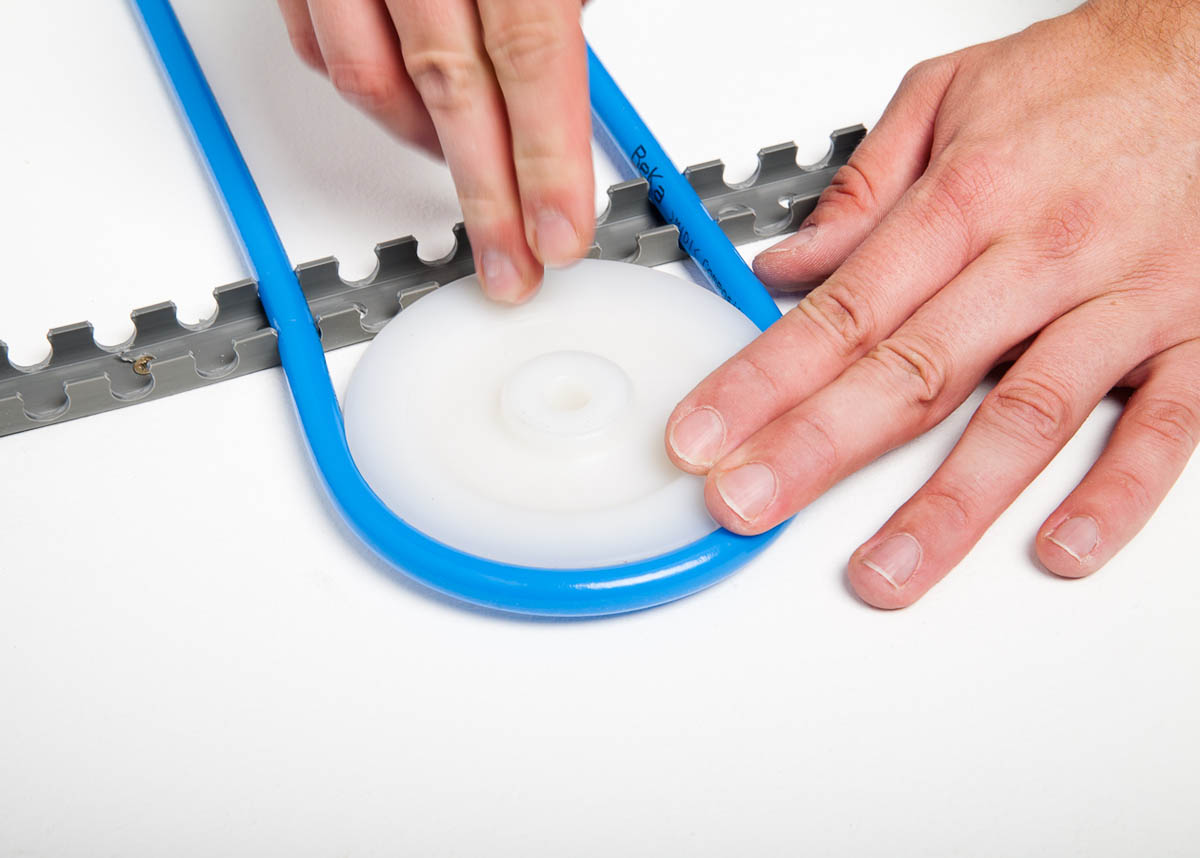
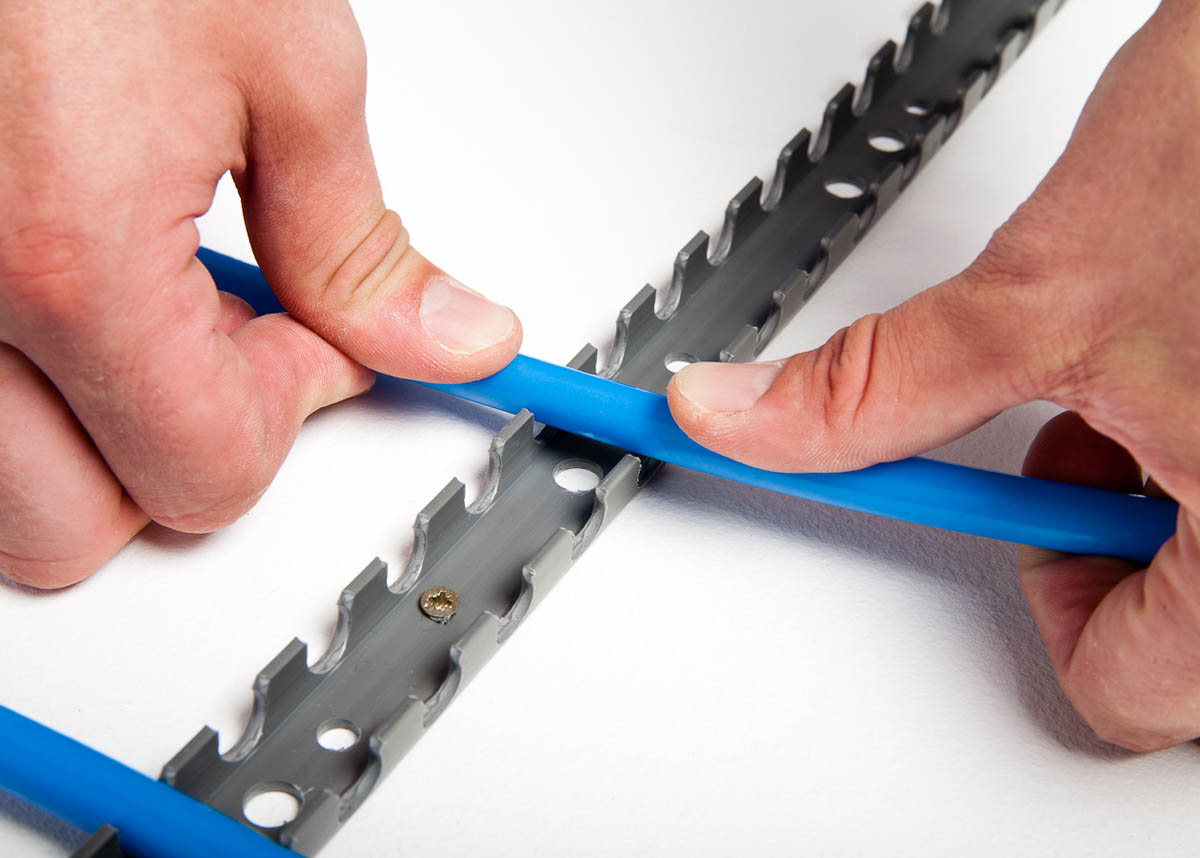
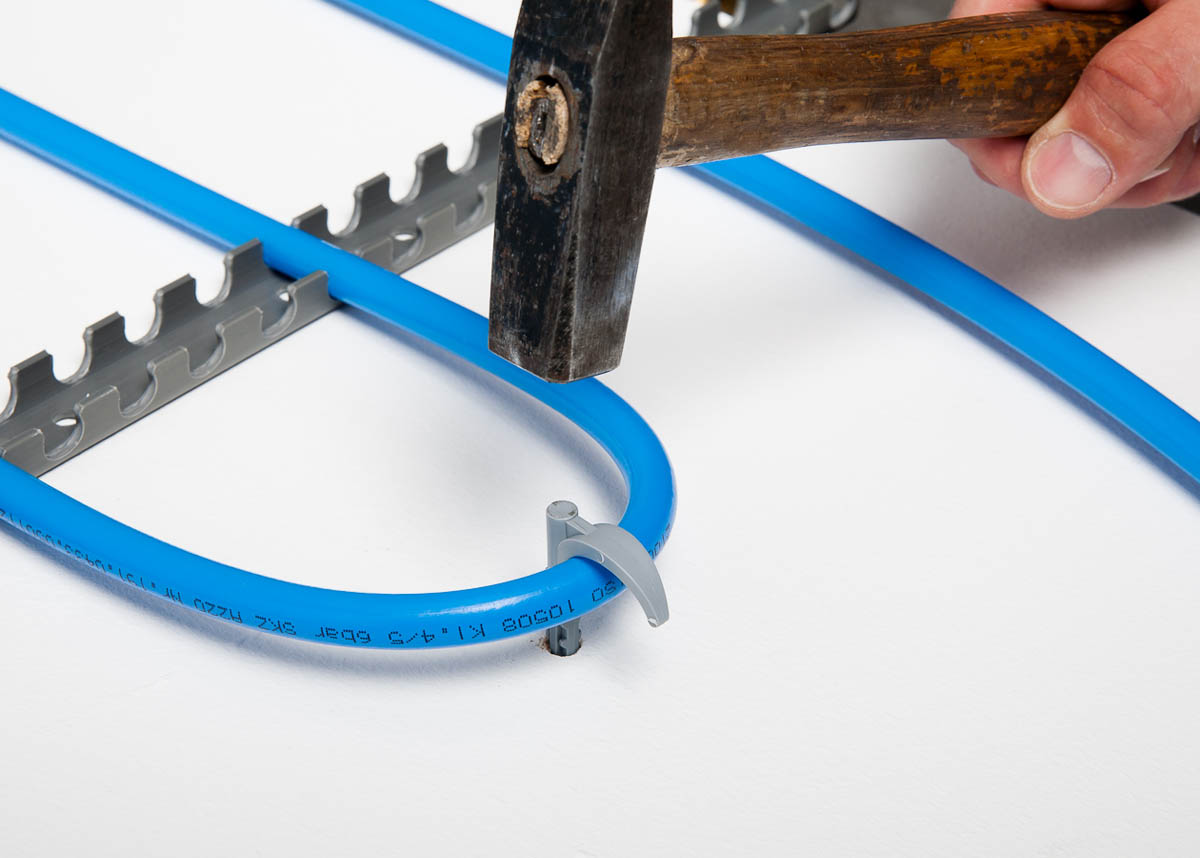
Ideally, the heating pipe should be laid close to the manifolds to minimise the length of pipe required for the connection. The minimum distance between the pipes is 10 cm. The distance between the underfloor heating and the walls of the room should be at least 5 cm. A minimum bending radius of 8 cm must be maintained in the area of bends. The 10 mm PE-RT heating pipe is pressed into the clip rails. The pipes must be laid without twisting. The overhang of the pipe in the bend area should be approx. 10-25 cm. The loops can be fixed using dowel hooks.
If the heating pipe is damaged
Kinked or damaged areas of the heating pipe must be cut out. The pipe must be re-connected using a permanently sealed coupling. The coupling must be protected from direct contact with the casting compound by wrapping it in PE film. Mark the position of the coupling. After this repair the pipes may need to be extended.
7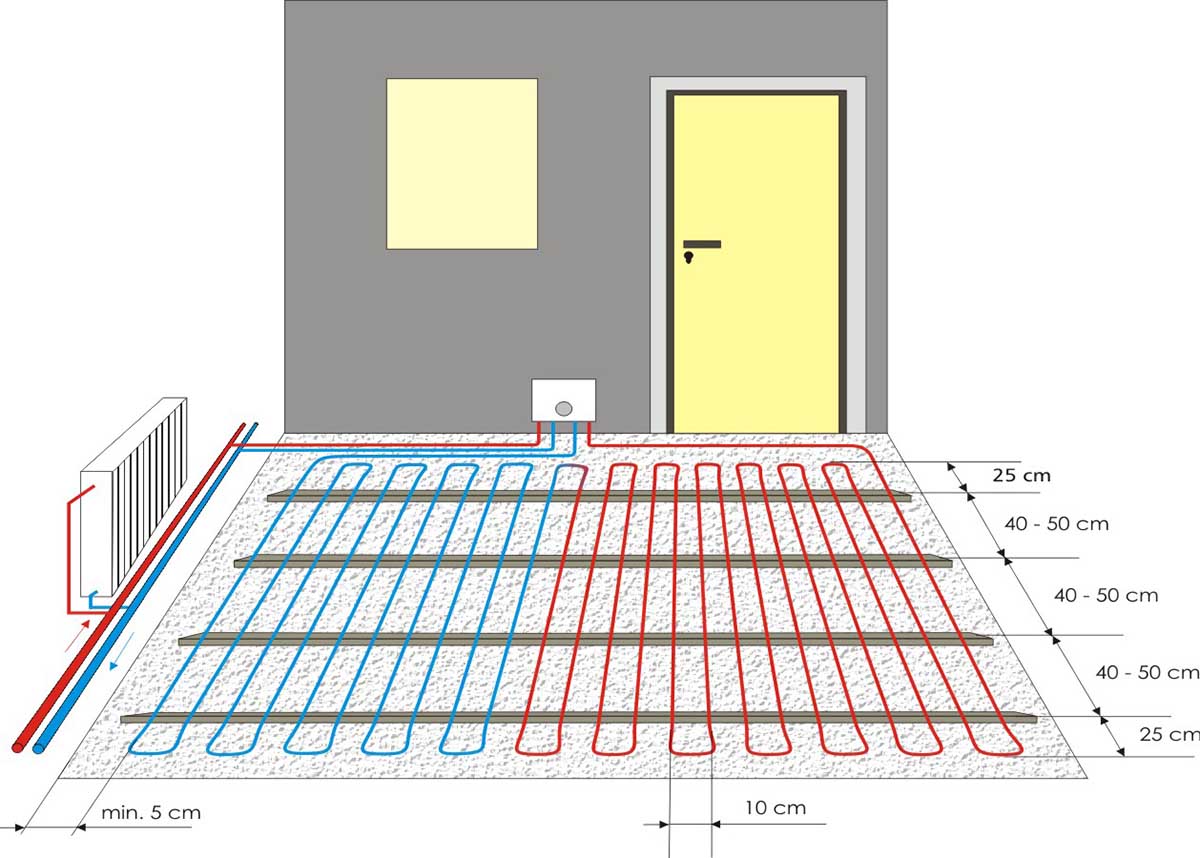
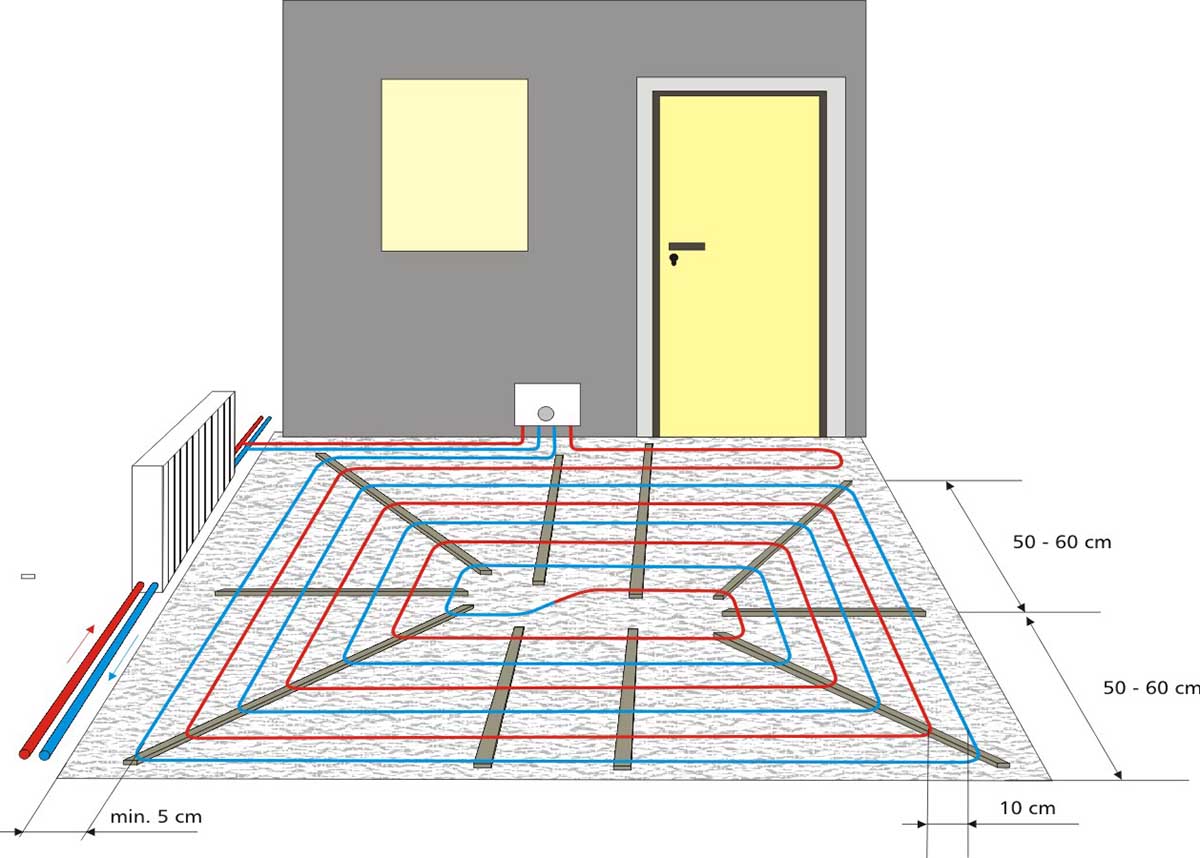
Low profile underfloor heating installation designs
A variety of installation designs are possible and can be adapted to suit the space available. A meandering or spiral installation is most commonly chosen.
8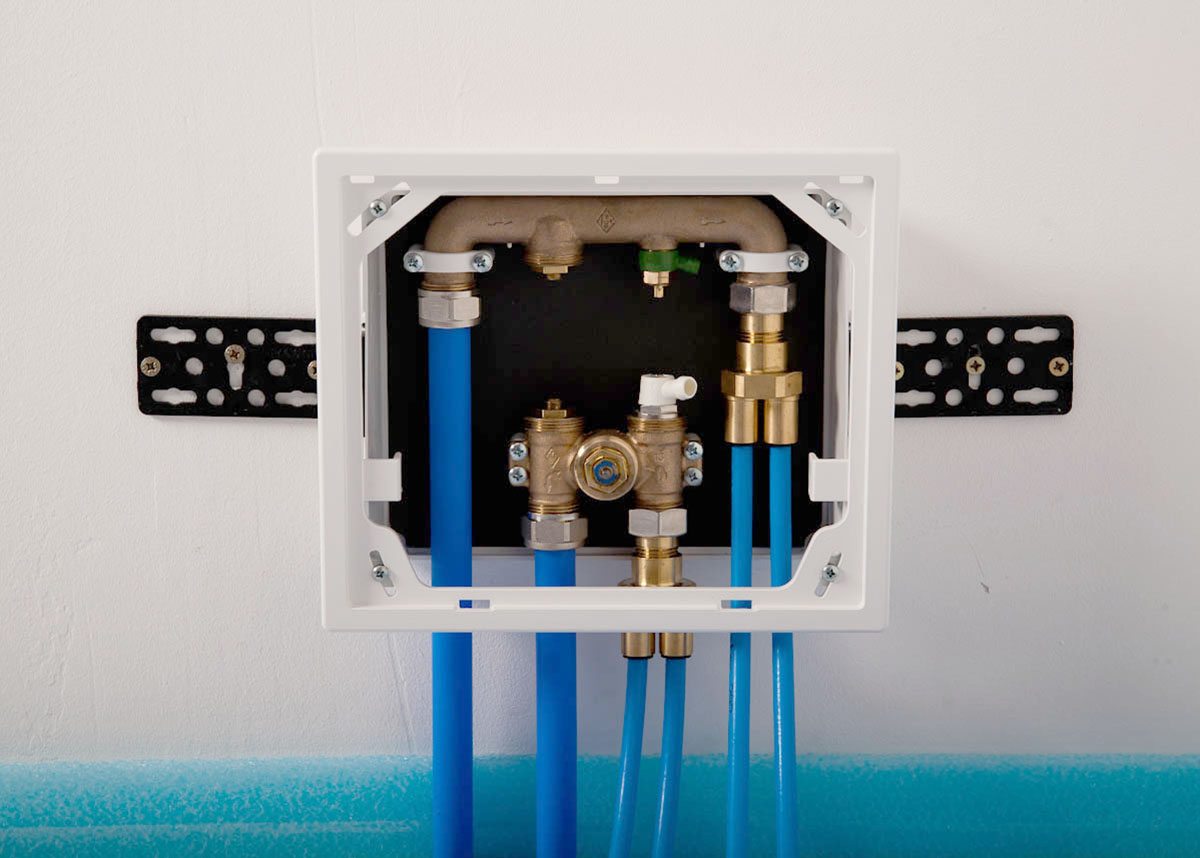
Connection to the RTL box
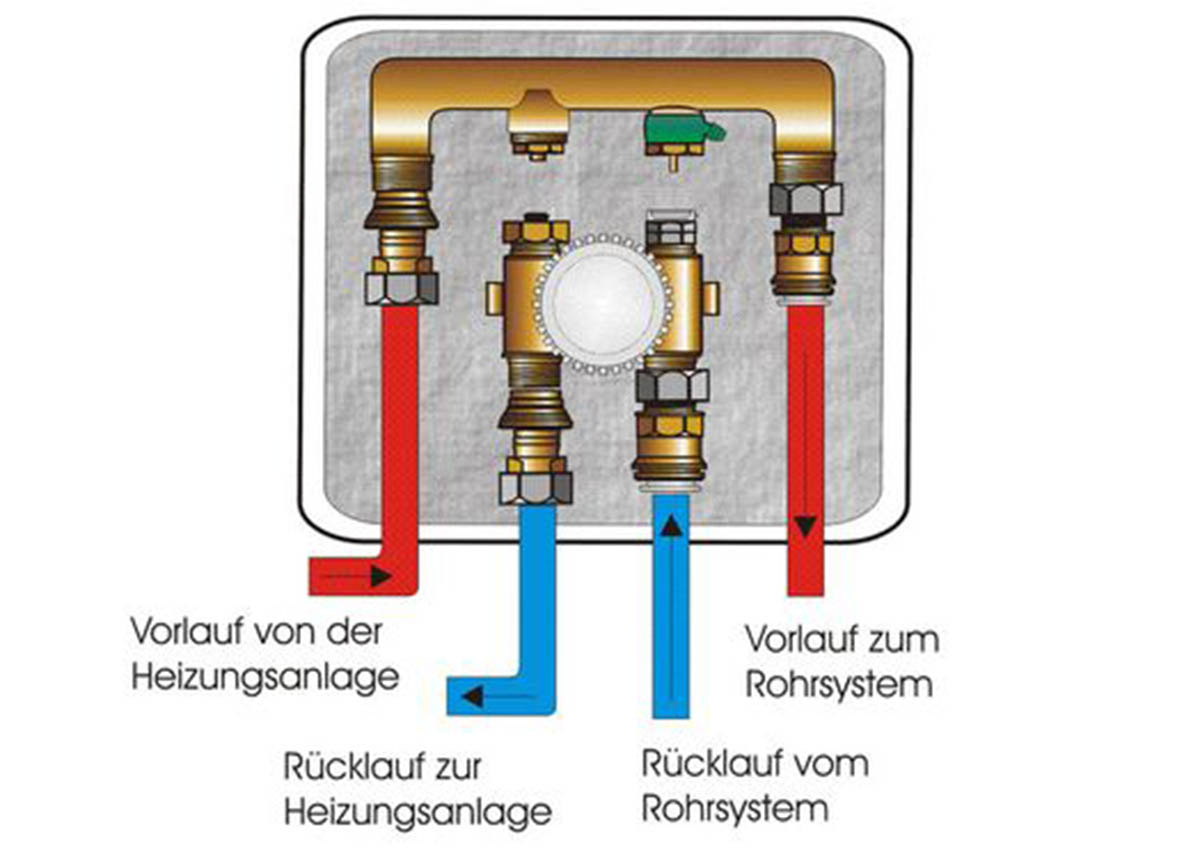
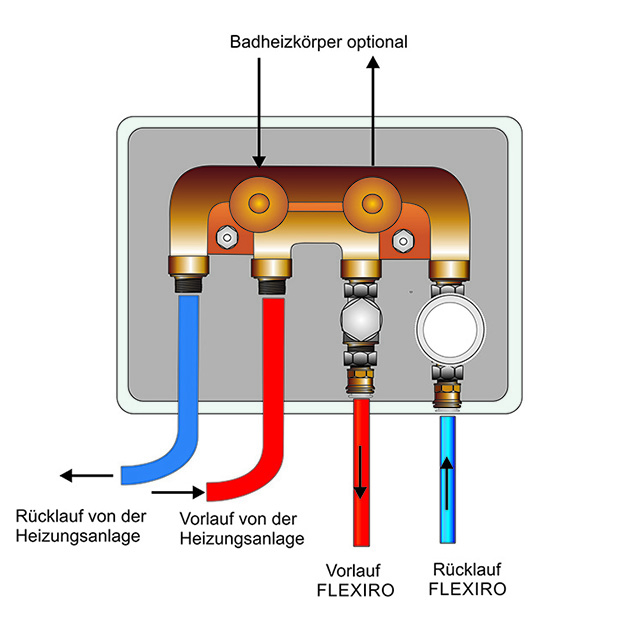
The manifolds are connected to the RTL box with a Eurocone screw connection. The Eurocone has a self-sealing effect, while the metal screw connection has a purely locking function. Over-tightening must be avoided at all costs in order not to compromise the tightness of the heating system.
The heating pipes in the manifolds are connected using a simple plug-in system. The heating pipes, which are cut straight and shortened if necessary, are inserted directly into the plug-in connections of the manifold fingers as far as they will go.
9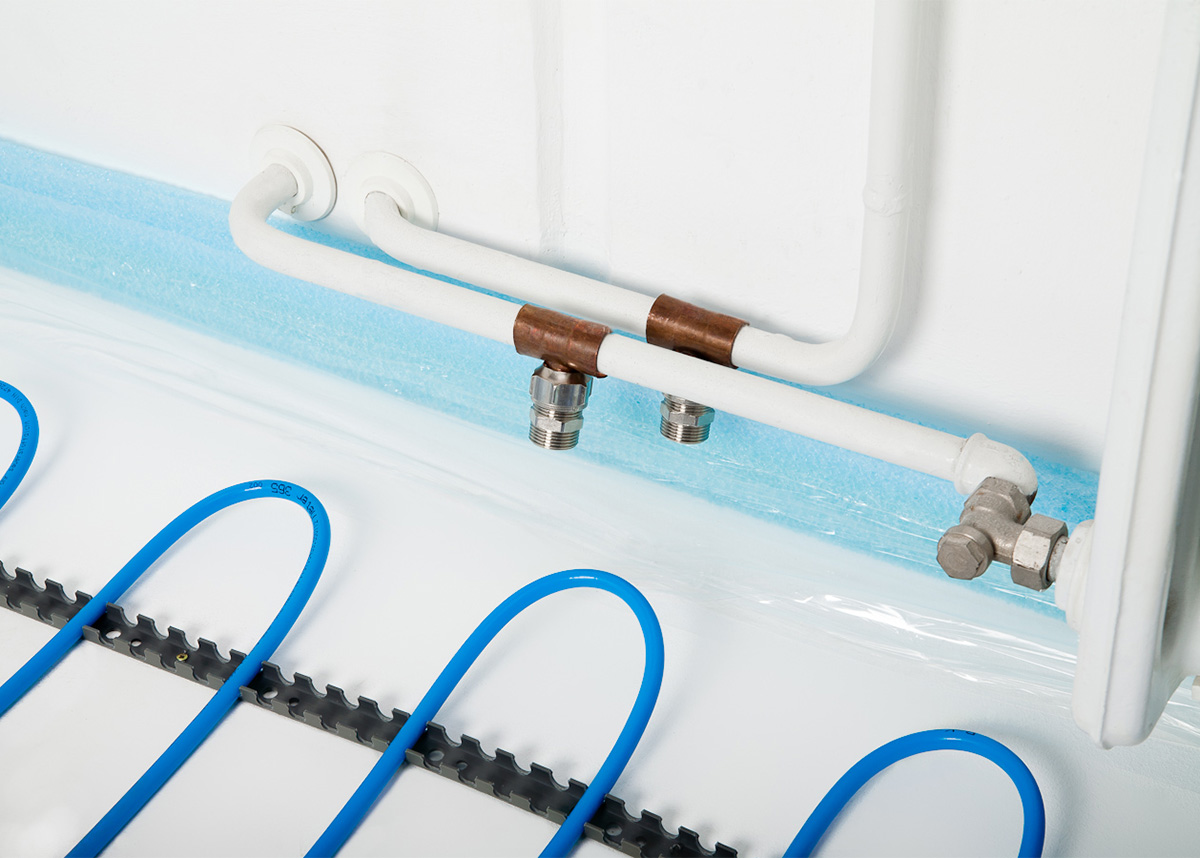
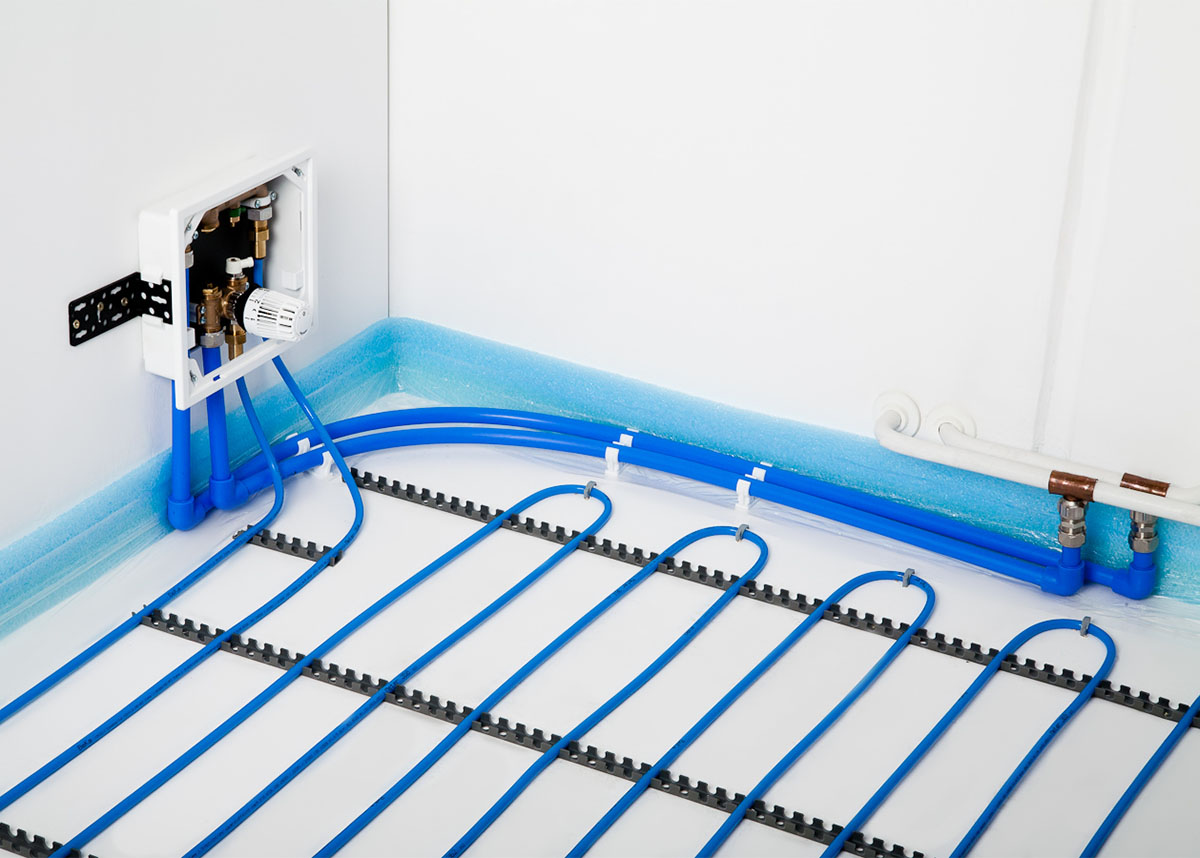
Connection to the heating system
As a rule, the FLEXIRO underfloor heating is integrated into the existing heating system in parallel with other radiators or as a replacement for an old radiator. This is done by inserting a T-piece (not supplied) into the flow and return pipes of the heating system.
Make sure that the flow and return are correctly assigned in the RTL box. Reversing the flow and return in the control box will disable the thermostatic valve and prevent the underfloor heating from operating.
10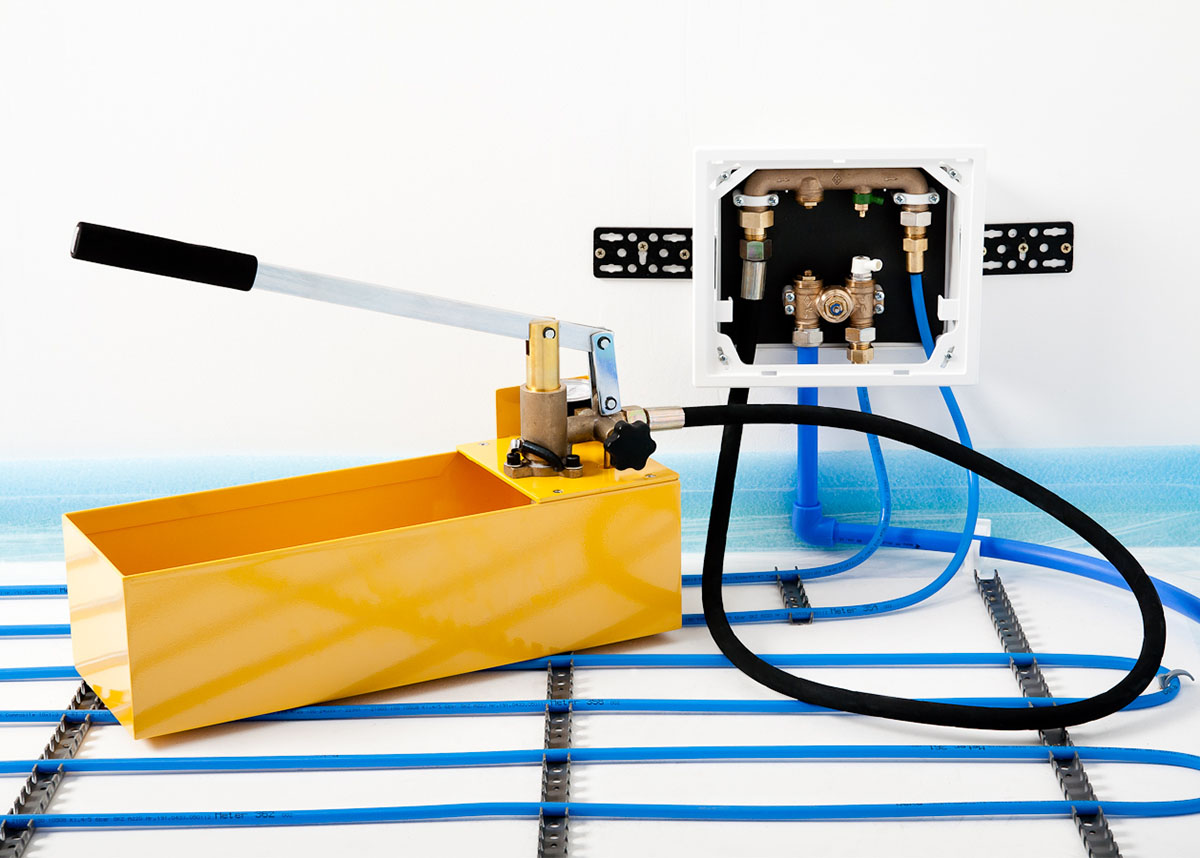
Carrying out the pressure test
Before commissioning the underfloor heating system it is essential to ensure that the system and all associated components are correctly installed and tight. The pressure test pump is available as an accessory in the shop.
See video for exact procedure and connections for pressure test
11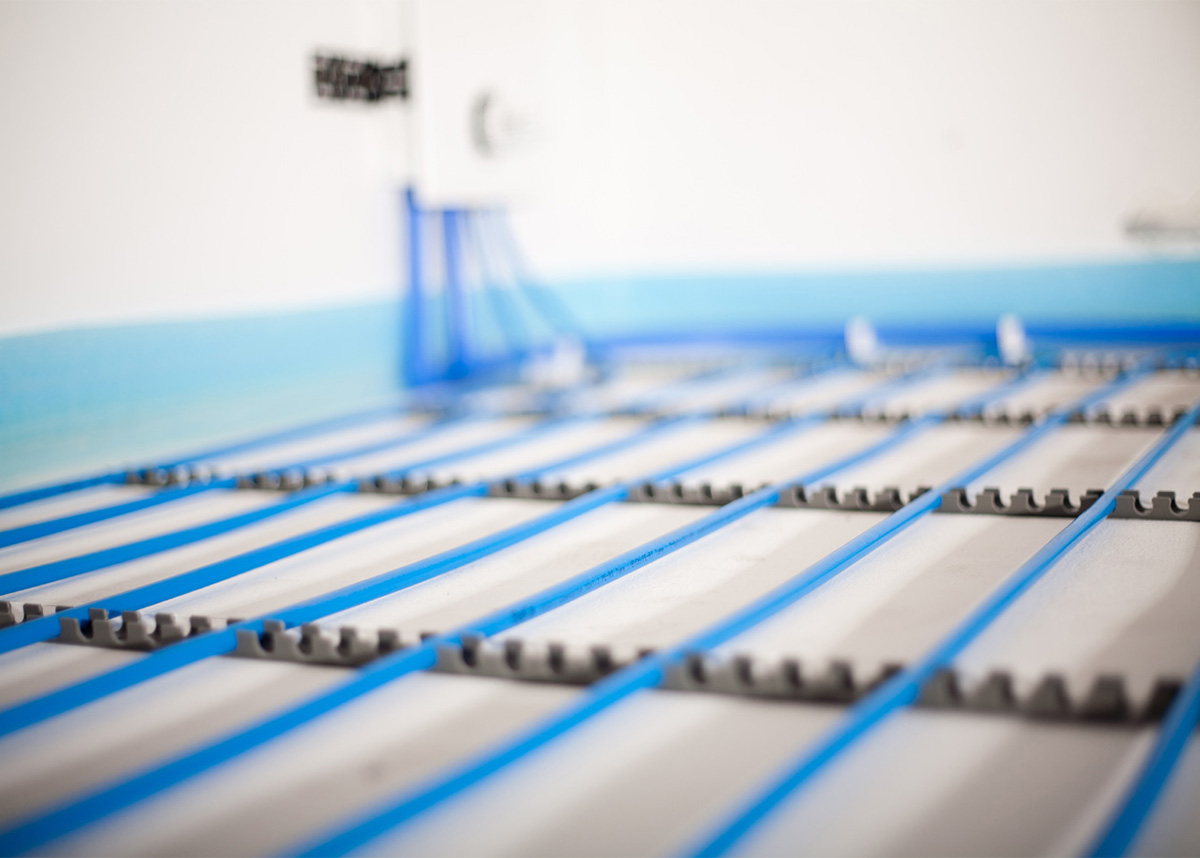
Test run of the underfloor heating
We strongly recommend carrying out a test run of the underfloor heating before covering the pipe system with levelling compound. This is the last opportunity to correct any installation errors or damage!
12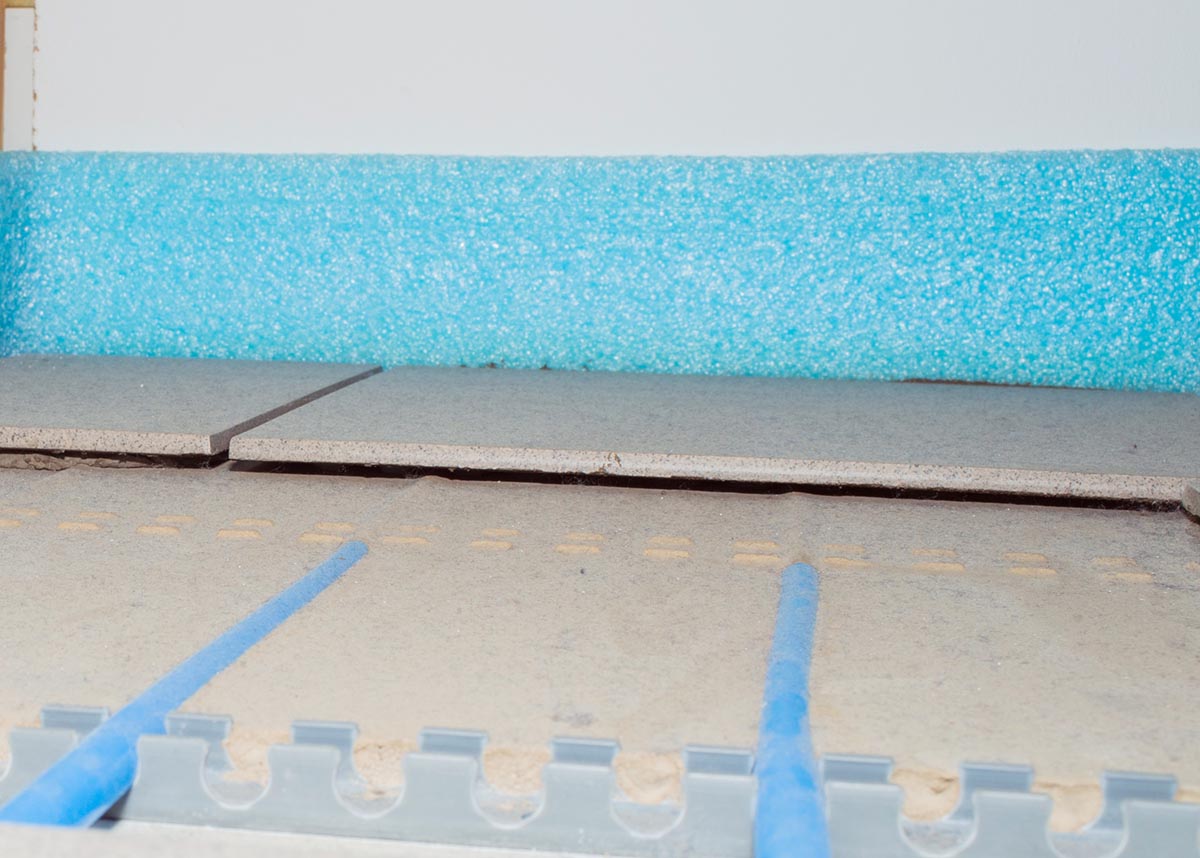
Applying the levelling compound
When selecting a suitable construction compound (levelling compound) for underfloor heating systems, attention should be paid to the "flexible" property. The underfloor heating must be switched off when applying the levelling compound! The minimum construction height is 12 mm if a ceramic surface covering is selected. For other top coverings, the levelling compound should have an additional covering of at least 5 mm of the heating pipe. All coverings must be labelled "suitable for underfloor heating".
13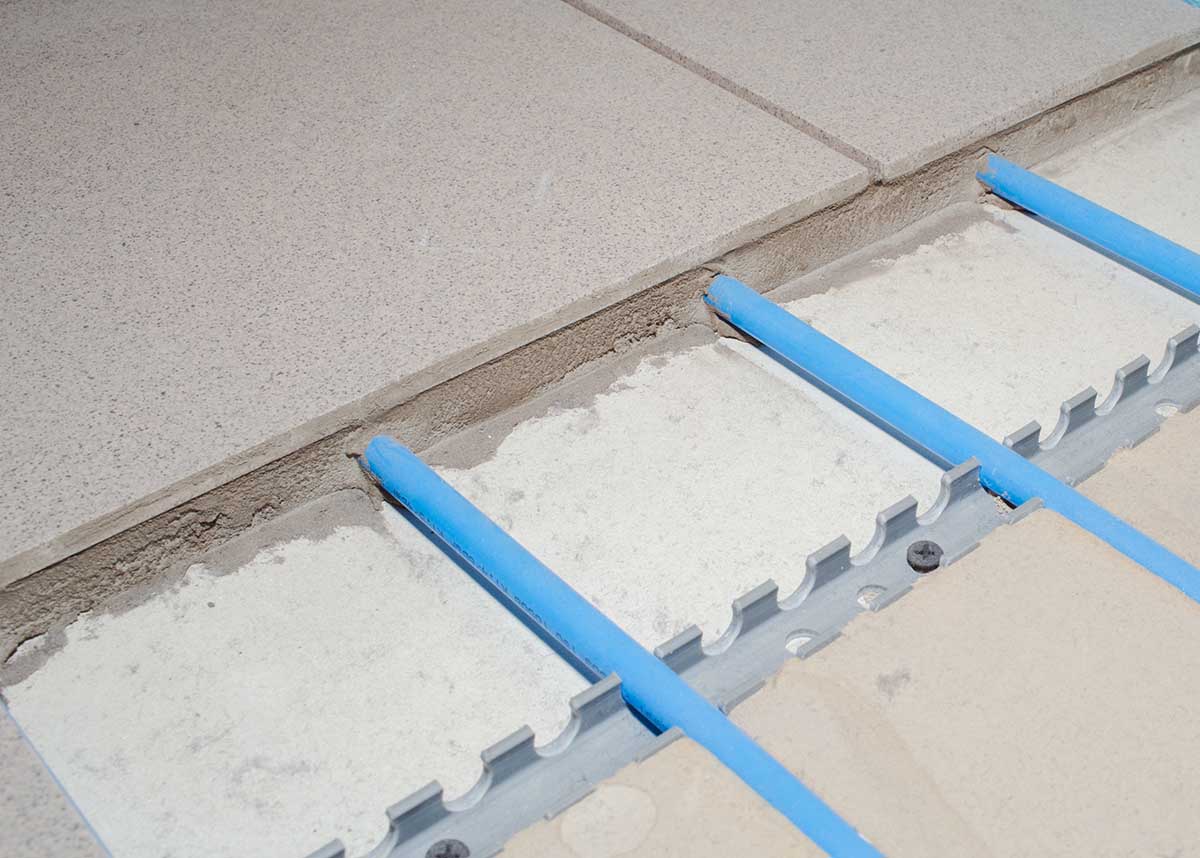
Putting the underfloor heating into operation
Once the surface covering has been completed and allowed to dry naturally, the heating process can begin. If the floor is to be tiled, the underfloor heating should not be switched on until the tile adhesive is fully hardened. Heating is usually carried out according to a heating protocol. Follow the manufacturer's instructions for the construction chemicals used.
14To conclude
Despite the simple design of the underfloor heating system and the ease of installation, we must point out that, as the manufacturer, we can only guarantee correct delivery from the factory and not installation and connection by third parties. Please also observe the current standards and regulations for heating systems.
The most important installation steps are also shown in our animated video.
FLEXIRO wishes you a successful installation!
19-
 Installation Manual - How to Fit a Low Profile Underfloor Heating with Clip RailsComprehensive DIY installation guidelines with all required information to retrofit a water underfloor heating system using clip rails.734 KB
forum
The Bostik company says yes! However, floating timber structures are not permitted as they are highly susceptible to deformation. Installation is therefore only possible on fixed timber structures, whereby these must be uncoupled. Please contact us for further information on laying on fixed timber structures!
The existing substrate must always be level, clean, dry and load-bearing.
FLEXIRO underfloor heating can be installed on OSB boards. Bostik's instructions clearly state that the OSB boards must be bonded to the substrate. Floating OSB boards are not suitable. The OSB boards must be primed before laying the FLEXIRO underfloor heating. In this case, the pipes should be covered with at least 5 mm of screed.
Due to the installation of the low profile underfloor heating directly below the surface, additional insulation is not required in most cases. This keeps the installation height low. Exceptions are floors above unheated basements and the ground. The requirements of the Energy Saving Ordinance must be observed. Further information on thermal insulation for underfloor heating
The low profile underfloor heating is designed for mounting directly on the existing surface. The modernisation of an existing and already insulated floor usually does not require additional insulation of the underfloor heating. Therefore we only sell special insulation boards for bathrooms and other wet areas. Additional floor insulation can be bought at any specialist store. Once the insulation has been applied, you need to ensure a stable surface before installing the underfloor heating.
