
This Is How It Works: DIY Retrofitting Wall Heating with Clay Plaster
Installation instructions
To demonstrate the simple installation of the FLEXIRO wall heating for plastering, we have carried out a test installation of approximately 2 m². The most important installation steps are described in the illustrated installation procedure. Detailed installation instructions can be downloaded at the bottom of the page and are included with each heating kit.
The FLEXIRO wall heating for plastering contains all the components required to retrofit existing wall surfaces as panel heating and to integrate the heating surfaces into the existing heating system. Suitable plaster materials for wall heating are Gypsum plaster, lime plaster and clay plaster and must be purchased separately.
The 10 mm PE-RT heating pipes are quickly and neatly laid on the wall in the previously installed pipe support honeycomb elements. The installation and connection of the wall heating to the existing heating system is simplified by the use of plug-in connections and RTL boxes, making FLEXIRO equally suitable for DIY enthusiasts.
Installing wall heating using the plastering method
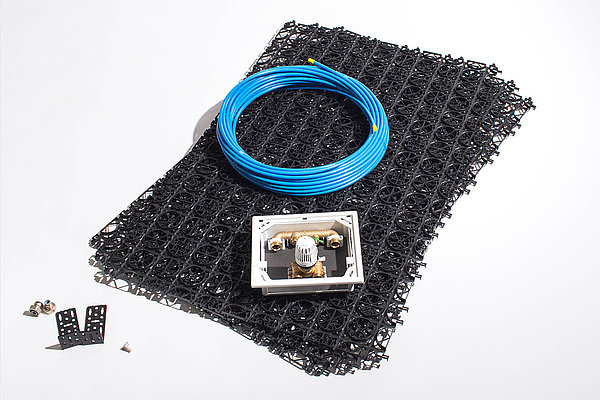
Kit components
The components of the complete plaster wall heating kit vary depending on the size of the kit. Please refer to the PDF installation instructions or the relevant product page for the exact contents. You can also find additional accessories and suitable tools in our shop.
Notice
Despite the simplified installation, the following also applies to FLEXIRO wall heating for lime, gypsum or clay plasters: Working on heating systems requires sufficient technical knowledge and skills. If in doubt, have the installation carried out by a professional.
1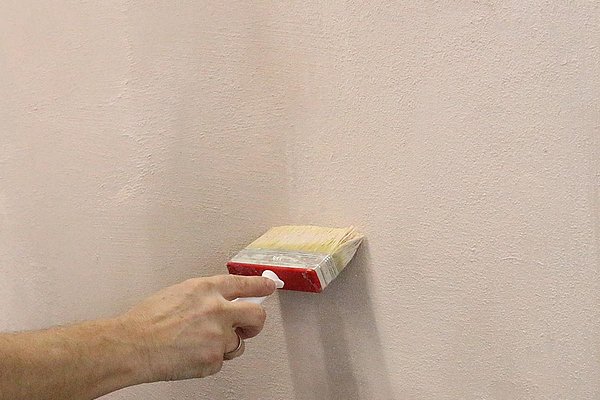
Positioning of the wall heating panels
The wall on which the wall heating is to be installed must be sufficiently strong and suitable for plastering.
The arrangement of the individual heating panels must be determined at the start of the work. The honeycomb elements used to secure the heating pipe (dimensions: 150 mm x 150 mm) can be plugged together in any direction as required. In most applications, the height of the wall heating is limited to approximately 2 metres. Any fixtures in the wall surface, such as light switches or sockets, should be installed before the wall heating is mounted. The honeycomb elements are recessed in such installations. The edge joints of the wall surface must be filled later with permanently elastic grout.
2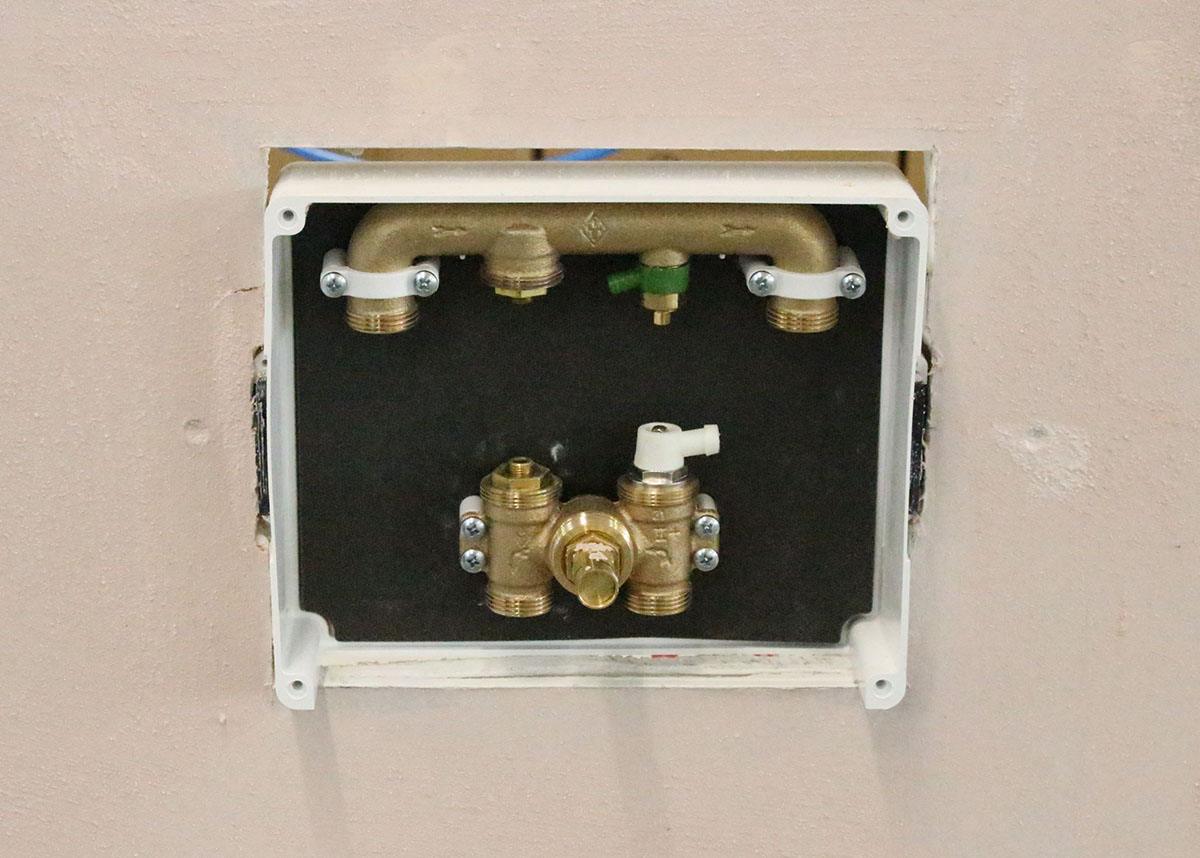
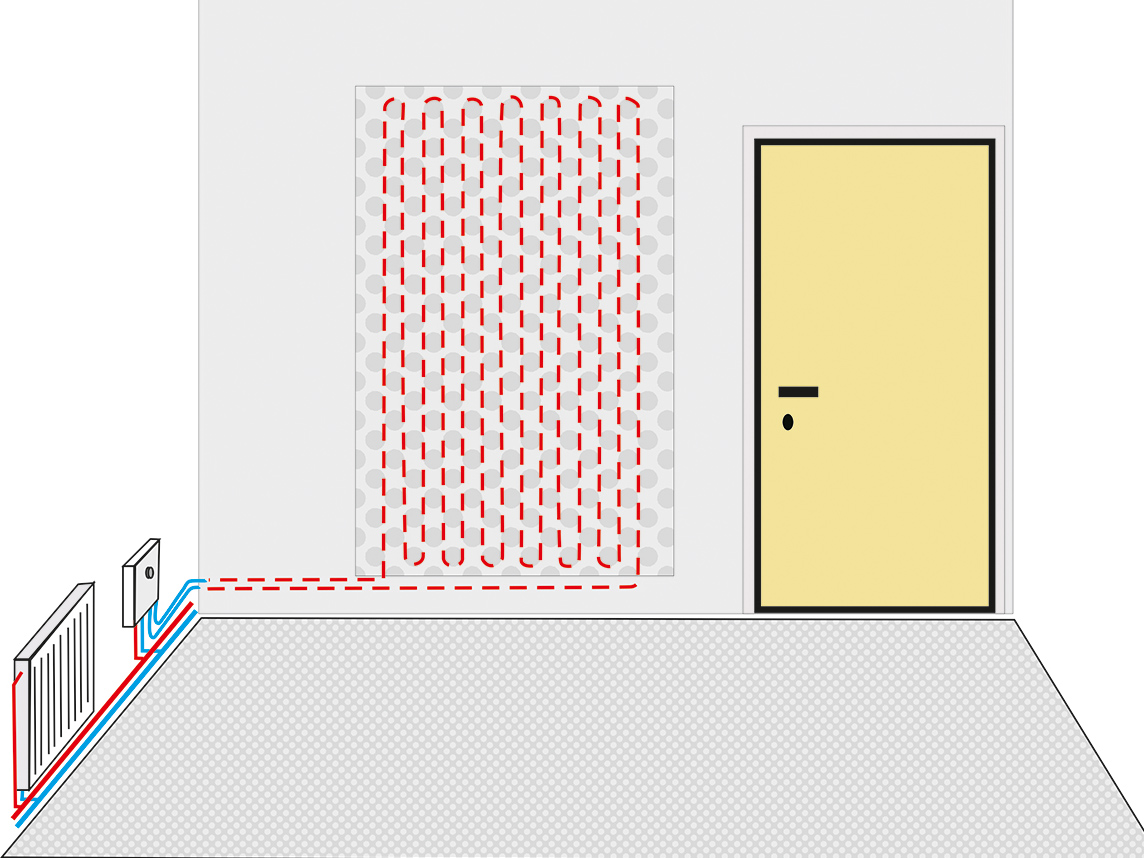
Positioning of the RTL box
The first step is to define the arrangement of the heating circuits.
ATTENTION: Set 2.7 m² corresponds to one heating circuit, set 5.4 m² corresponds to 2 heating circuits, set 8.1 m² corresponds to 3 heating circuits, set 10.8 m² corresponds to 4 heating circuits.
The position of the RTL box is chosen so that the heating pipes of all the heating circuits can be routed directly to the box without an extension. The position on the wall surface should also be planned so that the room air can flow well around the thermostatic head and at the same time ensure safe operation of the RTL box.
3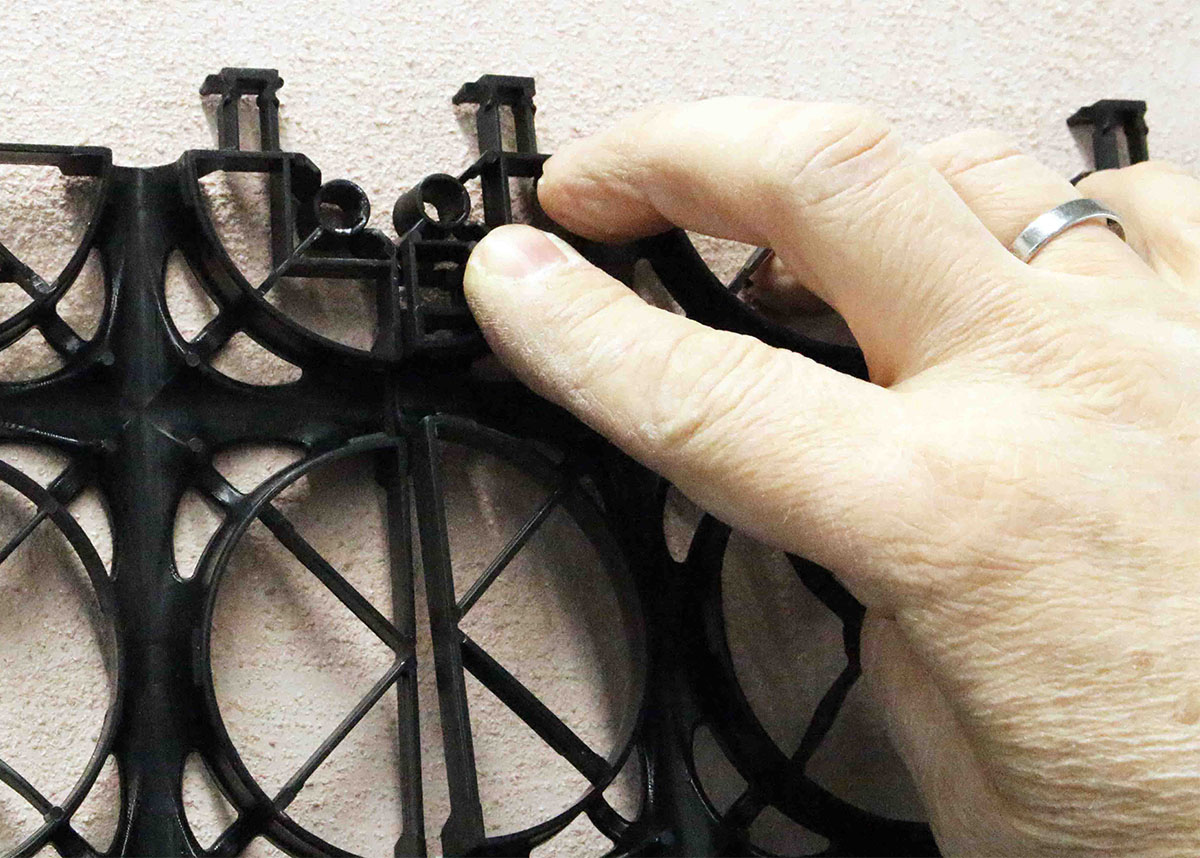
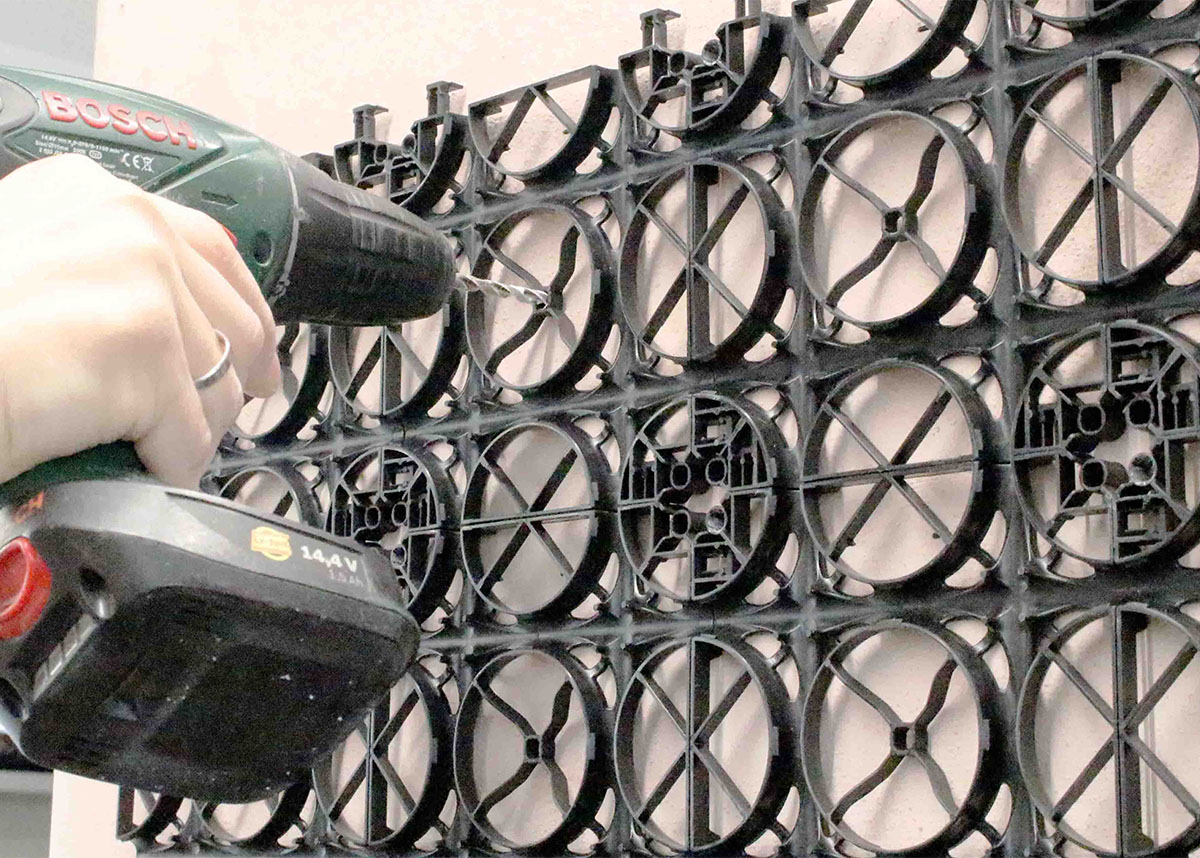
Mounting the honeycomb elements on the wall
Before installing the honeycomb elements on the wall, it is essential to ensure that any electrical cables, water, gas or heating pipes that may be in the wall are not damaged when pre-drilling for the plastic hammer-in nails.
The wall must be prepared for plastering. If necessary, plaster primer or a base coat is applied. The honeycomb elements are then fitted together in the desired arrangement.
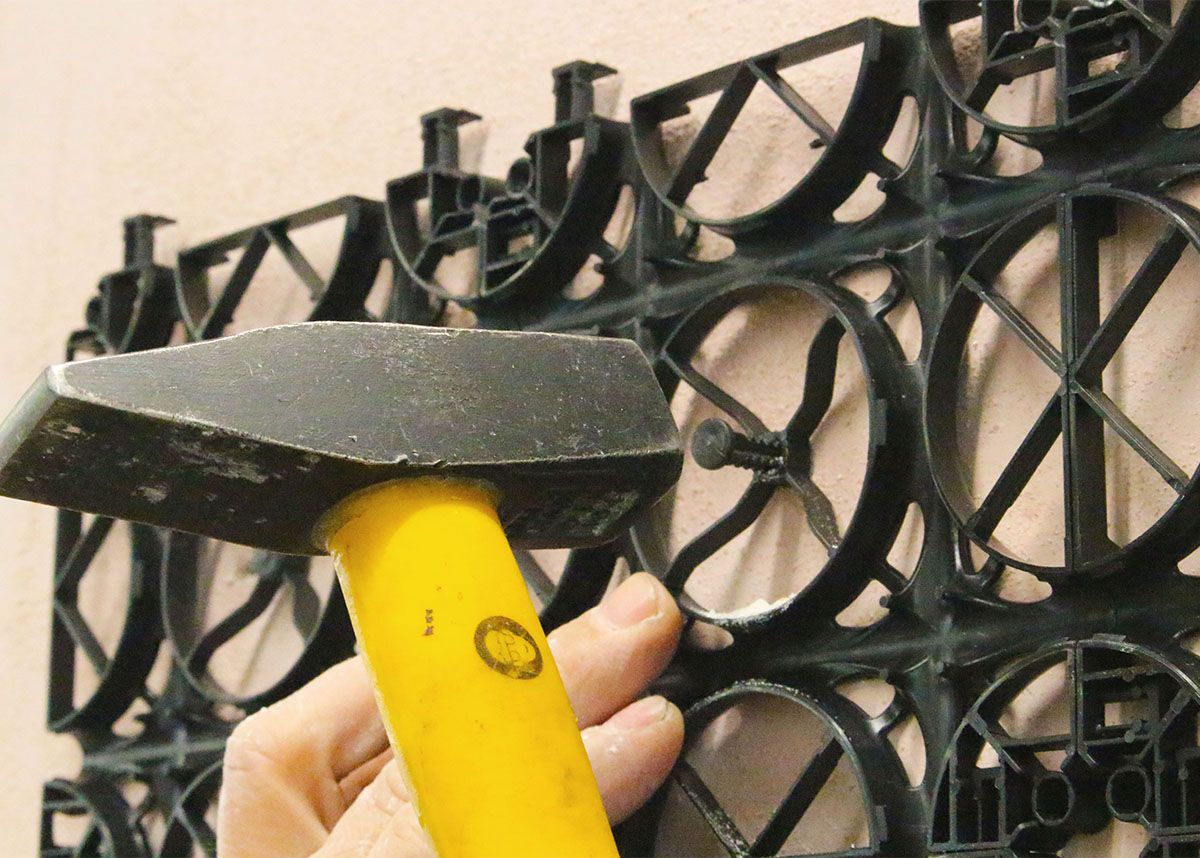
Position the honeycombs on the wall and pre-drill holes for the plastic hammer nails. The hole diameter is 6 mm. The honeycombs are secured by hammering in the plastic hammer-in nails. It is generally sufficient to secure every second honeycomb.
4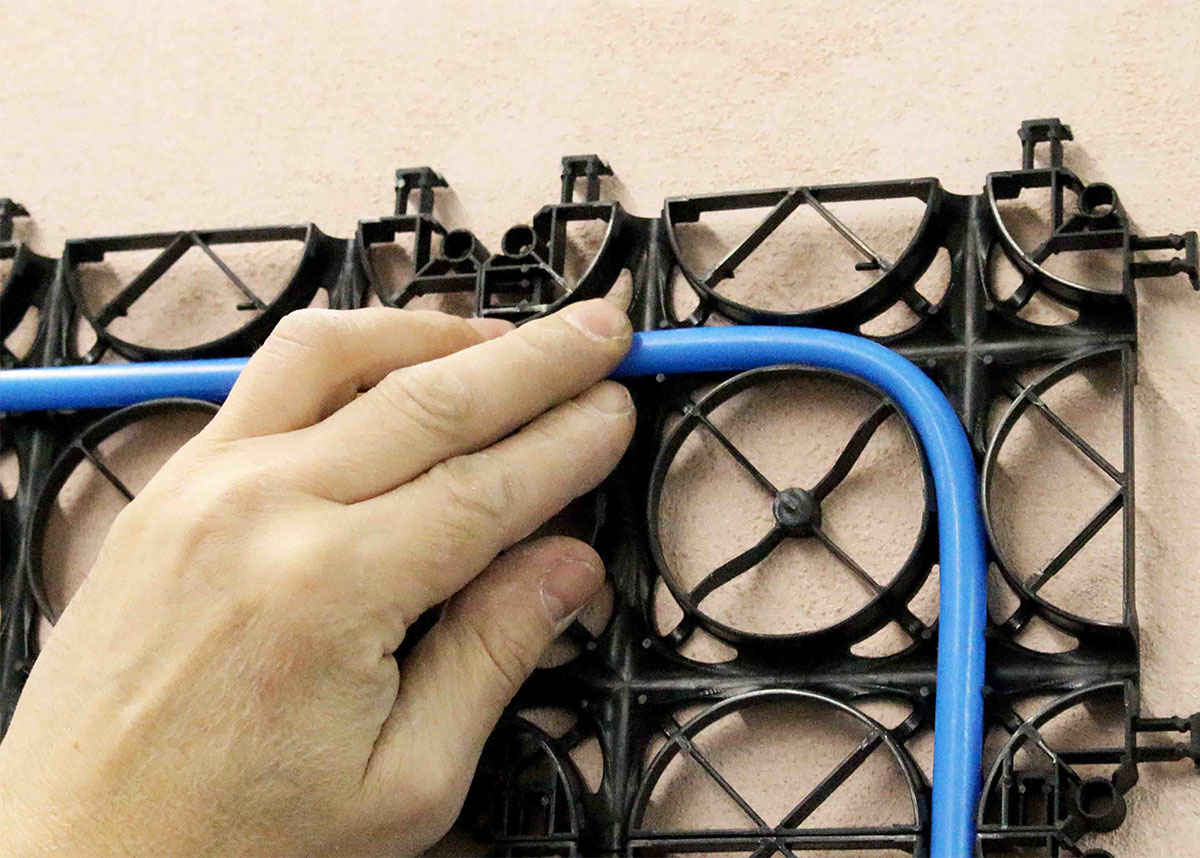
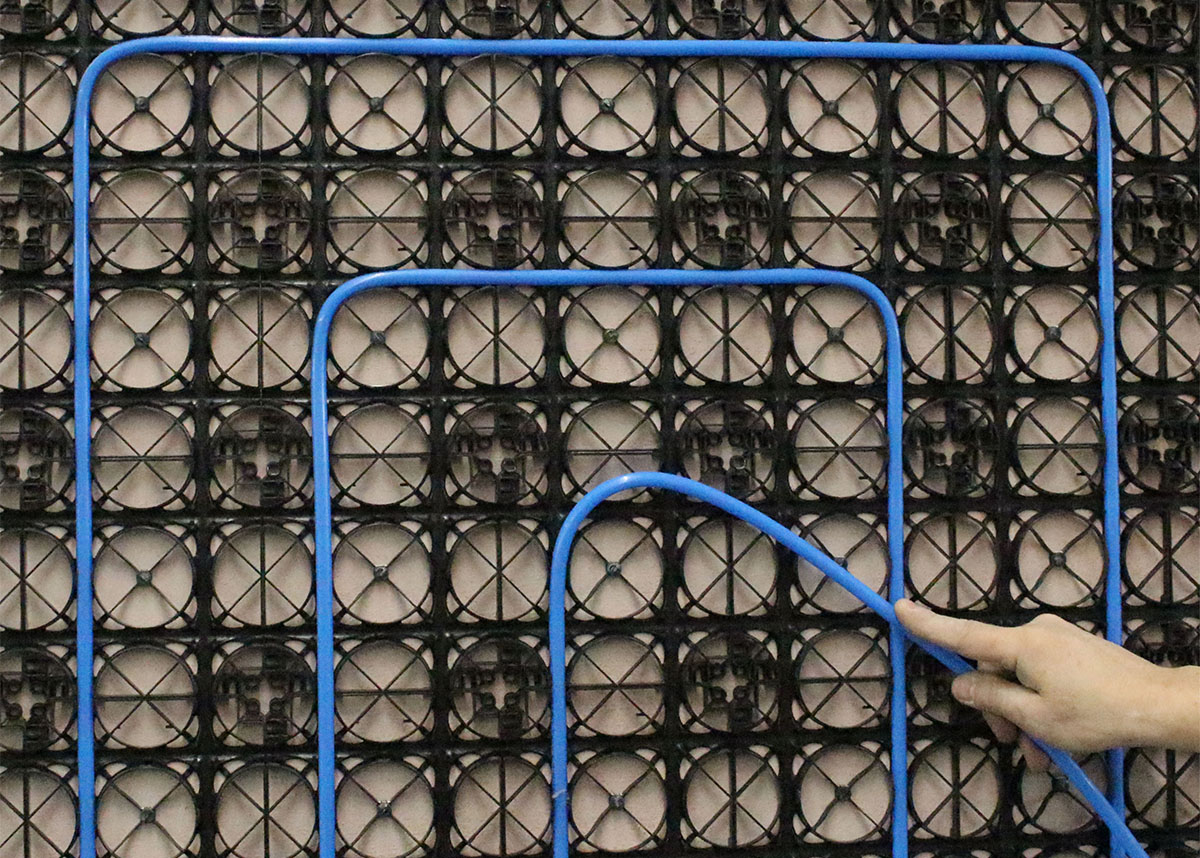
Installing the heating pipes
The heating pipes should be laid close to the manifolds to minimise the length of pipe required for the connection.
Depending on the initial conditions, different types of installation are possible, e.g. meandering or spiral installation. The pipes must be laid without twisting.
The minimum distance between the heating pipes is 7.5 cm. The distance between the wall heating and the walls of the room should be at least 5 cm. Avoid kinking the pipes when bending them. If the pipe bend protrudes from the honeycomb element, the loops can be fixed with dowel hooks.
5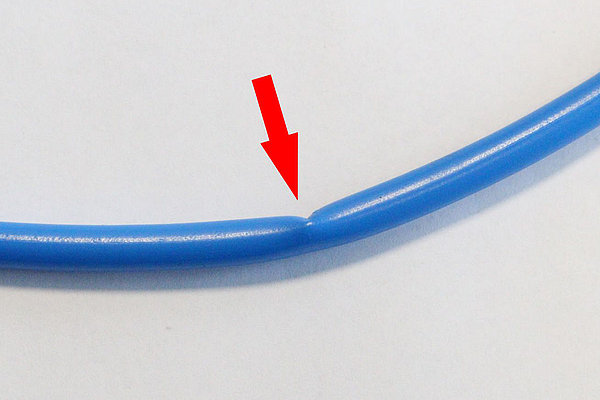
Repairing the heating pipe
Kinked or damaged sections of the heating pipe must be cut out. The pipe must then be reconnected using a permanently sealed joint (see plug-in connector).
Protect the coupling from direct contact with the plaster or surface covering by wrapping it in PE film. The position of the coupling should be marked. If necessary, the pipes can be extended using the same procedure.
6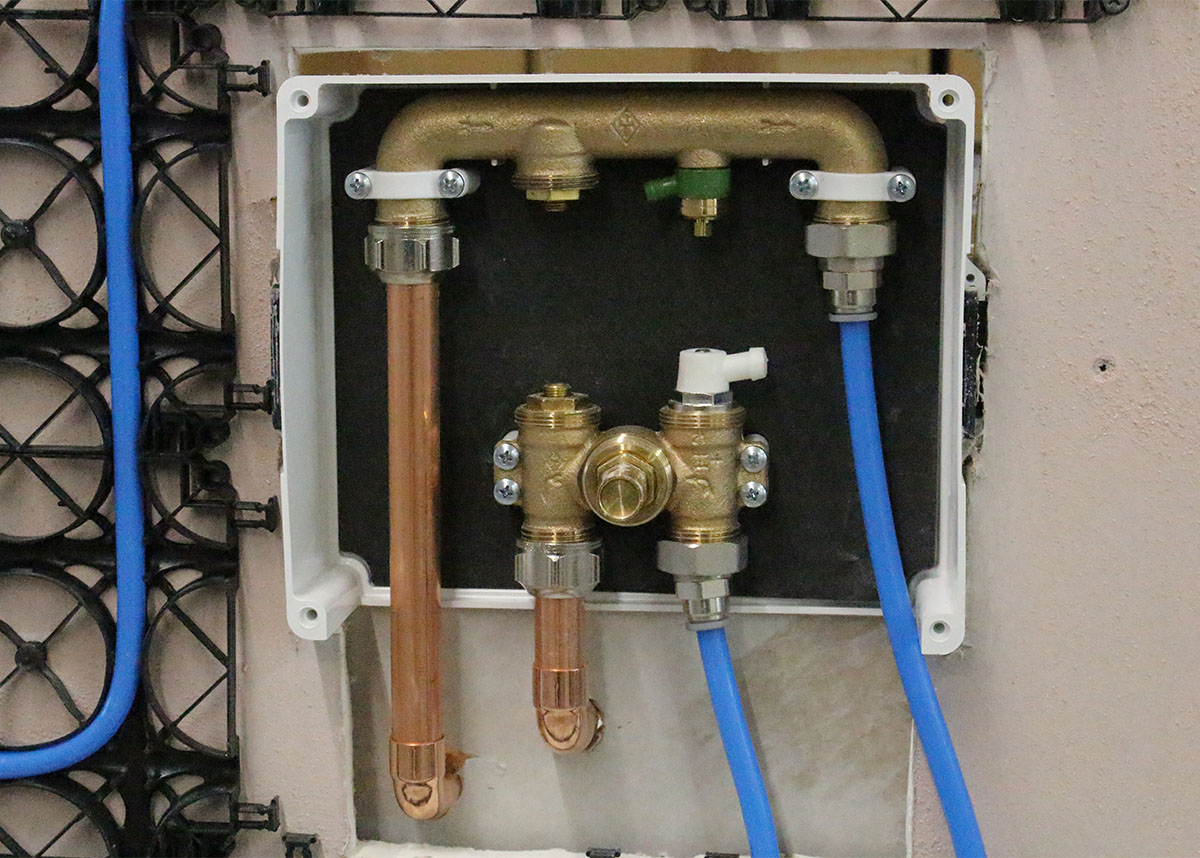
Connection to the RTL box
The manifolds are connected to the RTL box with a Eurocone screw joint. The Eurocone has a self-sealing effect, while the metal screw connection has a purely locking function. Over-tightening must be avoided at all costs in order not to compromise the tightness of the heating system.
The heating pipes in the manifolds are connected using a simple plug-in system. The heating pipes, which are cut straight and shortened if necessary, are inserted directly into the plug-in connections of the manifold fingers as far as they will go.
7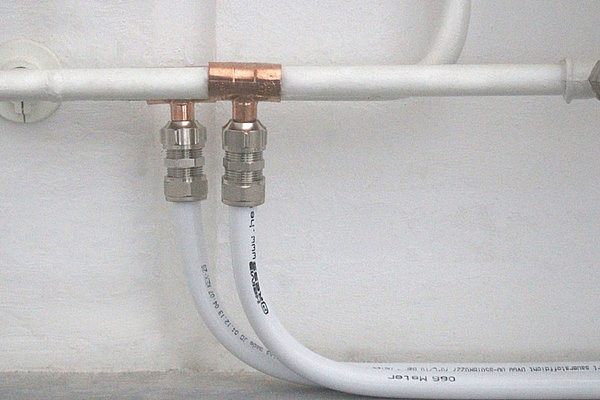
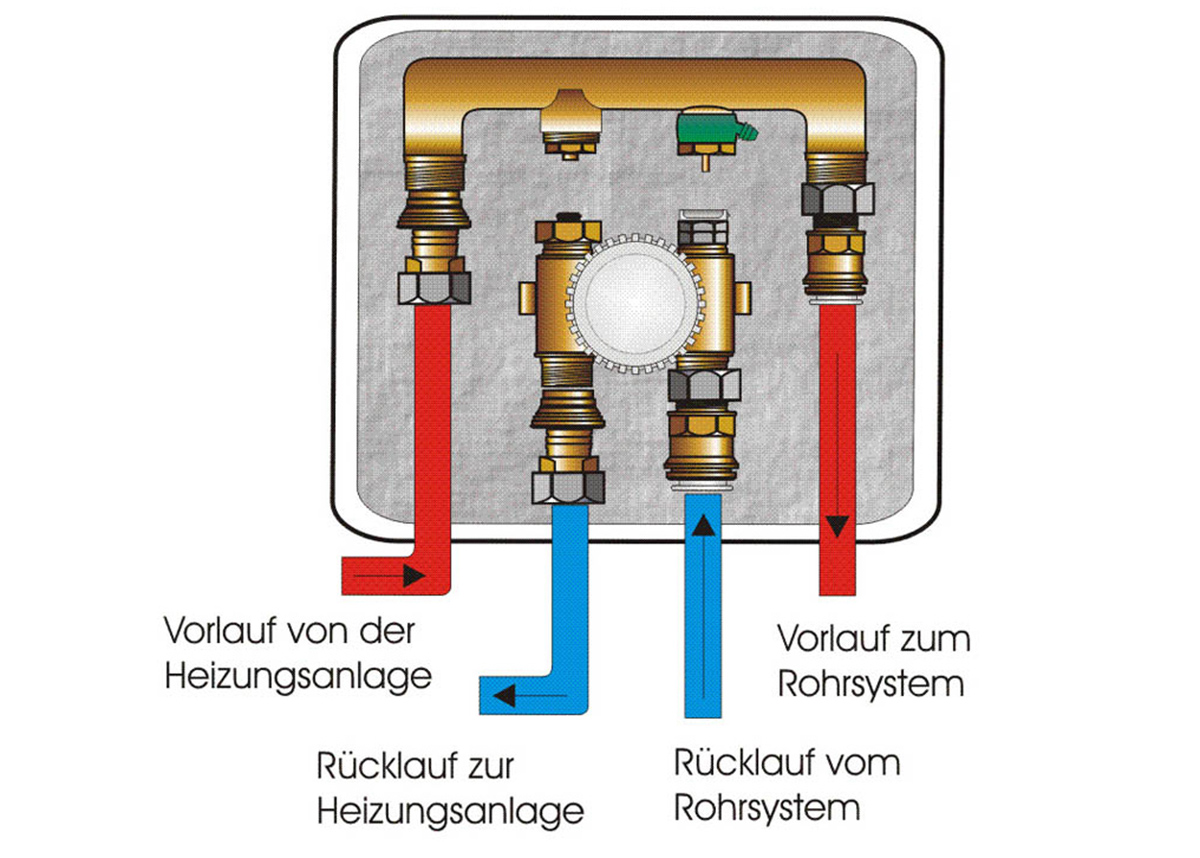
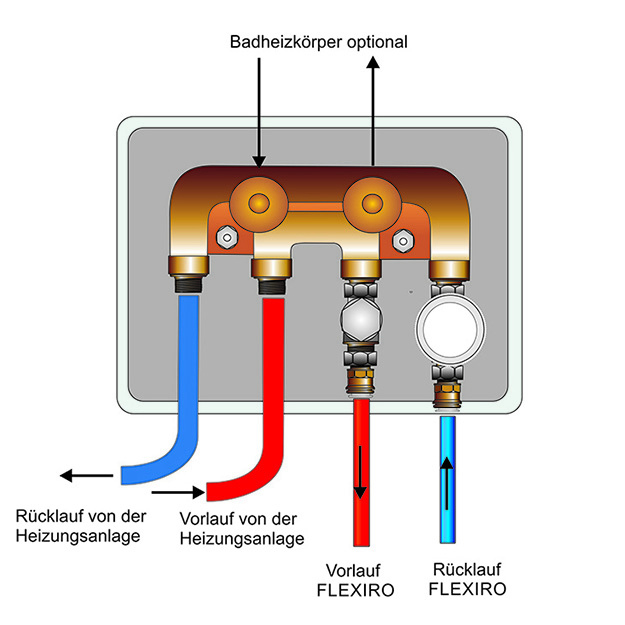
Connection to the heating system
The FLEXIRO wall heating is usually integrated into the existing heating system in parallel with other radiators or as a replacement for a radiator that is to be removed. This is done by inserting a T-piece (not supplied) into the supply and return pipes of the heating system.
Ensure that the flow and return in the RTL box are correctly assigned. Reversing the flow and return in the control box will disable the thermostatic valve and prevent the wall heating from operating.
8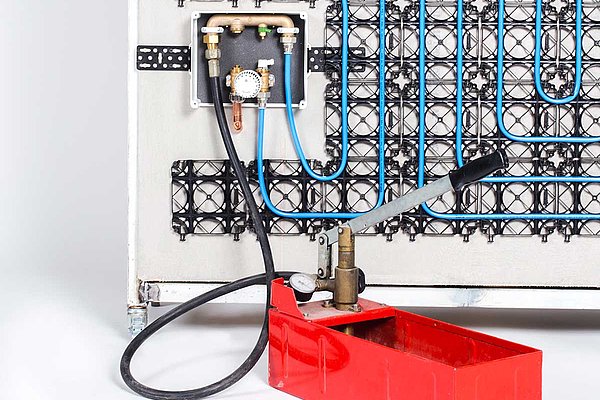
Carrying out the pressure test
Before commissioning the wall heating system, it is essential to ensure that the system and all associated components are correctly installed and sealed. The pressure test pump is available as an accessory from the shop.
See video for exact procedure and connections for pressure test
9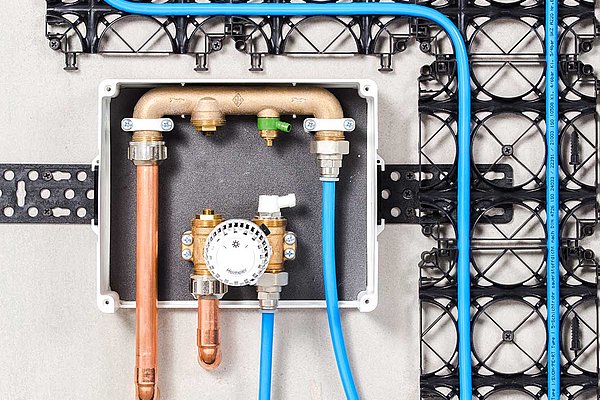
Test run of the wall heating system
It is highly recommended that you carry out a test run of the wall heating before the wall surface is sealed with plaster. This is the last opportunity to correct any installation errors or damage!
10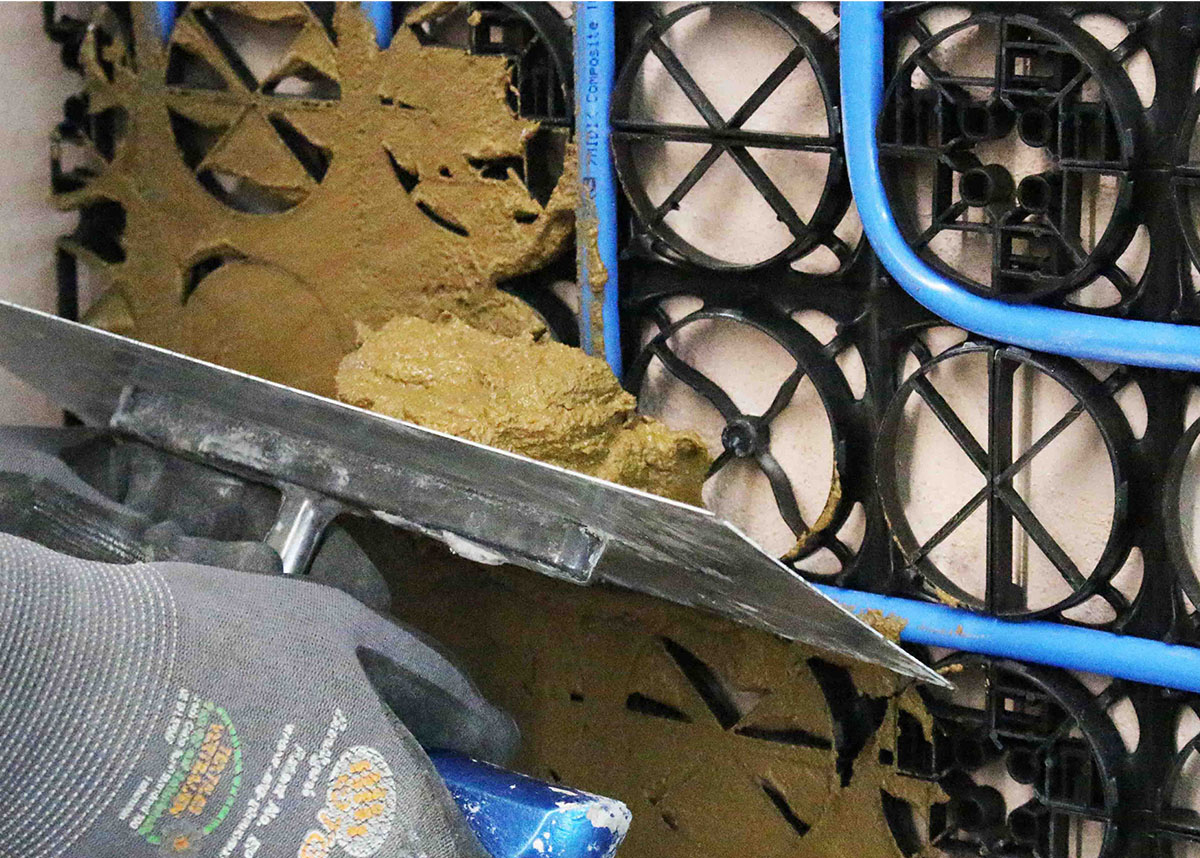
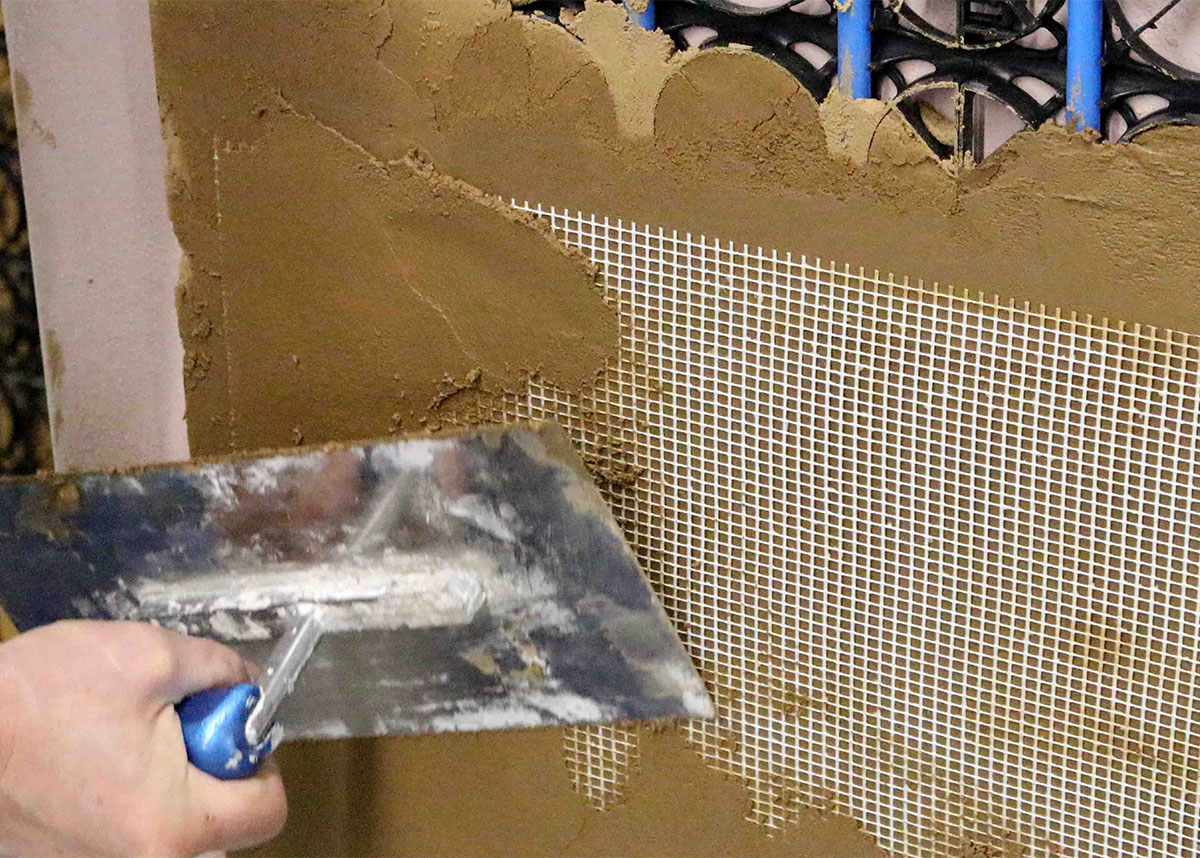
Applying the plaster
All common plaster materials approved for wall heating systems, such as gypsum plaster, lime plaster or loam plaster, are suitable for plastering the wall heating. It is important to follow the manufacturer's instructions when choosing the plaster material.
Before plastering, ensure that the wall heating is completely switched off. A running wall heating system can seriously disrupt the drying process of the plaster material and damage the plaster.
Seal the edge joints to the adjacent components with flexible joint sealant.
11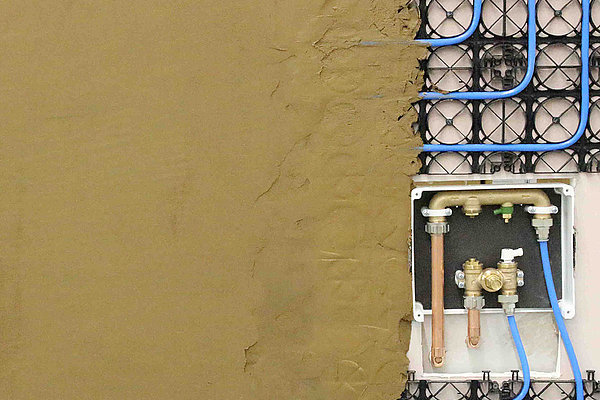
Commissioning of the wall heating
Once the plaster, paints and finishes have been completed and allowed to dry naturally, the wall heating can be put into operation. The specific heating instructions of the plaster manufacturer should be followed during the heating process.
During the first few hours of operation, the desired surface temperature is set on the control box by turning the thermostatic valve head. The wall heating is a radiant heating system. The feeling of heat is very direct. It is best to set the temperature according to how comfortable you feel, not according to the measured room temperature. In this way, heating costs can be saved despite the perceived thermal comfort.
12To conclude
Despite the simple design of the wall heating system and the ease of installation, we must point out that, as the manufacturer, we can only guarantee correct delivery from the factory and not installation and connection by third parties. Please also observe the current standards and regulations for heating systems.
FLEXIRO wishes you every success with the implementation of your project!
17-
 Installation Guide - How to Install a Wall Heating Kit, PlasterComprehensive installation guidelines with all required information to retrofit a radiant wall heating with lime, gypsum or clay plastering methods.1 MB
help
For the FLEXIRO wall heating dry construction, a standard gypsum plasterboard 12 mm thick is used. For damp rooms, dry construction recommends an impregnated gypsum plasterboard GKBI. Please ask for a customised offer.
Yes, the FLEXIRO wall heating can be mounted on an exterior wall. However, the exterior wall should have a maximum U-value of 0.30 W/m2K. If insulation is installed behind the wall heating to minimise heat loss to the outside, a building physics check of the construction may be required to prevent condensation in the wall when the wall heating is not in operation. During operating, the wall heating will dry-heat the affected wall rather than causing moisture damage to the construction.
After installing the drywall panels, you can visualise the arrangement of the heating pipes in heating mode with a thermal imaging camera. The pipes have a distance of 100 mm. In this way, pictures can also be hung later. Alternatively, if the walls are not tiled, you can spray them slightly damp when the heating is on. Where a heating pipe runs, the moisture will dry off more quickly.
