
This Is How It Works: Do-it-yourself Ceiling Heating with Ready-to-install Drywall Panels
Installation instructions
Radiant ceiling heating provides natural thermal comfort at comparatively low heating costs. In order to provide this thermal comfort in old buildings or in modernisation projects, a water-bearing ceiling heating system can be retrofitted in dry construction in just a few steps. Our 3 m² test installation shows exactly how this can be done.
It is based on our ceiling heating kit for heating areas from 2.9 to 11.6 m². The installation is carried out using suspended dry construction elements, into which the 10 mm PE-RT heating pipes have already been incorporated at the factory. The use of plug-in connections and RTL valves to connect to all common heating systems enables tool-free installation and makes retrofitting the DIY ceiling heating an interesting project for do-it-yourself enthusiasts. Detailed installation instructions can be downloaded at the bottom of this page and are included with each heating kit.
Installing ceiling heating with pre-fabricated plasterboard
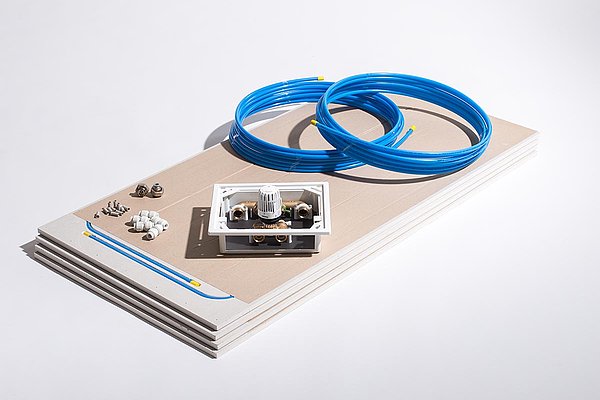
Kit components
The exact components of a complete water-bearing ceiling heating drywall kit depend on the size of the kit. Please refer to the PDF installation instructions or the relevant product page for full details. You can also find additional accessories and suitable tools in our shop.
Notice
Despite the simplified installation, the following also applies to FLEXIRO ceiling heating: Working on heating systems requires sufficient technical knowledge and skills. If in doubt, have the installation carried out by a specialist.
1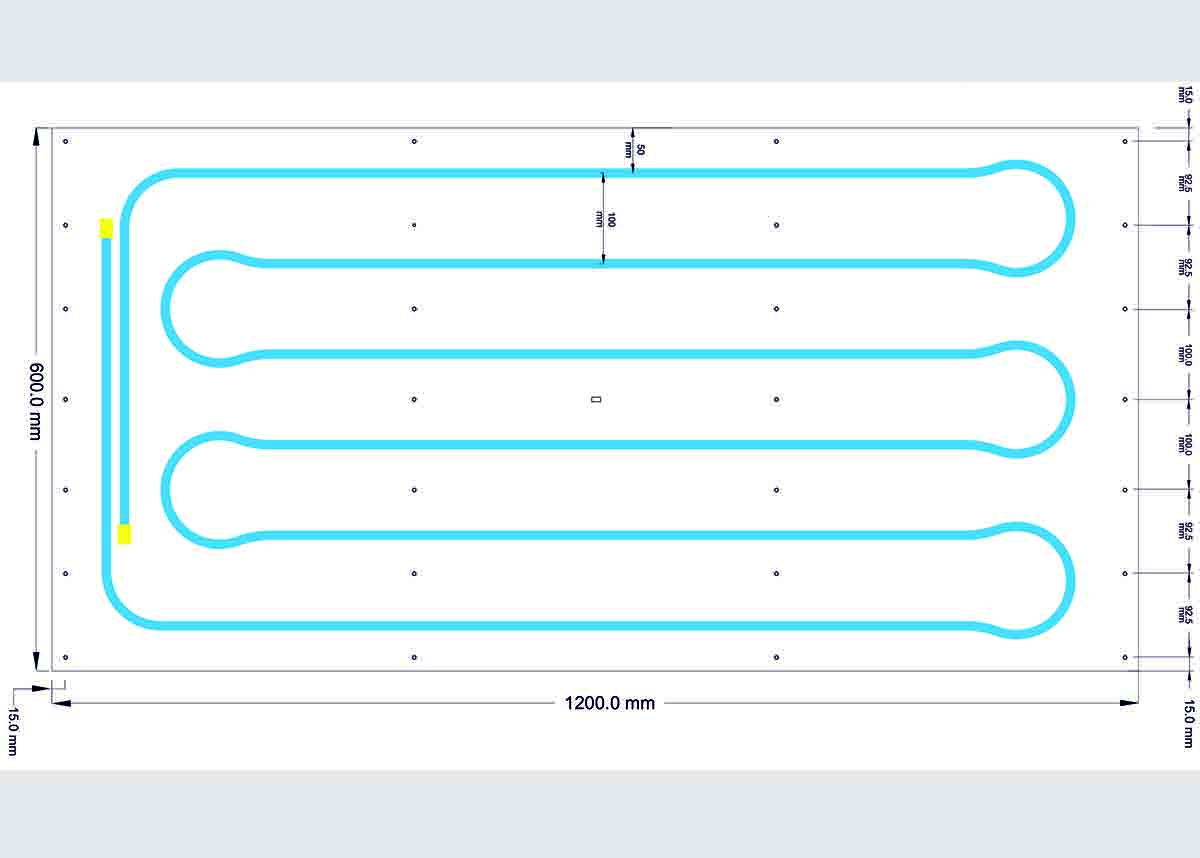
The ceiling heating plasterboard
Sketch of the ceiling heating element with pre-drilled holes (front and rear view). The element is supplied from the factory with cardboard backing.
Dimensions of the ceiling heating element: 1200 mm x 600 mm x 12.5 mm
2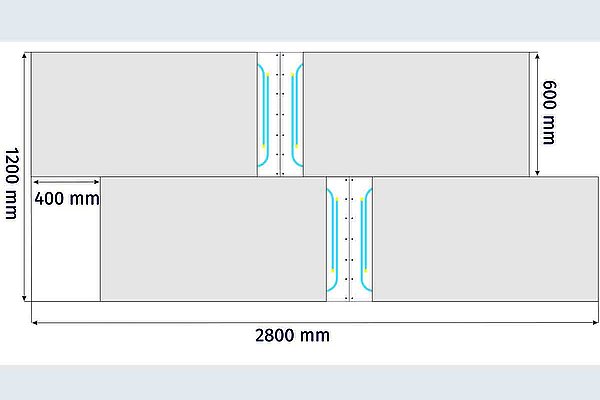
Positioning of the ceiling heating elements
Four ceiling panels are joined together to form a partial heating area. The arrangement of the individual ceiling panels must be determined at the start of the work. As the ceiling elements cannot be cut to size, it is necessary to provide cut-to-size panels for the surrounding edges of the proposed heating area. The additional standard plasterboard panels can be obtained from DIY stores or specialist suppliers.
Fixtures in the ceiling, such as light fixtures, cable ducts, etc., cannot be installed in the ceiling heating elements. Standard plasterboard panels are also used as strips at these points. The edges of the ceiling surface must be filled with a permanently elastic sealant in accordance with the guidelines for drywall construction.
3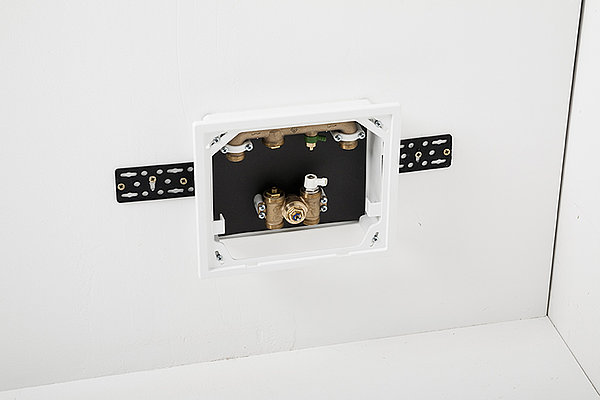
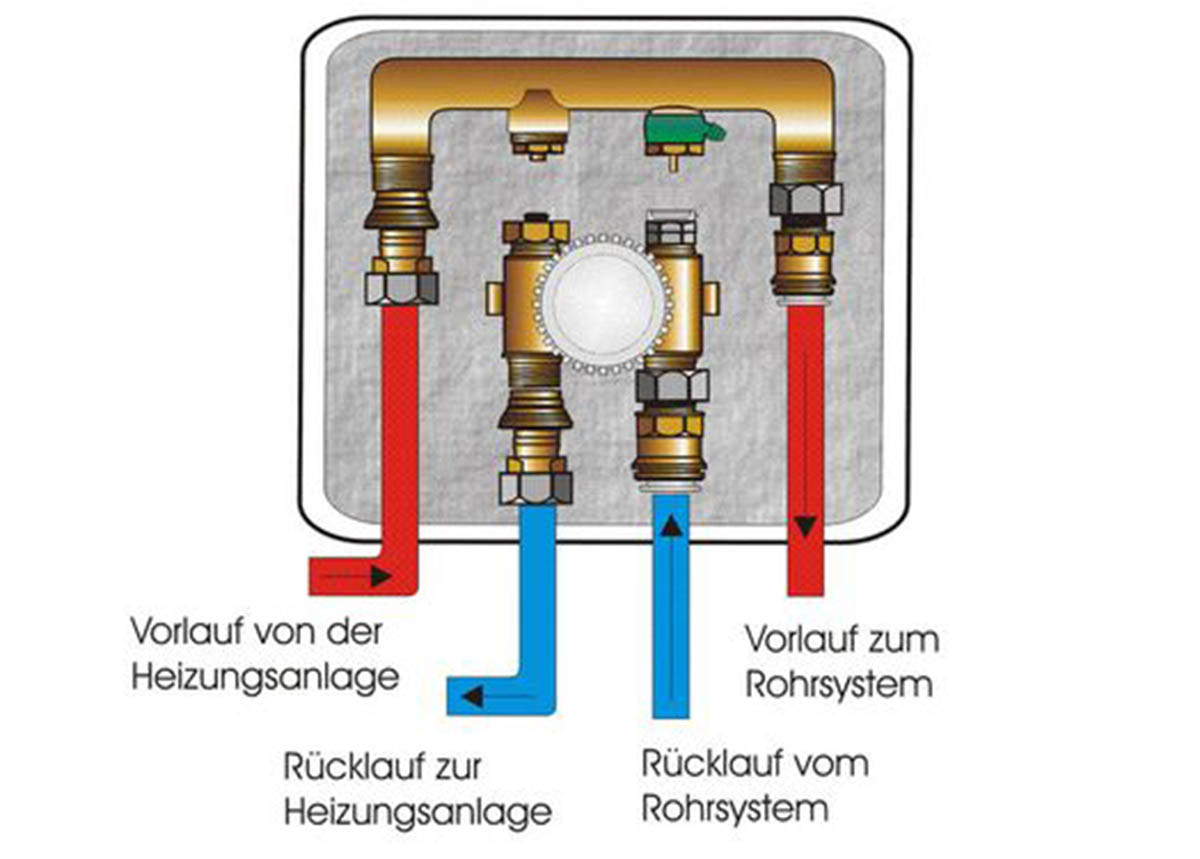
Positioning of the RTL box
The position of the RTL box can be planned relatively freely, but should be chosen so that the room air can flow well around the thermostatic head and at the same time ensure safe operation of the RTL box. Please refer to the separate installation and operating instructions for the RTL box.
4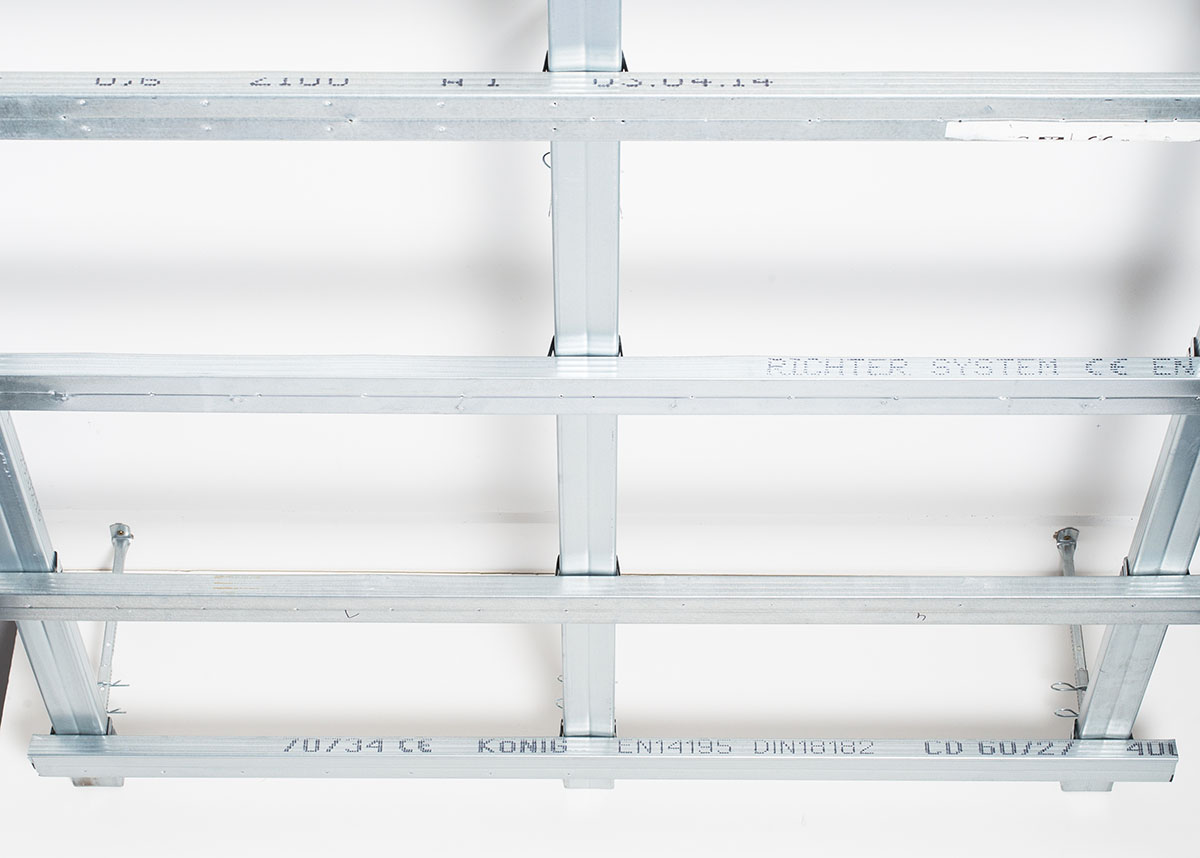
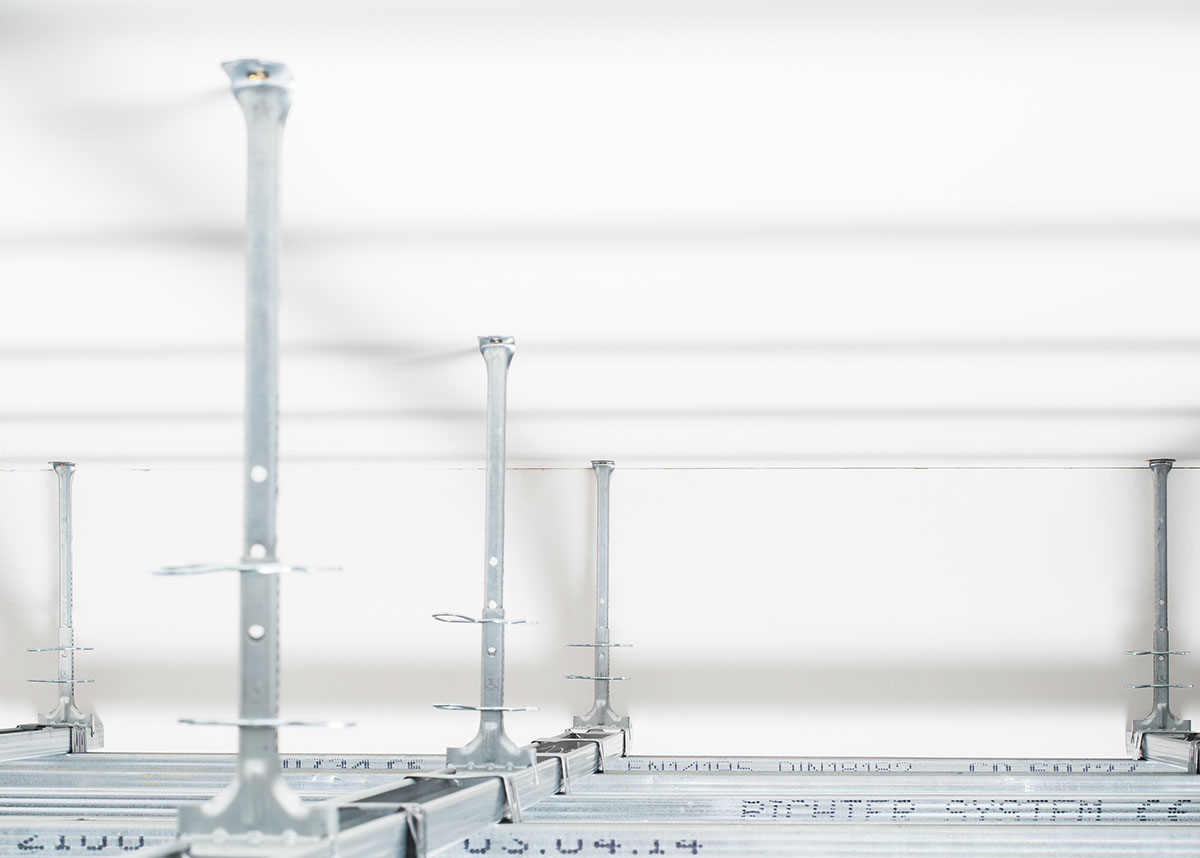
Drywall construction
The ceiling to which the radiant panel is to be fixed must be load bearing and capable of supporting an additional load of 17 kg/m².
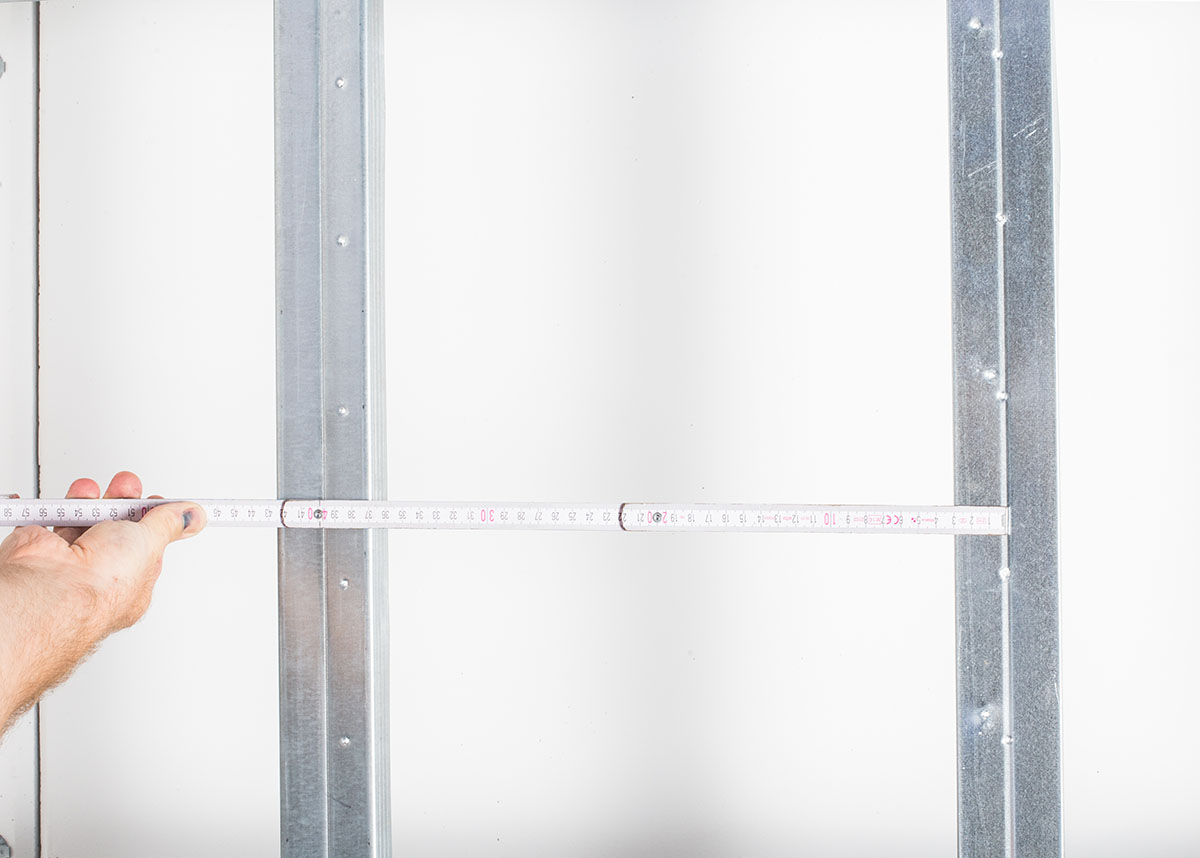
The substructure should preferably be fixed using drywall CD profiles in accordance with the guidelines for drywall ceiling construction. The standard spacing of the CD support profiles must be 400 mm. Direct fixing to a timber joist ceiling is also possible. Again, fixing battens must be provided every 40 cm.
5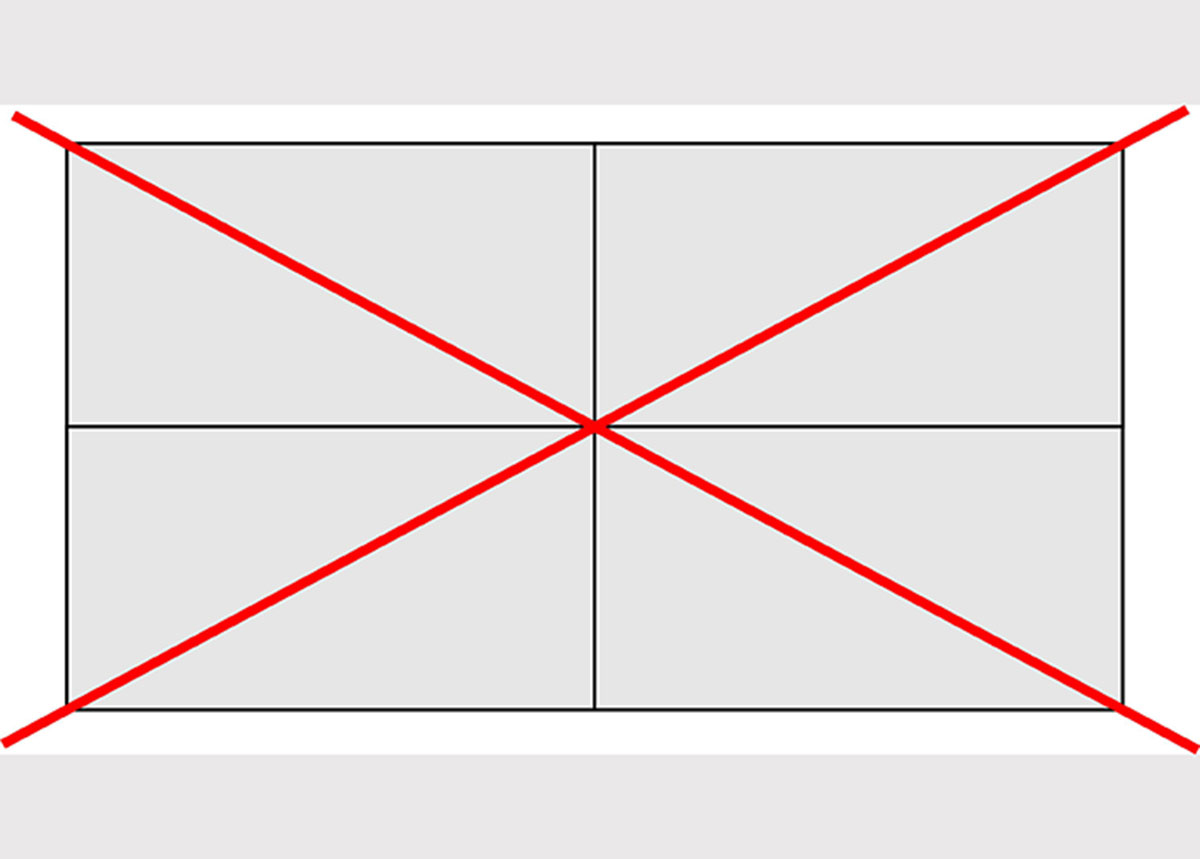
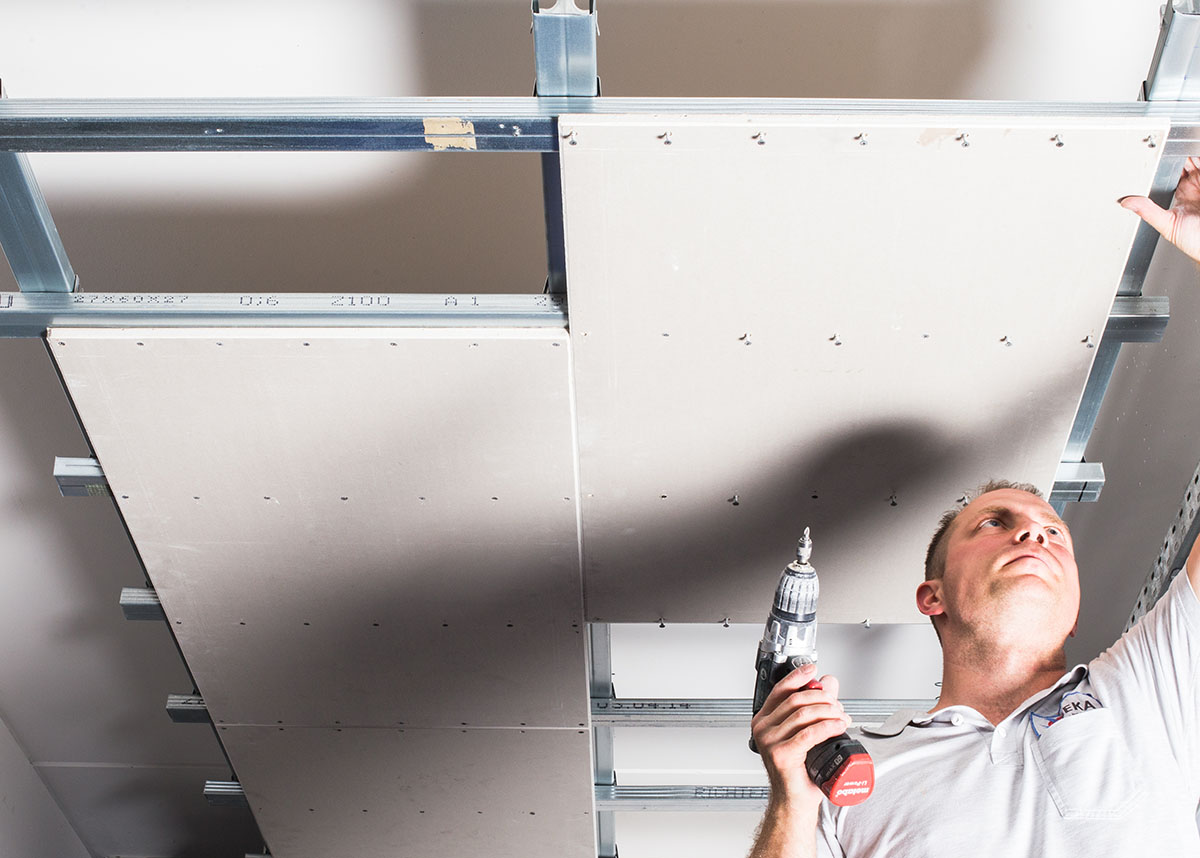
Preparation and arrangement of the ceiling heating elements
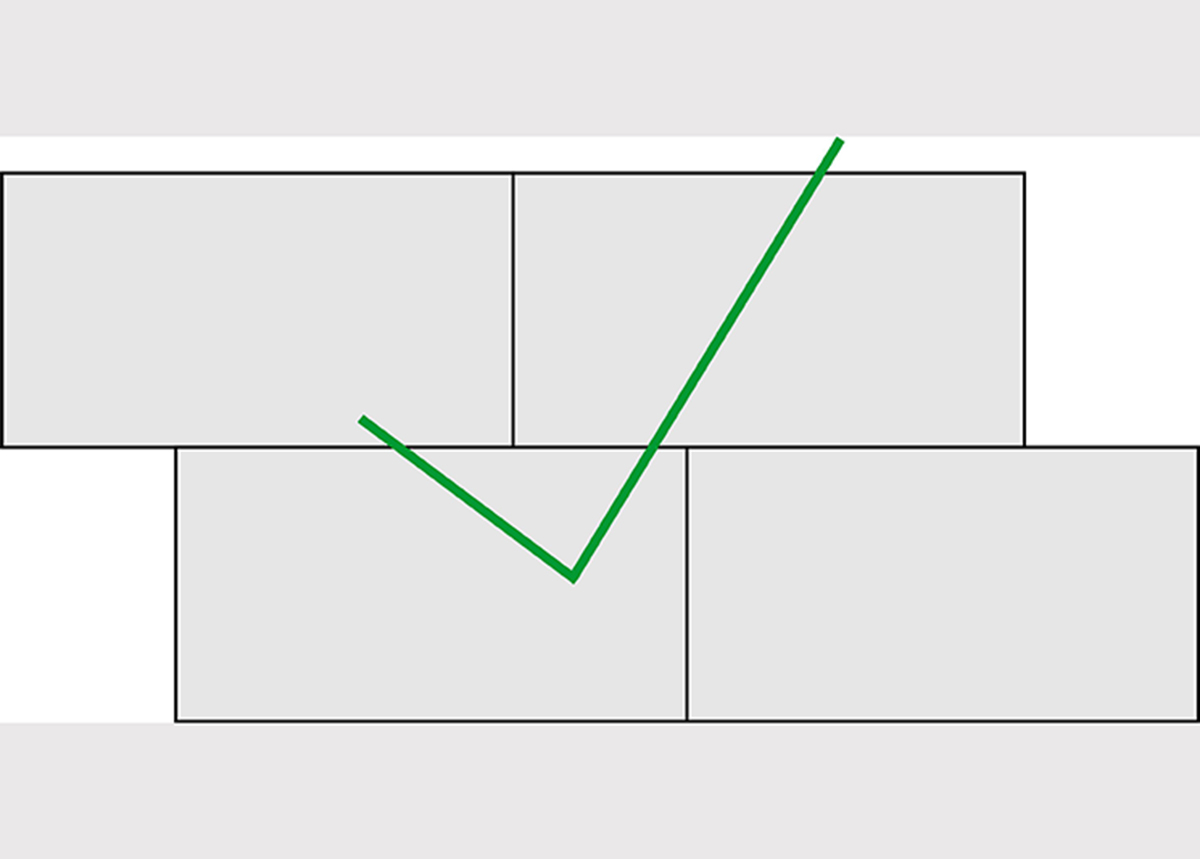
Draw up an installation plan for the ceiling heating, showing the exact position of the ceiling elements. Observe the regulations for dry construction. Cross joints are not allowed.
The ready-to-install drywall plasterboard panels with the heating pipe are preferably placed in the centre of the entire ceiling area. The edges are later covered with standard plasterboard (12.5 mm thick) cut to size.
6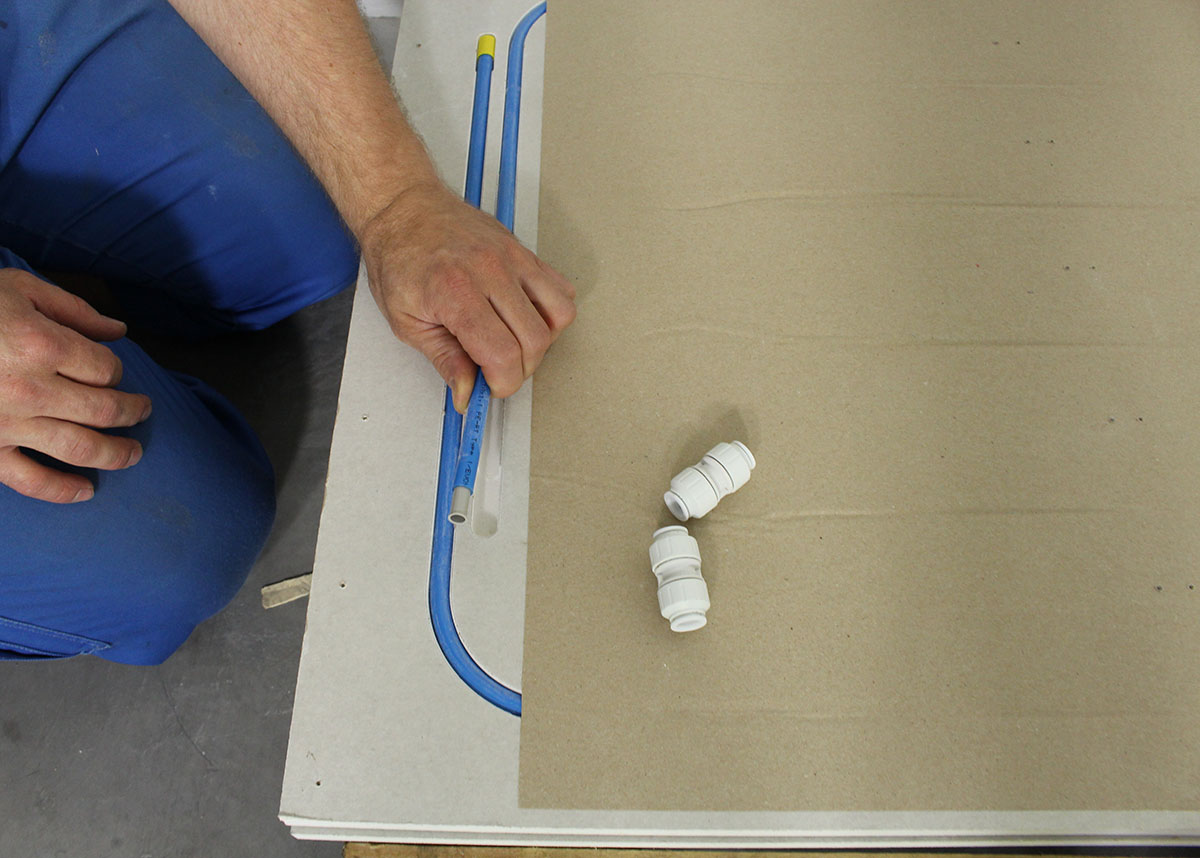
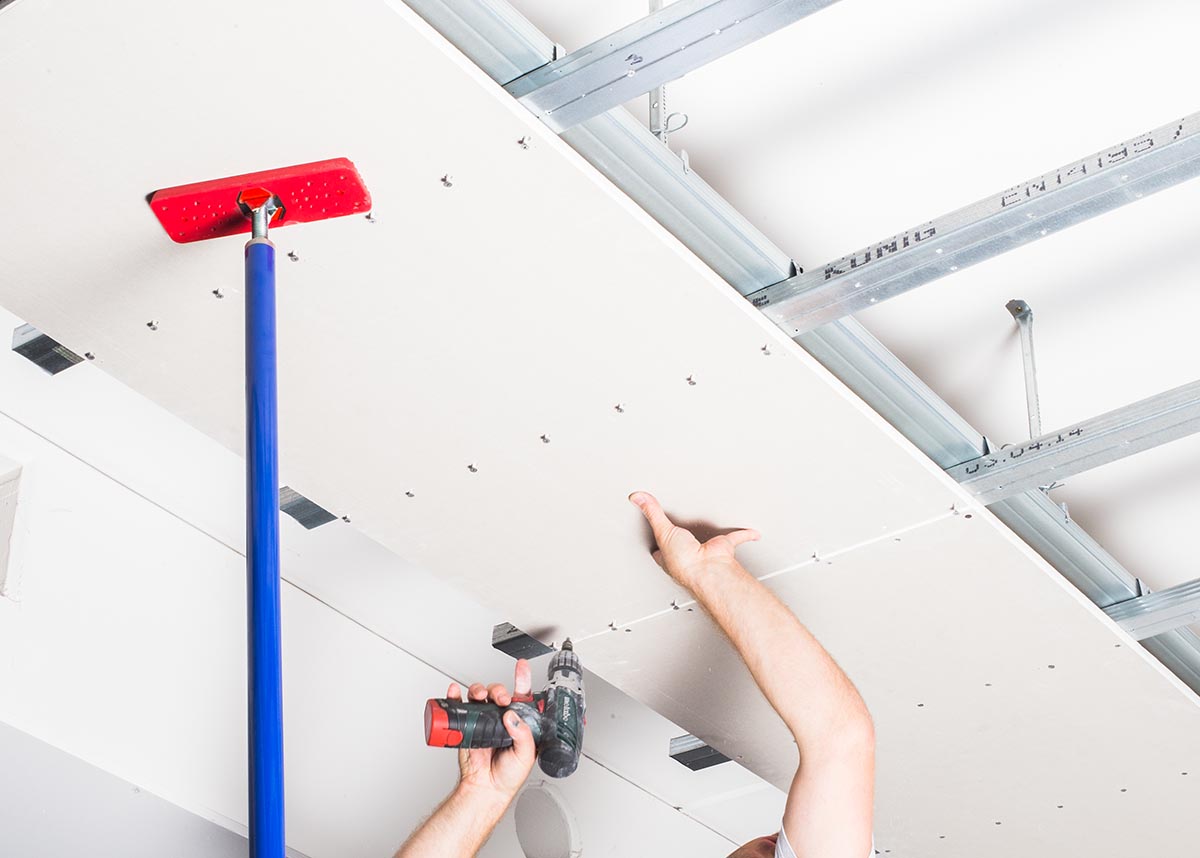
Installing the ceiling heating panels
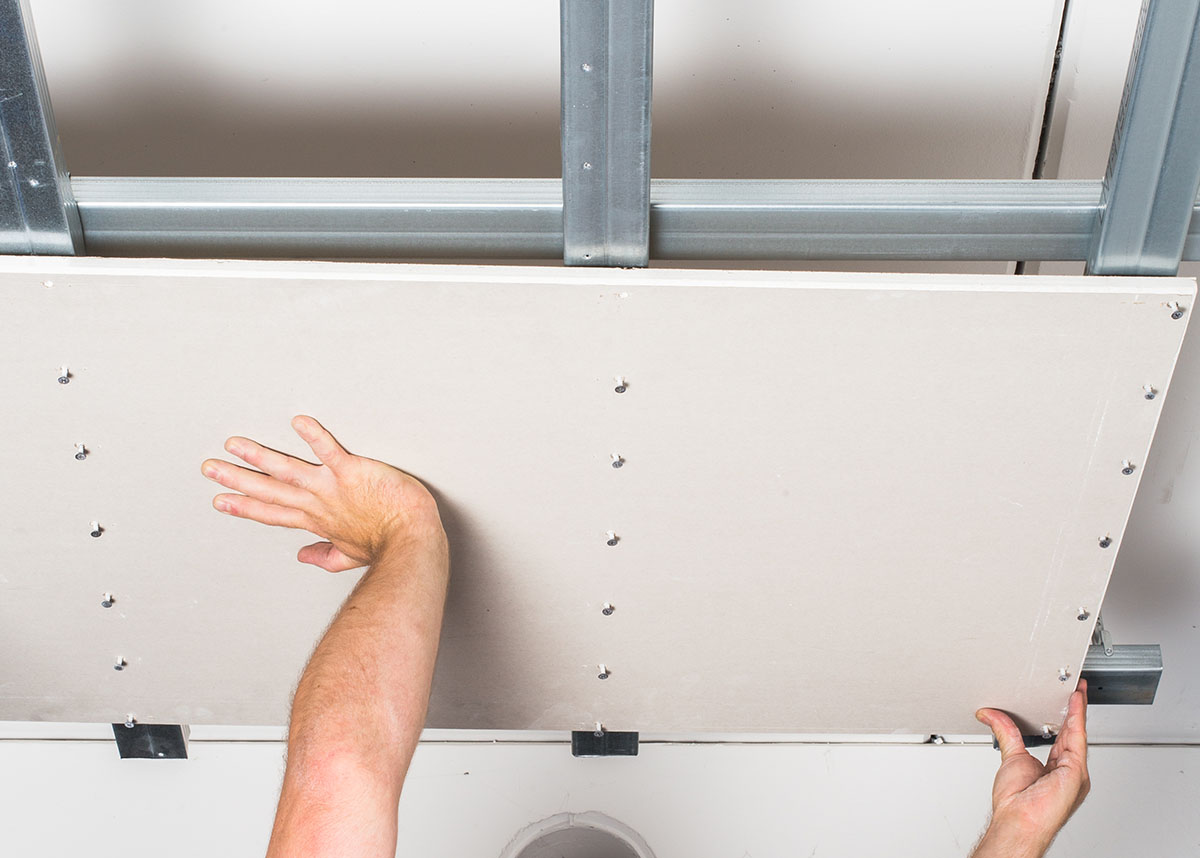
On the connection side, the connection pipe ends are removed from the transport position and the dust protection caps are removed.
The ceiling panels are fixed to the CD profiles using drywall screws. The arrangement of the screws is determined by the factory pre-drilled holes. The use of the pre-drilled holes ensures that the integrated heating pipes are not damaged!
7

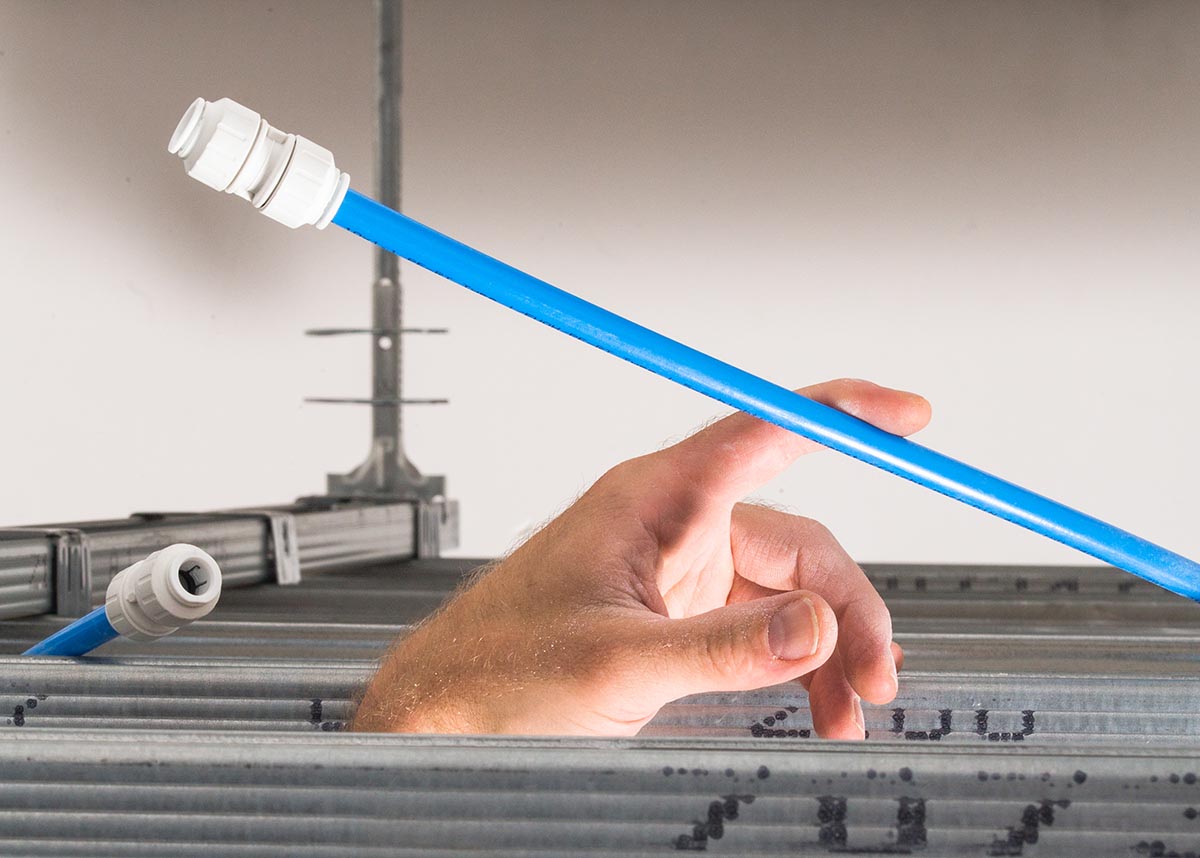

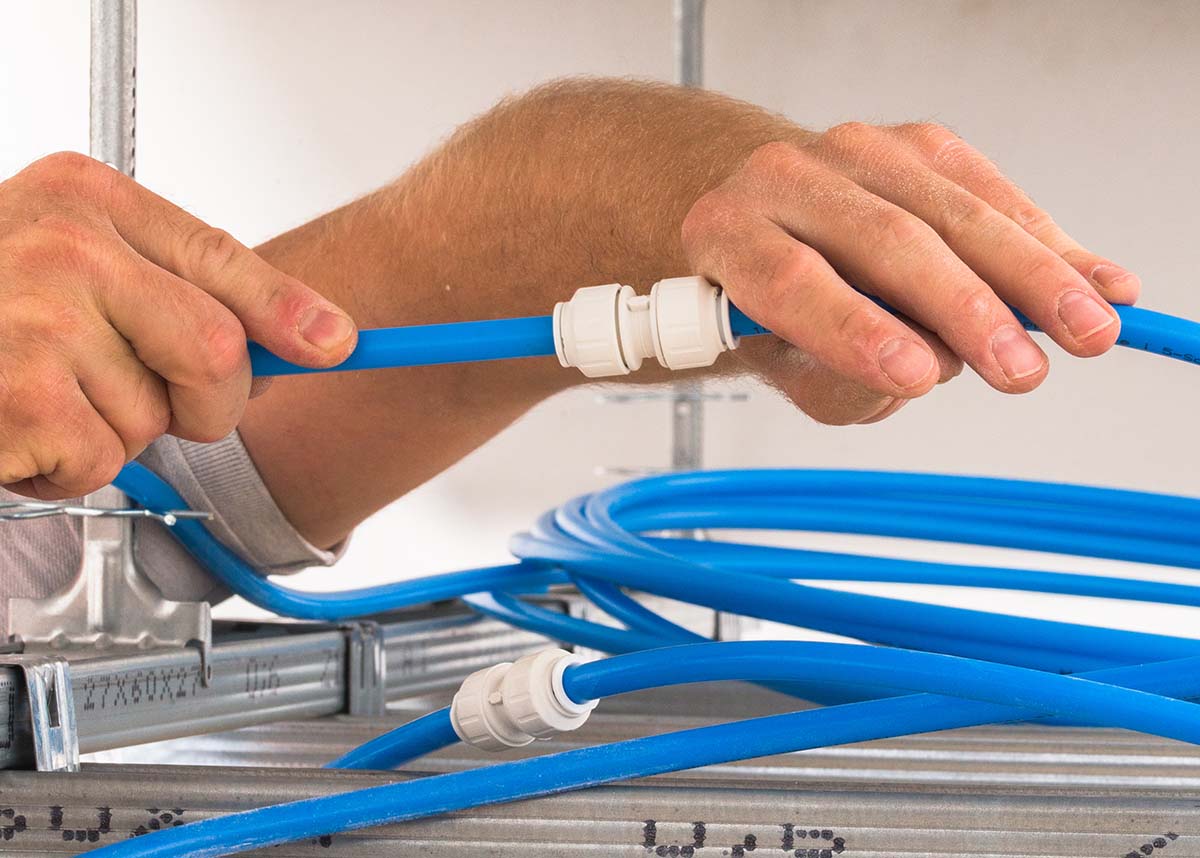
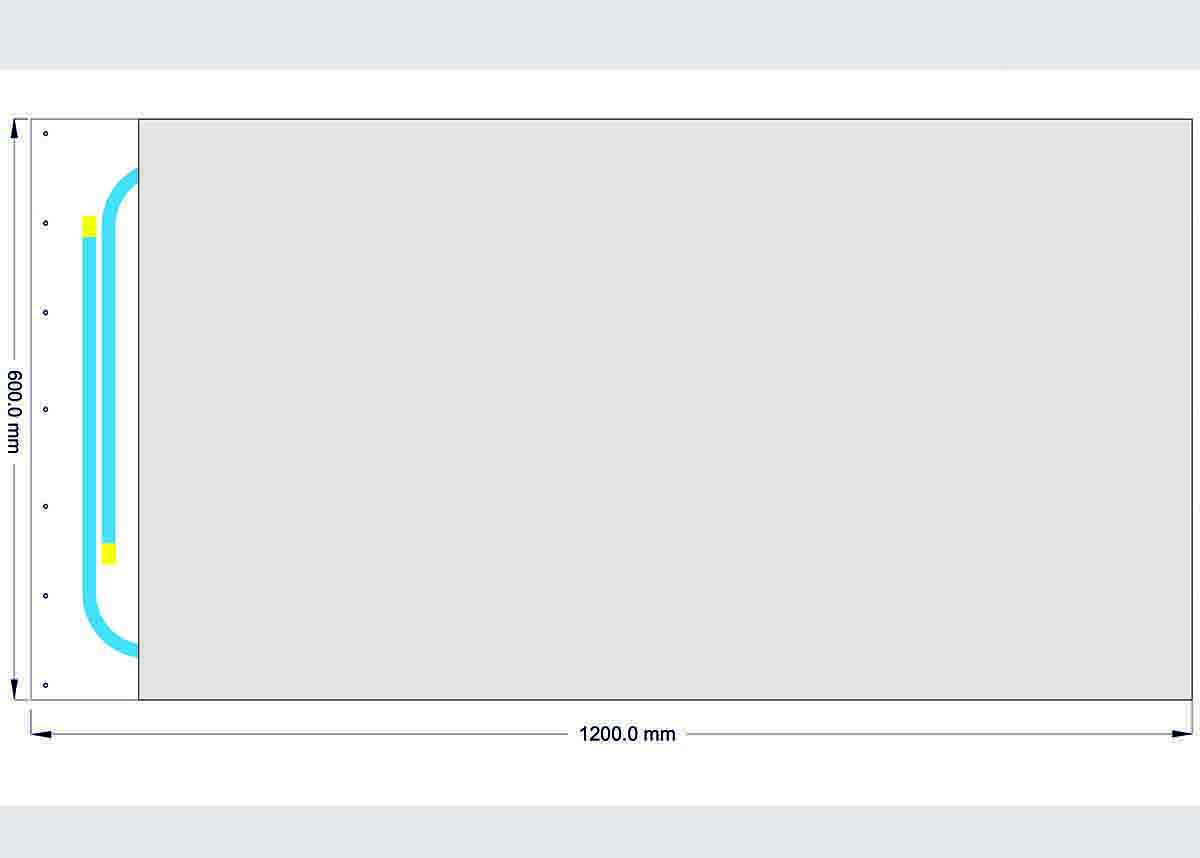
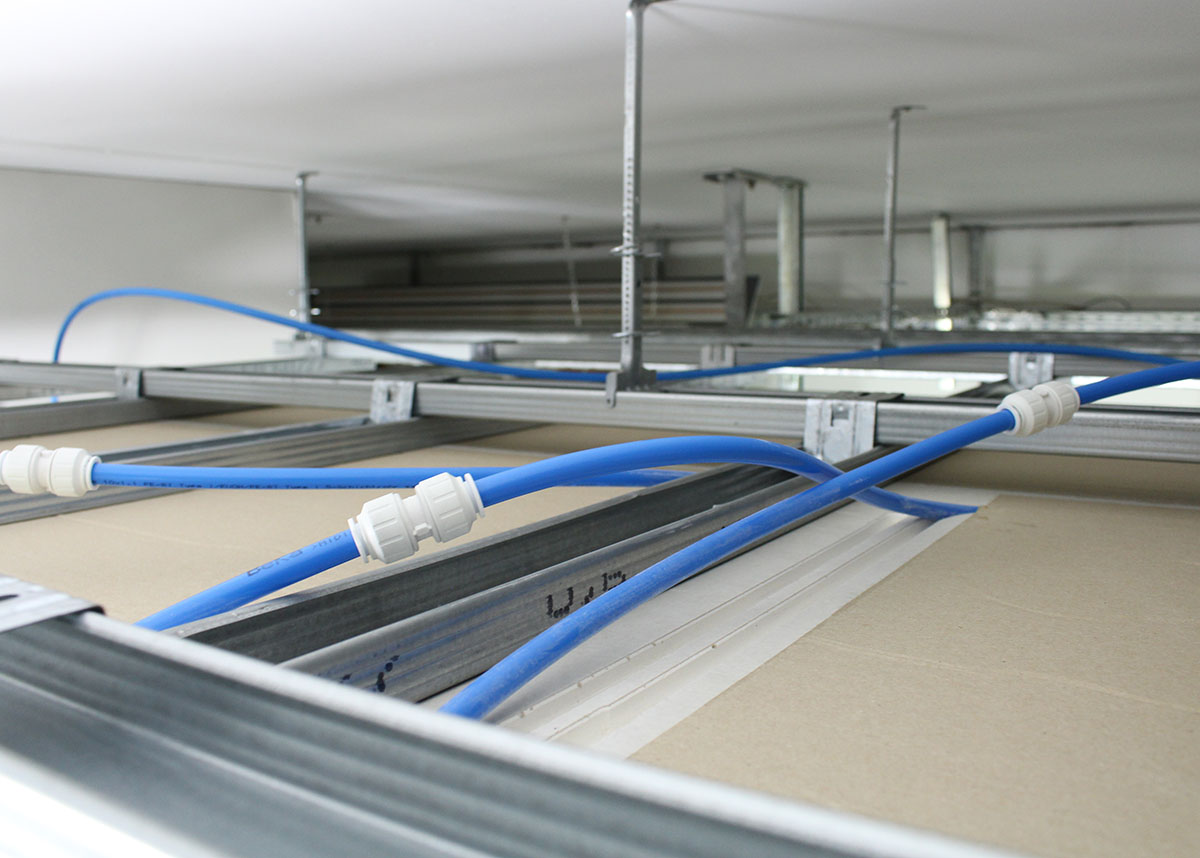
Connecting the ceiling heating panels
The connection hoses are used to connect four ceiling heating elements in series to form a partial heating surface in the ceiling cavity. The connection is made using the connectors supplied. Support sleeves have been pre-assembled in the ends of the heating elements for the ceiling heating. The connecting pipes do not require additional support sleeves.
8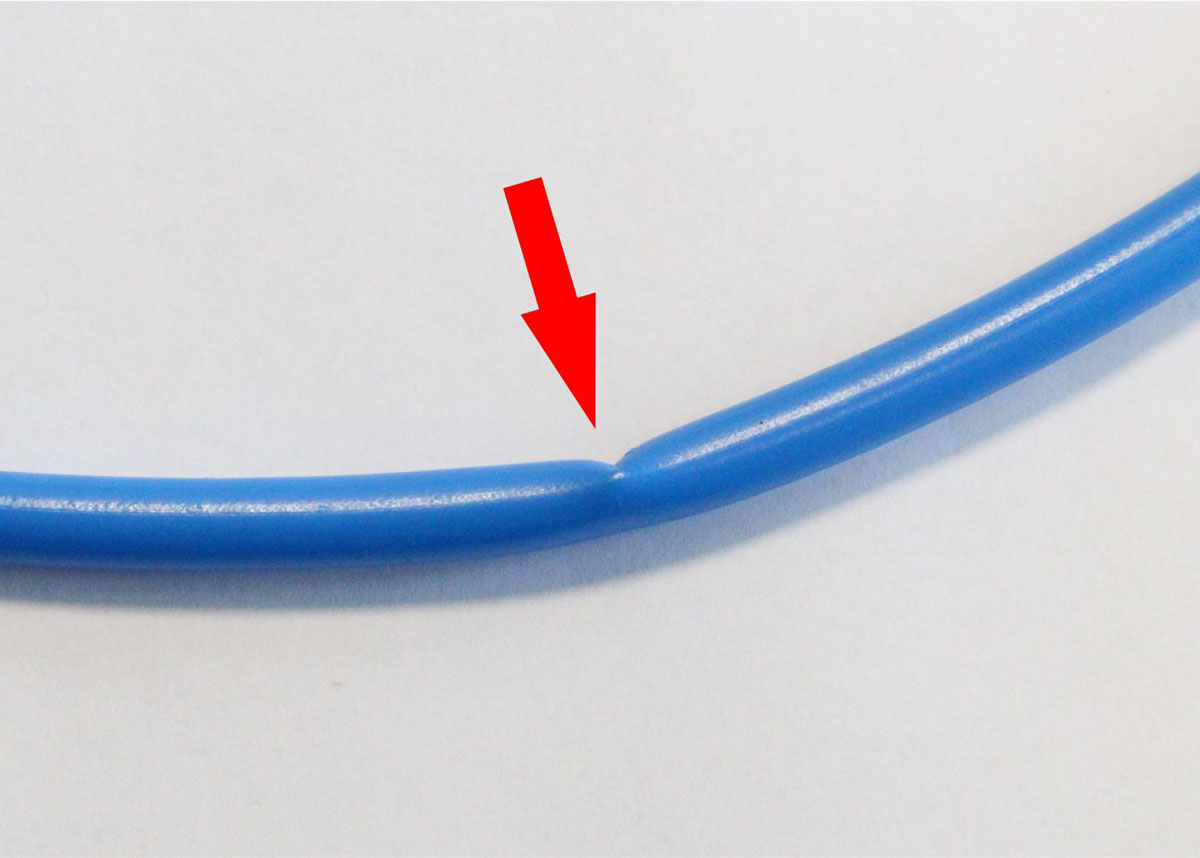
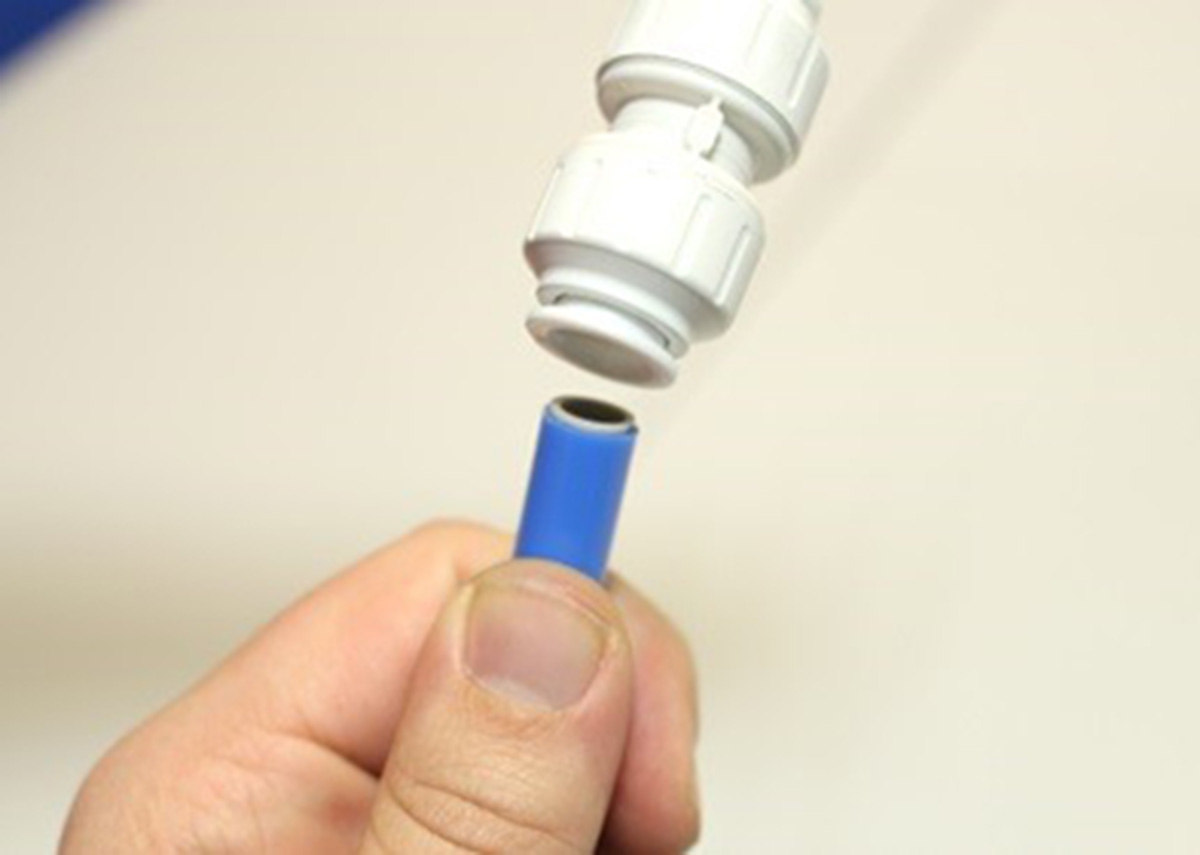
Repair of the heating pipe
The connection hoses must be laid without twisting and with a minimum bend radius of 200 mm. This avoids kinks when bending the pipe ends. Kinked or damaged areas of the heating pipe must be cut out.
Use the hose cutter available as an accessory or the Classic Pipe Cutter to shorten the pipe. The end of the pipe must be cut straight and burr-free. The pipe must then be reconnected using a permanently sealed coupling (plug-in connector). If necessary, the pipes can be extended using the same procedure.
9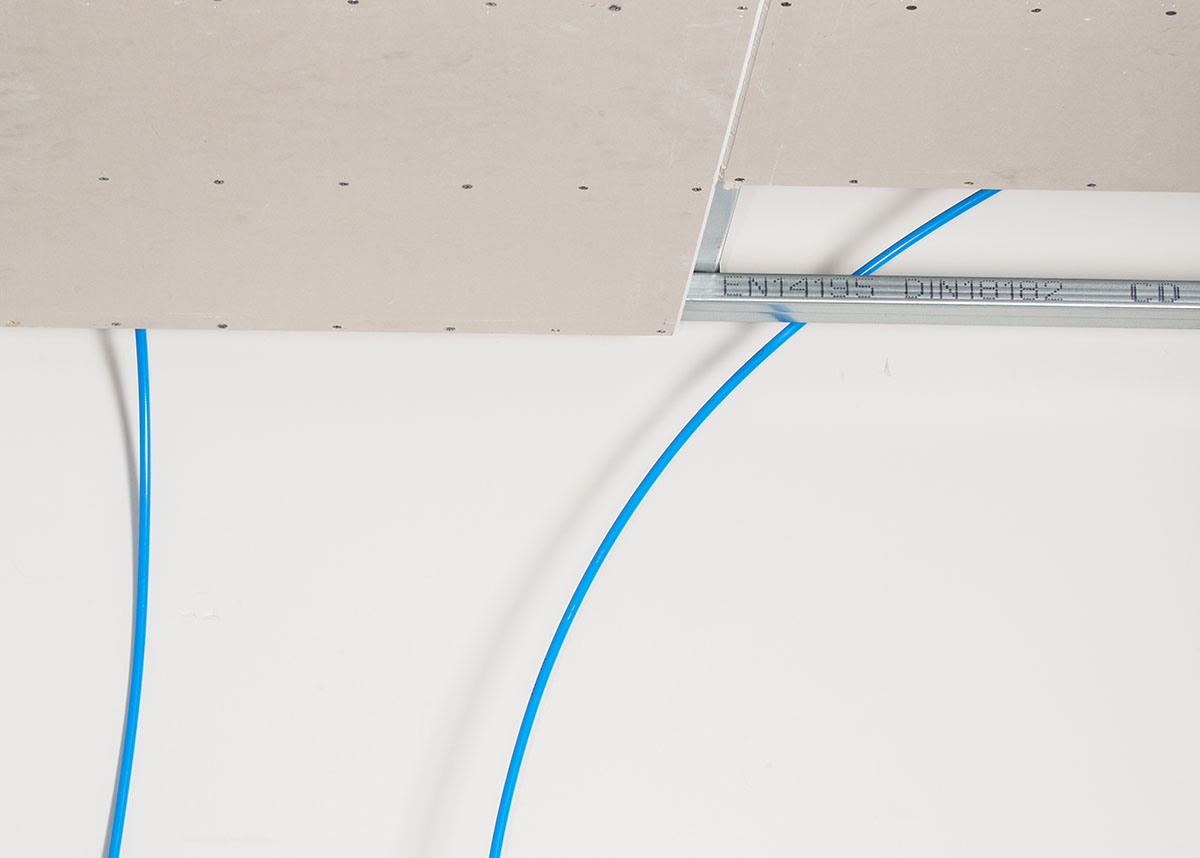
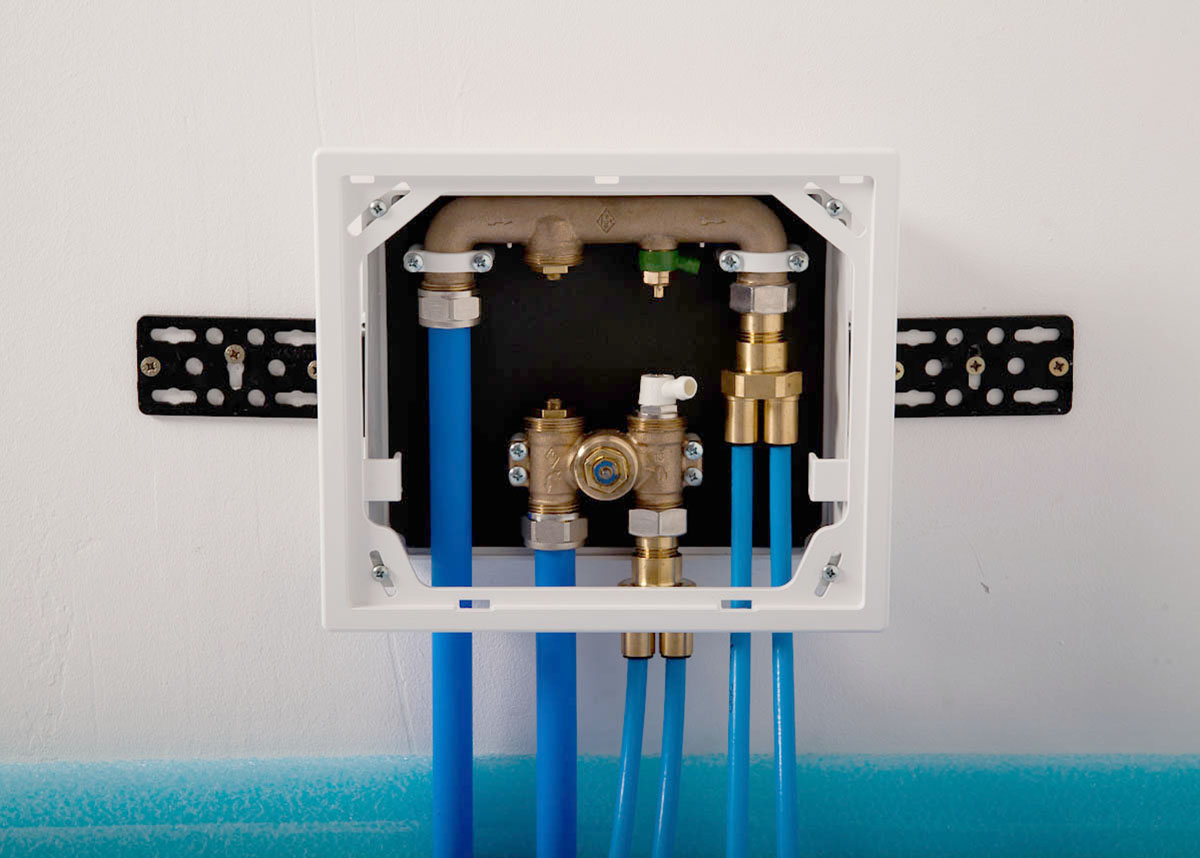

Connection to the RTL box
The flow and return of the first and fourth ceiling panel can now be connected to the RTL valve by means of the 7,000 mm long connection hoses.
The manifolds are connected to the RTL box using a Eurocone screw joint. The Eurocone has a self-sealing effect, while the metal screw connection has a purely locking function. Over-tightening must be avoided at all costs in order not to compromise the tightness of the heating system.
The heating pipes are connected in the manifold fingers by means of a simple plug-in installation. The heating pipes, which are cut straight and shortened if necessary, are inserted directly into the plug-in connections of the manifold fingers as far as they will go.
10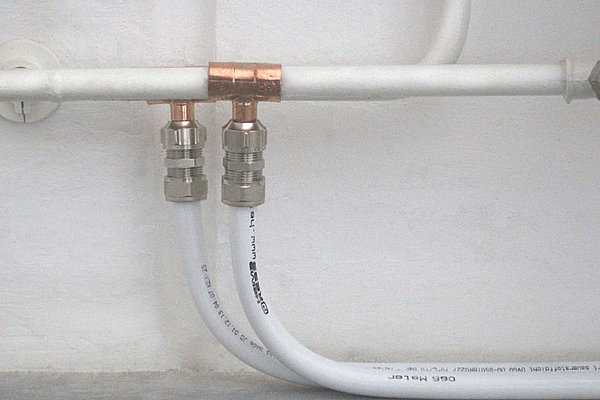
Connection to the heating system
The FLEXIRO ceiling heating is normally integrated into the existing heating system in parallel with other radiators or as a replacement for a remote radiator. This is done by inserting a T-piece (not supplied) into the supply and return pipes of the heating system.
Make sure that the flow and return are correctly assigned in the RTL box. Reversing the flow and return in the control box will disable the thermostatic valve and prevent the ceiling heating from working.
11
Carrying out the pressure test
Before commissioning the ceiling heating system, it is essential to ensure that the system and all associated components are correctly installed and leak-proof. The pressure test pump is available as an accessory from the shop.
See video for exact procedure and correct connections for pressure test
12Test run of the ceiling heating system
We strongly recommend that you carry out a test run of the ceiling heating before the ceiling is plastered. This is the last opportunity to correct any installation errors or damage!
13
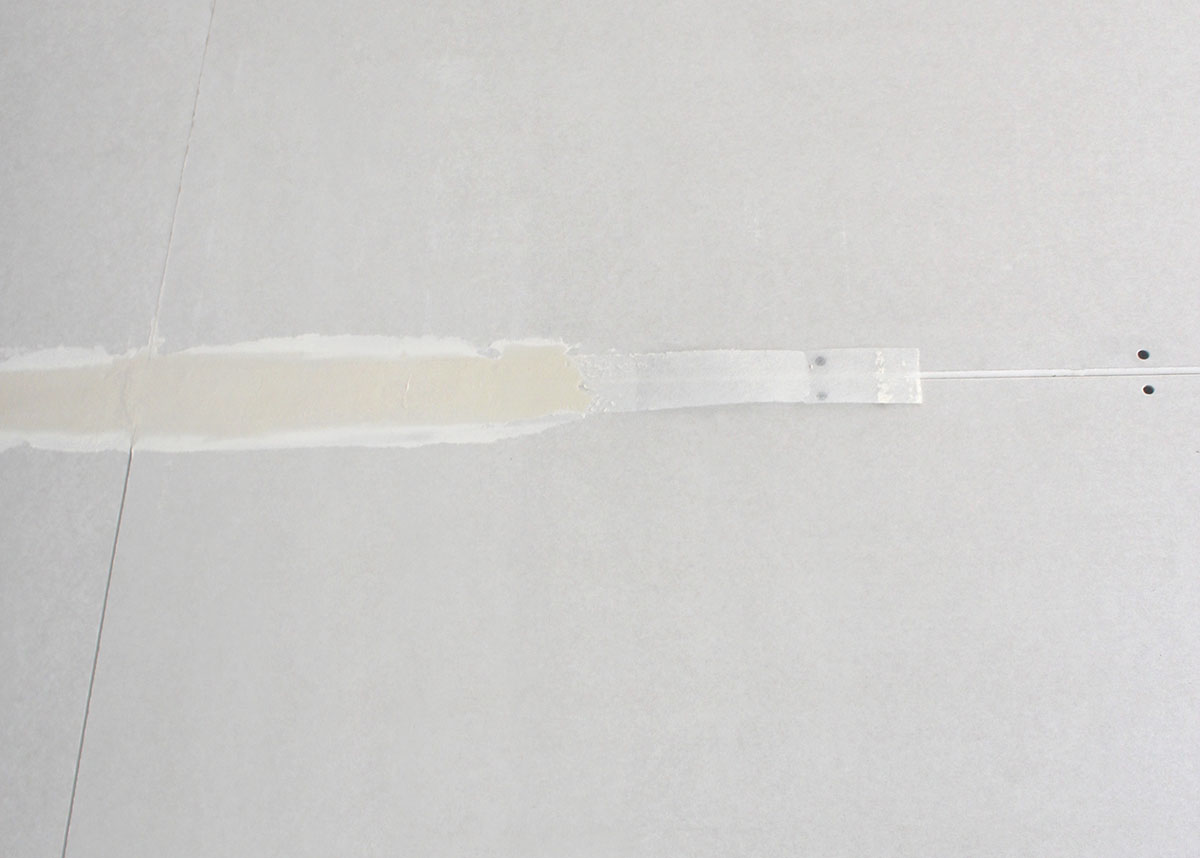
Closing the ceiling surface
The plasterboard used to seal the edge of the ceiling to the adjacent walls must be 12.5 mm thick. Joints to adjacent components must be flexible to prevent the heating surface from cracking due to expansion. Also follow the joint sealant manufacturer's instructions.
14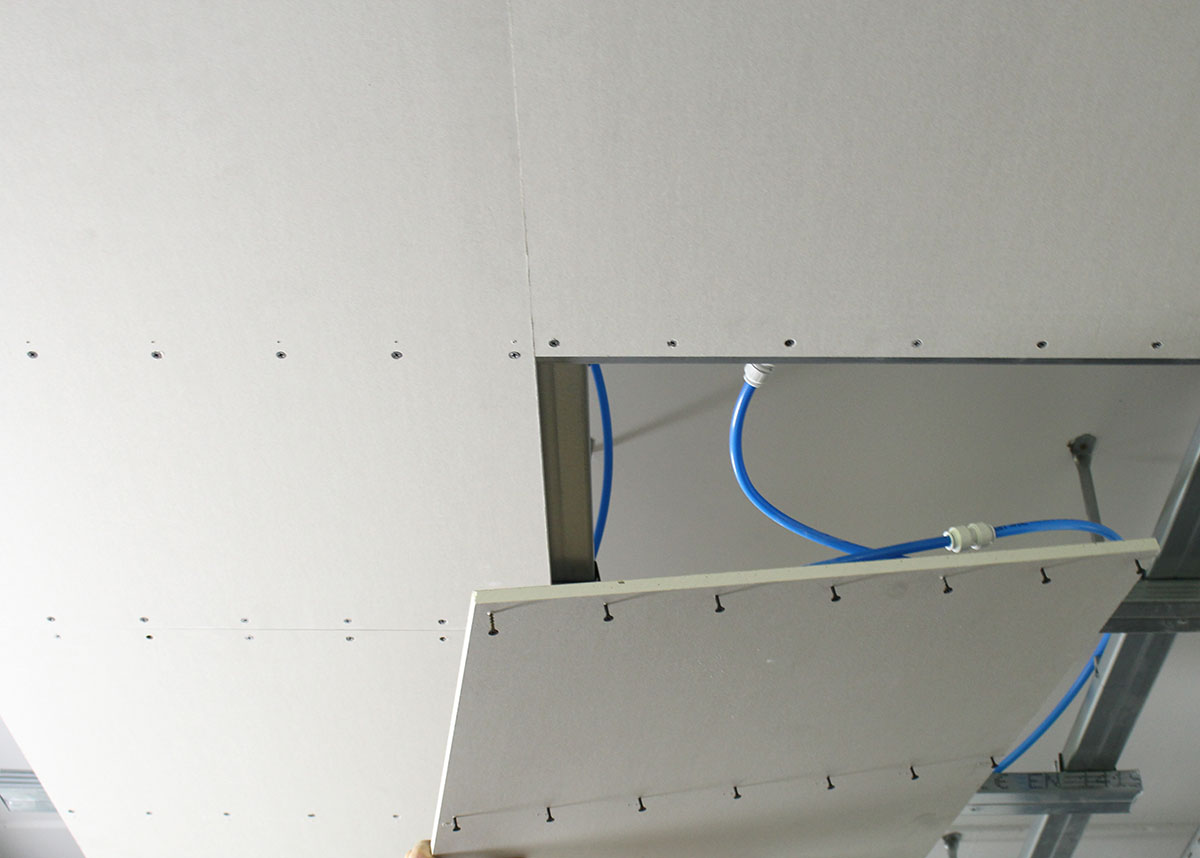
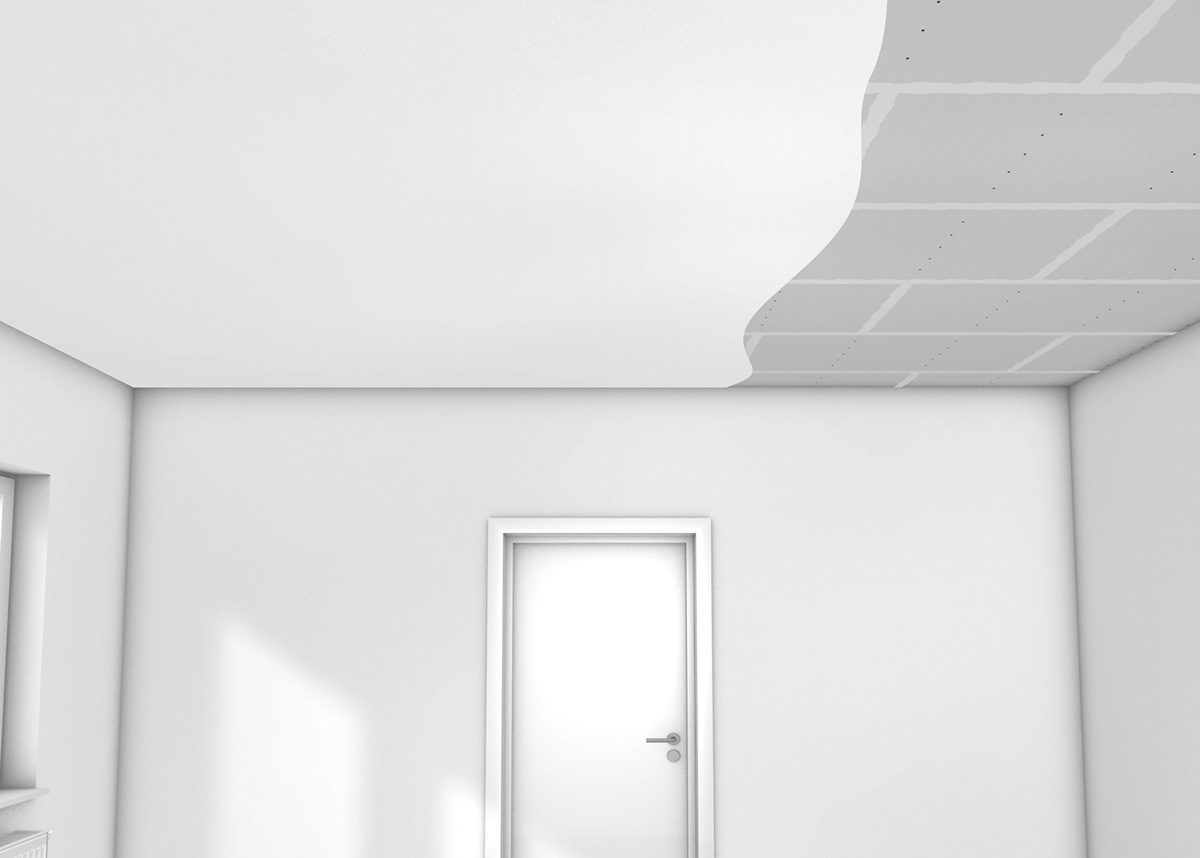
Completion and commissioning of ceiling heating
The additional standard plasterboard panels are cut to size according to the manufacturer's specifications. Once the entire ceiling surface has been sealed, the joints between the boards are filled. Joint masking strips and levelling compounds designed for plasterboard are used. The edge joints to the adjacent components are sealed with elastic joint sealant.
Finally, the drywall elements are plastered. When the work is complete and the surfaces are completely dry, the ceiling heating can be put into operation.
15To conclude
Despite the simple design of the ceiling heating and the ease of installation, we must point out that we, as the manufacturer, can only guarantee correct delivery from the factory, not installation and connection by third parties. Please also observe the current standards and regulations for heating systems.
FLEXIRO wishes you a successful installation!
16-
 Installation Guide - How to Install a DIY Drywall Ceiling Heating KitComprehensive installation guidelines with all required information for retrofitting a FLEXIRO water-based ceiling heating with prefabricated plasterboard.926 KB
help
Yes, it is possible to use the ceiling heating kit for cooling in summer. Sufficient cool water supply is required though. Further details can be found at: How to use a ceiling heating as cooling ceiling.
If there is an unheated room above the ceiling activated with FLEXIRO and the old ceiling has no thermal insulation or the heat transfer coefficient of the ceiling is unknown, we recommend adding an additional insulation layer. In any case, thermal insulation above the ceiling heating will shorten the reaction time of the heating.
The substructure for the ceiling heating should comply with the dry construction guidelines for suspended ceilings. When using CD profiles and direct hangers, a suspension height of approx. 5 cm can already be sufficient. A small distance to the raw ceiling is also required for the installation of the FLEXIRO connection pipes and plug connections. The dry construction guidelines also permit the use of wooden beams as a substructure for the plasterboard. However, their stability and torsional stiffness is usually less good compared to CD profiles made of metal.


How to turn a FLEXIRO ceiling heating system into a cooling ceiling in the summer trending_flat 4 Possible solutions
- What water cooling options can be considered?
- What cooling capacity can be expected?
- How can the chilled ceiling be controlled?
We provide answers to the most important questions when retrofitting a cooling ceiling.